A/B-Testing and Split Testing in WordPress | Advanced Ads
A/B testing, or split testing, is a great strategy when you want to optimize your website.
By using A/B testing, you can determine how changes to the layout of your website affect your users’ behavior. If advertisers pay for ads based on clicks or sales, you can also use split testing strategies to increase your revenue.
A/B testing of ad layouts, positions, and behavior allows you to improve the click-through rate (CTR). The more users interact with an ad, the more you will benefit financially.
This tutorial will guide you through planning, running, and evaluating A/B tests and split tests in WordPress using Advanced Ads.
What is A/B Testing?
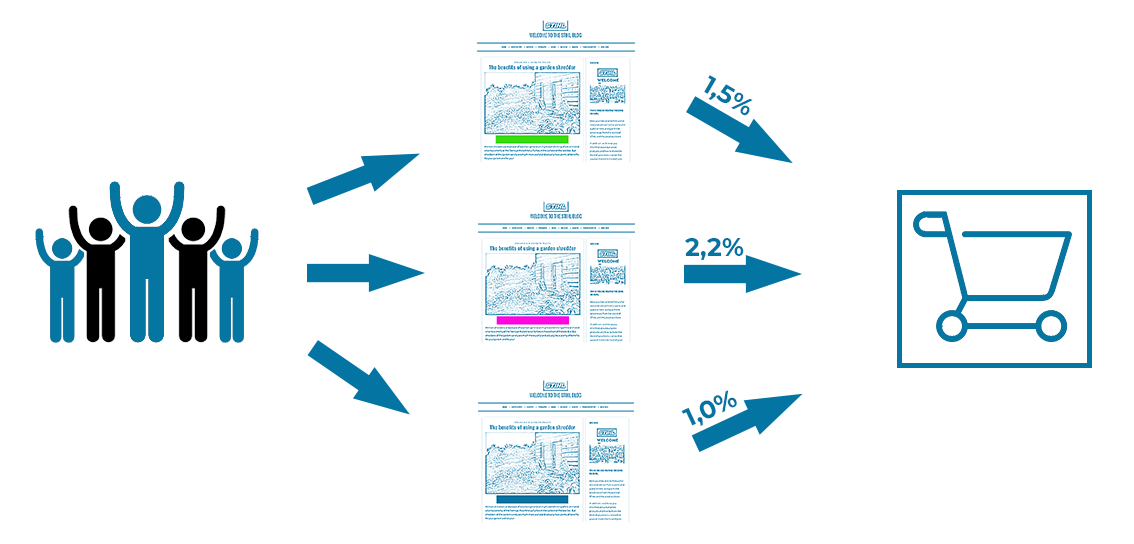
A/B split testing is a technique that allows you to compare two versions of the same element of a web page. In this scenario, a randomly selected group of visitors sees version A of a specific element, while the other group sees version B.
You can then precisely measure which version performs better in this A/B test and optimize your website based on those findings.
A practical example is optimizing a call-to-action button (CTA) that you embed in your website.
You could display this button in different positions and vary its size, color, font, or anchor text. You’ll almost certainly find that the different designs result in various CTRs.
 A/B testing plays a crucial role in ad optimization.
A/B tests and multivariate split tests
A/B tests
In a simple A/B test, you compare the performance of two different elements. In our case, you either test two entirely different ad layouts against each other or focus on a particular difference. For example, this could be the color of a CTA button or the anchor text.
In such a simple A/B test, you should only change one variable per ad at a time to get meaningful results. So, in the case of the CTA button mentioned above, you could create two ads and vary the button color:
- CTA button with a yellow background
- CTA button with a blue background
Avoid split testing too many changes at once
Be aware of changing too many things between variants. That would be the case if you changed the button layout and the label.
While you could determine which of the two buttons performs better in such tests, you would not know which change of the two features is responsible for this improvement.
A scenario for such an A/B test with low significance might look like this:
- CTA button with yellow background and anchor text “Buy now”.
- CTA button with blue background and anchor text “Get it”.
It is even possible that the new label performs better, but a bad color choice neutralizes this improvement so that the number of clicks on both variants is still equal.
Therefore, this split test does not have full explanatory power because it does not explain whether the changed background color or the modified anchor text is responsible for the click behavior.
For such use cases, a multivariate split test is the better method.
Multivariate split tests
Multivariate split tests allow you to test multiple changes at once.
Thanks to the flexible ad groups in Advanced Ads, you can implement complex A/B tests.
A meaningful split test for the mentioned example with the CTA element might look like this for him:
- CTA button with a yellow background and anchor text “Buy now”.
- CTA button with a blue background and anchor text “Buy now”.
- CTA button with a yellow background and anchor text “Get it”.
- CTA button with a blue background and anchor text “Get it”.
You can probably already imagine how essential a logical naming of your ads is for later evaluation. We’re only varying two features here and haven’t tested different positions yet.
Sample sizes
Your A/B test will be more meaningful the more significant the sample you choose is. For ad optimization, this means that the more impressions each ad in your test counts, the more reliable the result will be in the end.
In other words, the smaller the number of tracked impressions per ad tested, the less accurate the result of your split test.
Without sufficient traffic, your results are not statistically valid.
Therefore, I recommend a sample of at least 5000-10000 impressions for each ad unit involved in an A/B test.

If you consider your monthly traffic, you can easily calculate how long you need to run such a split test to get the sample size for valid results.
Assuming you count 10.000 ad impressions per day for a particular placement, you would need to run the test for the above example with the varied color of the CTA button for two days. So that both versions are displayed 10.000 times each.
Each additional element that you include in a split test increases the test duration. So in the example of the multivariate test where we varied color and anchor text, the test duration would be no longer 2 days, but 4 days instead, since you want to ensure that each version has a proper sample size.
What to consider when setting up an A/B split test
If you want to conduct split tests, you must be very accurate in planning and execution. Put yourself in the role of a scientist who precisely plans, documents, and evaluates his experiment.
This precision will be crucial if you want your A/B test to give you valid results that you can use as a basis for optimizing your ad setup afterward.
To analyze the data you have collected, it is essential that you clearly name your ads. You must be able to tell from the ad name which version it is, on which placements it is displayed, and which segment of your visitors sees it.
Also, if you test more than two ads against each other, you should document your split test in a spreadsheet to easily understand the results later.
Implement A/B testing with Advanced Ads
Advanced Ads offers three essential tools for A/B testing and ad optimization: Ad Groups, Placement Tests, and Tracking.
You can use these tools to set up A/B tests and to measure the performance of certain features, for example:
- Ad position (e.g., Before Content vs. After Content).
- Ad format (e.g., leaderboard vs. rectangle ads)
- Ad layout (e.g., different banners of the same campaign of an advertiser)
- Ad variations (e.g., features of a CTA element)
- Ad targeting to users (with visitor conditions, e.g., mobile users, users from a specific country, users of a search engine)
- Ads matching to related content (with display conditions, e.g., specific categories)
Tracking
Split testing is only helpful if you can collect data and create statistics in the process. This tracking is the only way to measure the performance of a particular ad.
When you include ads from an ad network, you sometimes have extensive statistics at your disposal. The best example is Google AdSense, which provides detailed reporting to its users.
If you want to use A/B testing to increase the revenue of your Google AdSense ads, I recommend that you create a separate ad unit in your Google AdSense account for each position or variation. This way, you can later evaluate the results of each ad unit in detail.
However, in most cases, you lack access to such data, or the external networks do not collect it at all. This is where the Advanced Ads Tracking comes into play. This add-on records clicks and impressions for each ad unit and automatically calculates the CTR that completes the setup for A/B testing on your WordPress website.
A/B Testing for Ads
Using ad groups is the easiest way to run split tests. First, create all the ads you want to test against each other. Make sure you configure them according to your test goal (e.g., conditions, variations) and name them clearly.
If you create several almost identical ads, you will save a lot of time using the Duplicate ads feature at this stage.
Then, create a new ad group and add all the ads that are part of your test. Select the “Random ads” mode in the group options and define an Ad weight for each ad.
 Example for split testing various CTA buttons
This ad weight will mostly be the same for all ads because you want to test them equally against each other. However, you can use ad weights to tip the test toward certain ads and make sure they get more impressions than other ads.
Now you just need to create a new placement for your test. Alternatively, use an existing placement where you want to test the ads. For example, this could be a Before content placement.
If you use caching on your website, enable Cache Busting in Advanced Ads > Settings > Pro to ensure ads rotate when someone reloads the page.
A/B Testing for placements
While using groups to split testing single ads against each other, the placement tests (Advanced Ads Pro) allow you to measure in which positions of your website an ad performs better.
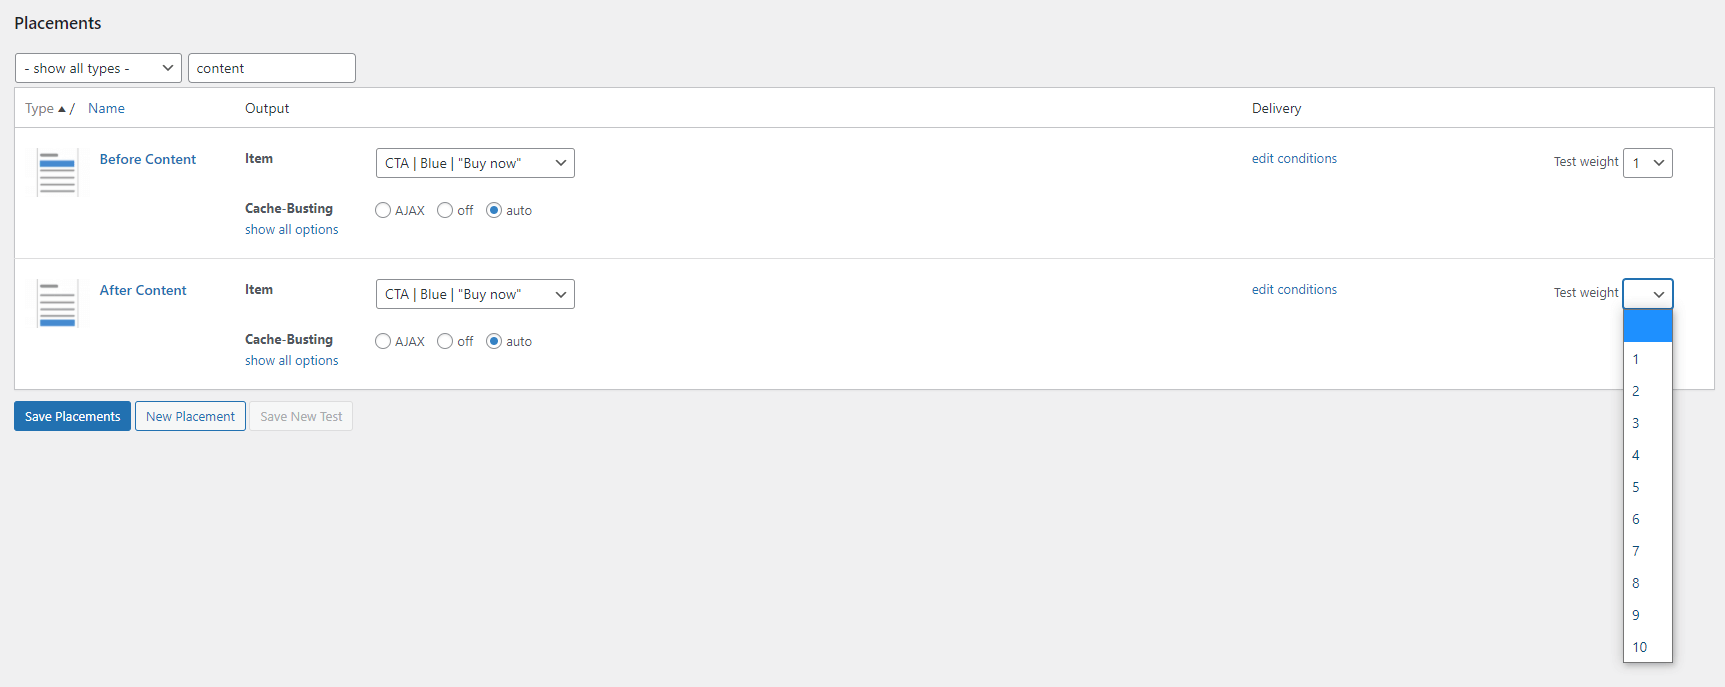
You can find this option under Advanced Ads > Placements in the last column of the placement overview (Test weight).
There, you can select the placements you want to test against each other and give different weights via the dropdown menu to the probability of their insertion.
 Example: A/B Testing placements
Of the placements involved in a placement test, only one placement is delivered on the website simultaneously.
Let’s stay with our example of the CTA button, where you want to determine which position users are more likely to click.
- Create two placements, e.g., Before Content and After Content.
- Duplicate the ad with the CTA button and give both versions clear titles, e.g., “CTA Button | Yellow | Before Content”.
- Adjust the ad layout.
- Assign the related ads to each placement and set the corresponding test weights according to your needs.
By default, I would define the same test weight for both placements. But you can also set that, for example, the Before Content placement is shown more often than the After Content placement.
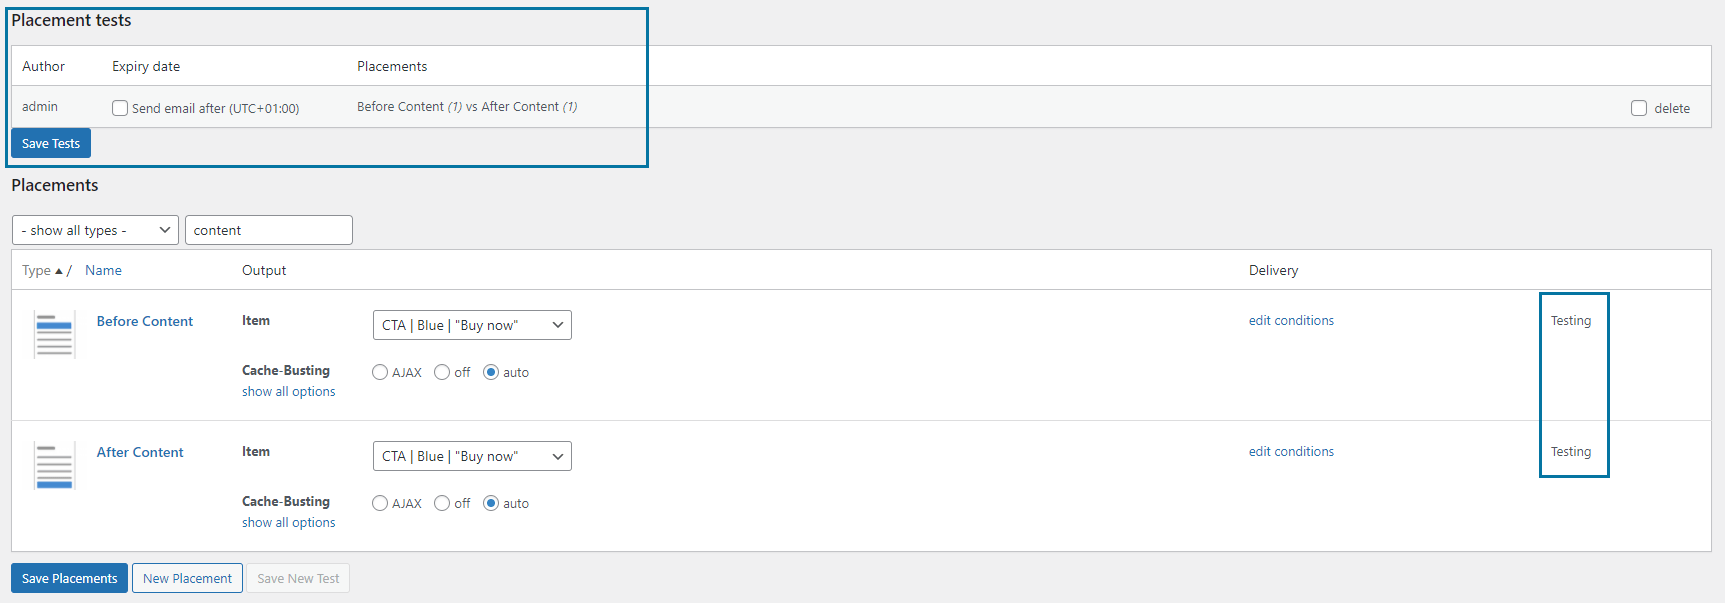
 Example for a running placement split test in WordPress
After your ads have reached the required number of impressions, you can end the test via the button on the placement page and evaluate the results.
Combine A/B Testing Placements and Split Testing various ads
It is also possible to combine these placement tests with the tests described above. In this case, you could vary the button color, the anchor text, and the position of the respective CTA element on the website.
For the test in this example, the consequence would be that you would not have to create and test 4 different ads, but 8. Consequently, the test duration would double again from 4 days to 8 days if each ad continues to receive approximately 10.000 impressions.
Evaluation of Split Testing
Your split test ends when all ads to be tested have reached a significant minimum number of impressions.
Now you can analyze the results and compare the respective CTR data.
I thought up the values in the following table for myself. They are not real measurement results. But the numbers are comparable to the CTR tests I’ve run on my websites.
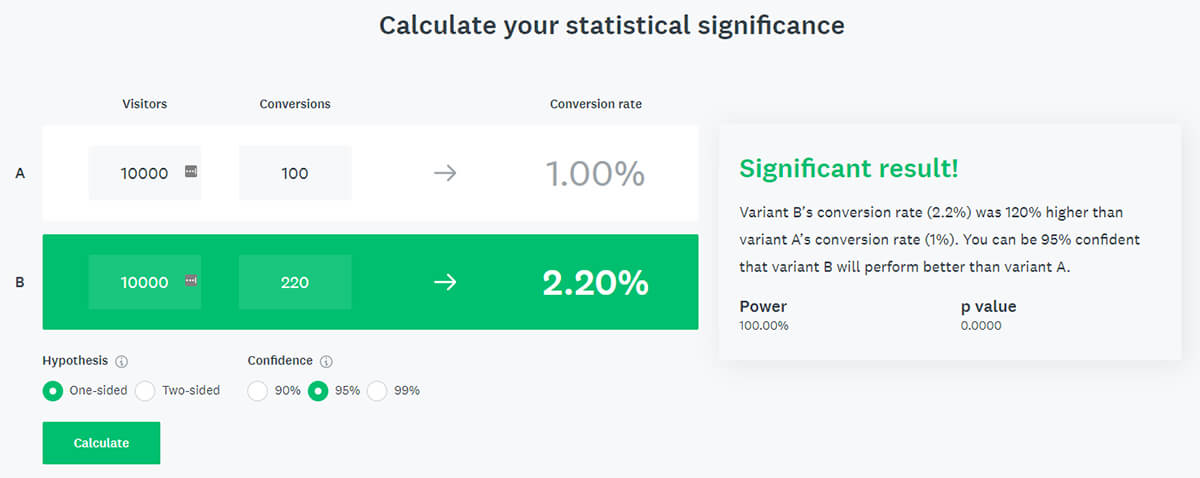
For example, you tracked 100 clicks and 10,000 impressions for ad A, and 220 clicks and 10,000 impressions for ad D. The CTR values are 1,0% vs. 2,2%.
Ad unitClicksImpressionsCTRCTA | Yellow | “Buy now” 10010.0001,0%CTA | Blue | “Buy now”12010.0001,2%CTA | Yellow | “Get it”20010.0002,0%CTA | Blue | “Get it” 22010.0002,2%The result is relatively straightforward: Ad D performs 120% better than ad A.
This result may look insignificant at first glance, but if we extrapolate the 10,000 daily ad impressions from our example to the month, the difference would already amount to 3600 clicks. That would be a noticeable optimization through a simple multivariate split test and should reflect in correspondingly higher revenues.
After you’ve evaluated your test, all you have to do is implement the results into your ad setup. Now, you can look forward to improved ad performance.

Joachim started marketing his first local news website in 2009. Shortly after, he successfully monetized his travel blogs about Morocco. He is an expert in affiliate marketing in the tourism and travel industry. When he’s not writing tutorials for Advanced Ads or supporting other users, he prefers staying in Marrakech or at the Baltic Sea.


