ASUS VG279QM Review | A High-performance Gaming Monitor
We’ve reviewed a ton of ASUS monitors over the years, with most being well-placed within a particular market or price bracket. Today we’ll be taking a look at one of the ASUS’s latest gaming monitors, the VG279QM – a 280Hz, 1ms response powerhouse that will literally give you an edge over your competition.
If the following review, we’ll be taking a closer look at the more important aspects of this monitor and seeing how they compare to similarly priced alternatives – including previous iterations of the VG27 family.
So, with a ton of stuff to get through, let’s waste no further time and dive straight into it!
Mục Lục
Specifications
- Screen size
– 27″
- Aspect ratio
– 16:9
- Panel type
– AHVA IPS
- Resolution
– 1920 x 1080
- Brightness
– 400
cd/m²
- Contrast ratio
– 1000:1
- Response Time
– 1ms GTG
- Refresh Rate
– FreeSync 30-144Hz (VRR)
- Viewing angle
– 178°(H)/178°(V)
- Color Depth
– 8-bit
- Color Gamut
– sRGB 99%, DCI-P3 80%, Rec. 2020 57%
- Backlight technology
– W-LED
- Dynamic Range
– SDR
- Panel Coating
– Anti-Glare with 3H Hardness (Matte)
- Inputs
– 2 X HDMI 2.0, 1 x DisplayPort 1.2, 1 x 3.5mm Audio Jack
- Dimensions (WxHxD)
–
619 x 362 x 50mm (without stand)
619 x 500 x 211mm (Stand at max height)
619 xm 373 x 211mm (Stand at lowest height) - Curvature
– Flat Panel
- VESA – 100 x 100mm
- Weight – 5.6KG (12.35lbs)
Design And Features
The TUF Gaming VG279QM comes in a box almost identical to the other VG27 models – fairly compact with the black and gray color theme we’ve come to expect from this lineup of products. Inside the box, we find the monitor inside two robust styrofoam protective pads and a variety of cables too. Like always, a setup manual is provided with this monitor to ensure a stress-free installation.
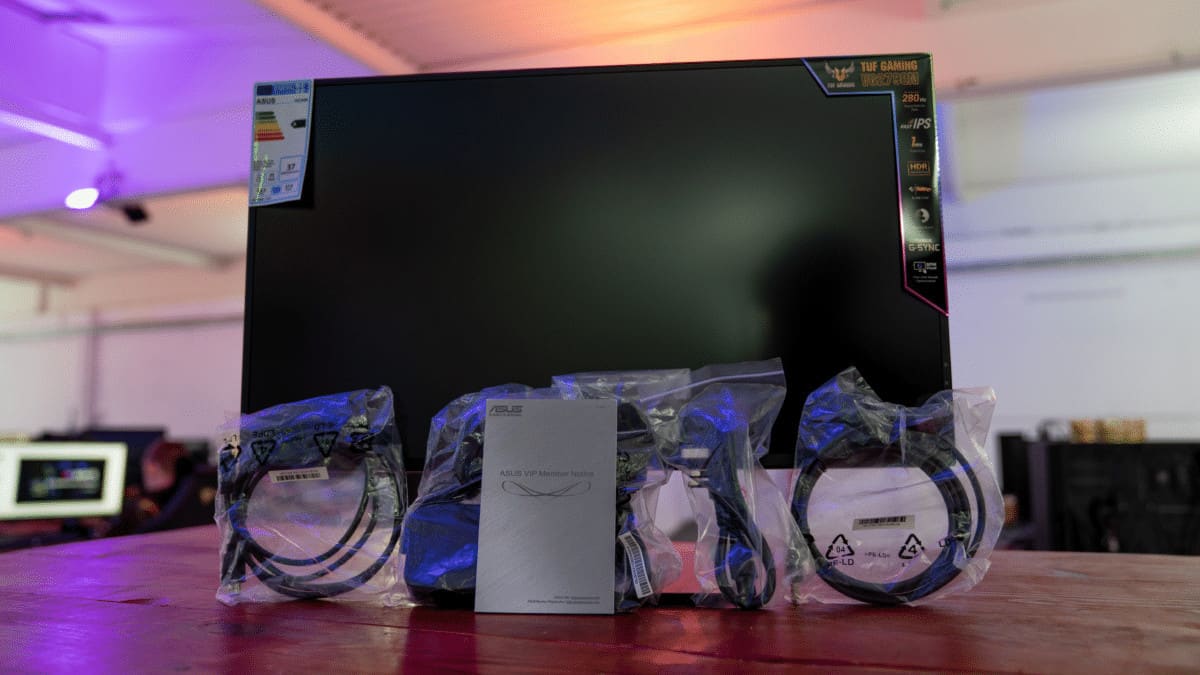
- ASUS TUF Gaming VG279QM
- Power cable – EU and UK
- Powerpack
- HDMI 2.0
- DisplayPort 1.2
Picture Quality & Color Accuracy
The following section will be a more in-depth look at the overall design, build quality, and features the VG279QM comes equipped with. Taking the newly improved refresh rate out of the equation, it’ll be interesting to see how the ASUS VG279QM compares to the VG278Q/VG279Q – and whether those differences are worth the increase in price.
Design
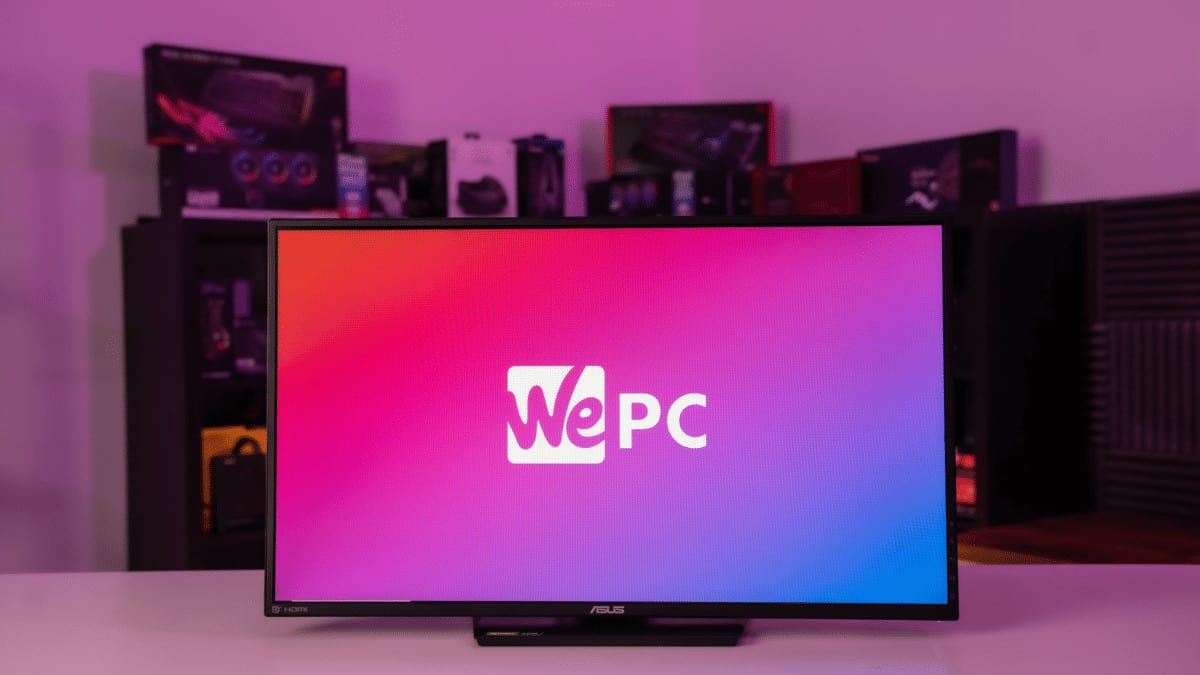
On first impressions, it’s safe to say no real design changes have been made to VG279QM when comparing it to the VG278Q. It offers the same general design as its predecessor, predominantly made of plastic and feeling pretty identical from a build quality standpoint. I suppose ASUS has opted for the “if it ain’t broke, don’t fix it” approach for this one – and we’re Ok with that.
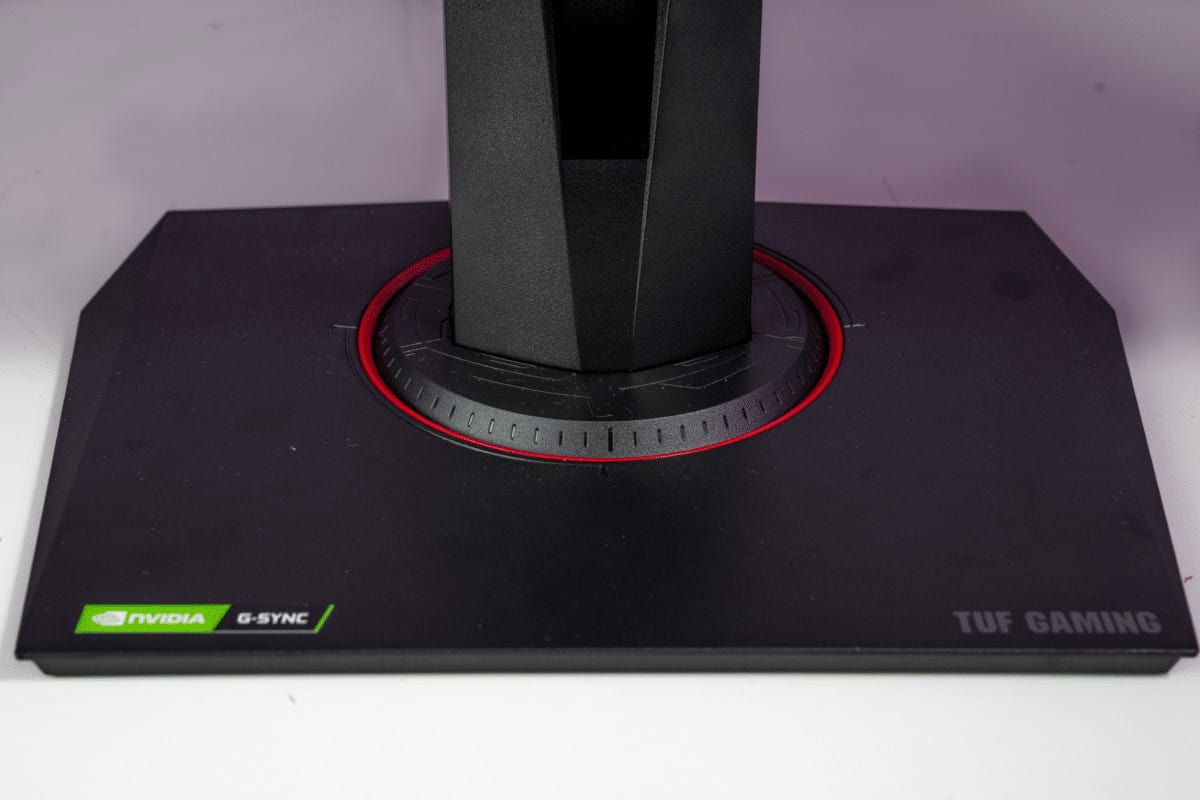
Like all VG monitors from ASUS, the base plate is square in shape with a slight ‘winged’ effect towards the rear. The base of the stand has a cool engraved look that is more Mayan than gaming, yet still works extremely well with the monitor’s subtle design. A red trim can be found on the base of the stand with a compass style outline which tells users how much maneuverability they have left.
The great thing about this monitor, apart from the lightning-quick refresh rate, is that you could easily utilize this in an office setting. It has that level of versatility which opens it up to a much wider demographic market. Overall, a nice, discreet looking monitor that doesn’t take the gaming vibe too far.
Build Quality
Like we’ve always said, ASUS never seems to fail us when it comes to the build quality of their monitors – no matter what price range you’re looking at. The same could almost be said for their VG279QM, albeit for one minor flaw which, if truth be told, isn’t that much of an issue.
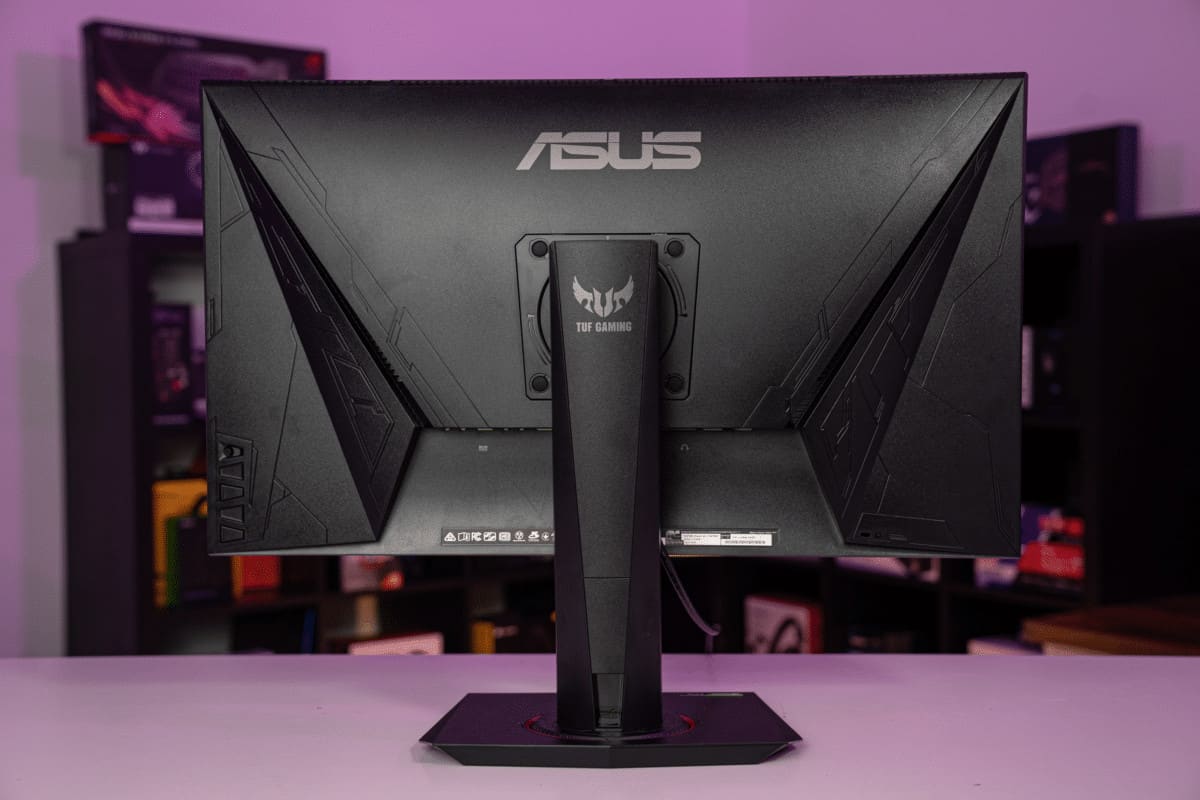
Let’s get the positives out the way first though. Whilst this monitor is made predominantly from plastic, it still feels pretty rock-solid. There was little to no creek when testing the build quality of this monitor, neither was there any great amount of movement found from the base of the stand. The plastic used on the stand is both sturdy and rigid, providing excellent stability for the most part.
That leads us to the flaw. There seems to be a decent amount of play in the actual stand mechanism which rotates, tilts, and swivels this panel. Now, it’s by no means as bad as the VG270UP we tested at the start of the year, but it’s not a million miles away either. Comparing this to the more expensive ASUS PG278QR, however, you can clearly feel the difference. The latter just feels much sturdier and well-grounded. Apart from that though, you’d be hard-pressed to find any more build quality issues with the VG279QM.
Panel Coating
The panel coating used for the ASUS VG279QM is anti-glare with a 3H hardness in matte. This is fairly standard for most monitors these days, mitigating natural light to an extremely high level. Whilst you can still pick up some reflections, this particular panel coating also does a good job of keeping your eye focused on the game.
Bezels
The bezels on the VG279QM are as you’d expect, noticeable but not ugly or garish. The sides and top bezel all measure approximately 10mm. The bottom bezel is more in the region of 14mm but, again, doesn’t really take anything away from the user’s viewing pleasure.

Stand
The stand, despite its minor flaw, still offers up excellent versatility and functionality for a ton of different scenarios. It has four-directional functionality, including tilt, swivel, pivot, and height adjustments – that’s more than a lot of high-end offerings.

As far as adjustments go, users are treated to the following;
- Forward Tilt – 5 degrees
- Backward Tilt – 33 degrees
- Left Swivel – 90 degrees
- Right Swivel – 90 degrees
- Left Pivot – 90 degrees
- Right Pivot – 90 degrees
- Height – 130mm
That gives you a huge amount of versatility when it comes to finding the perfect viewing angle. Most of the adjustable range won’t ever come into practice, however, simply having it gives you a step up over similarly priced alternatives. The pivot functionality is particularly useful for people who like to stream on Twitch or YouTube, giving them a much longer comments feed if they wish to use it for that purpose.
Inputs
All the inputs are found at the rear of the monitor, with cables being attached in a vertical fashion. The VG279QM offers up 2 x HDMI 2.0, 1 x DisplayPort 1.2, and 1 x 3.5mm audio jack.
Like the other VG monitors that offer pivot functionality, whilst the cables may be tucked away behind the stand, they’re still very much accessible when pivoting it 90 degrees.
OSD
Another huge plus for this monitor was the OSD controls. The VG279QM utilizes the classic joystick style that we’ve seen used across a plethora of ASUS monitors. Every time I use it, I just scratch my head and question why other brands aren’t using something similar, but anyway…
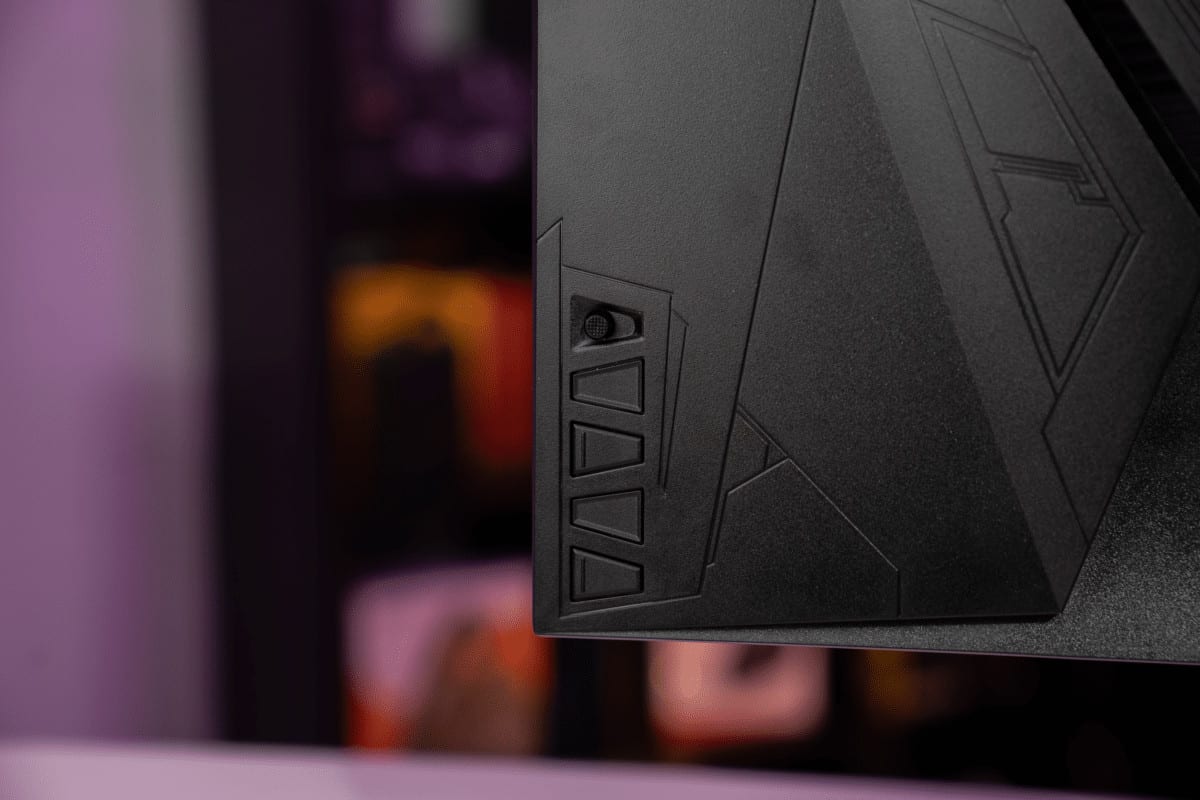
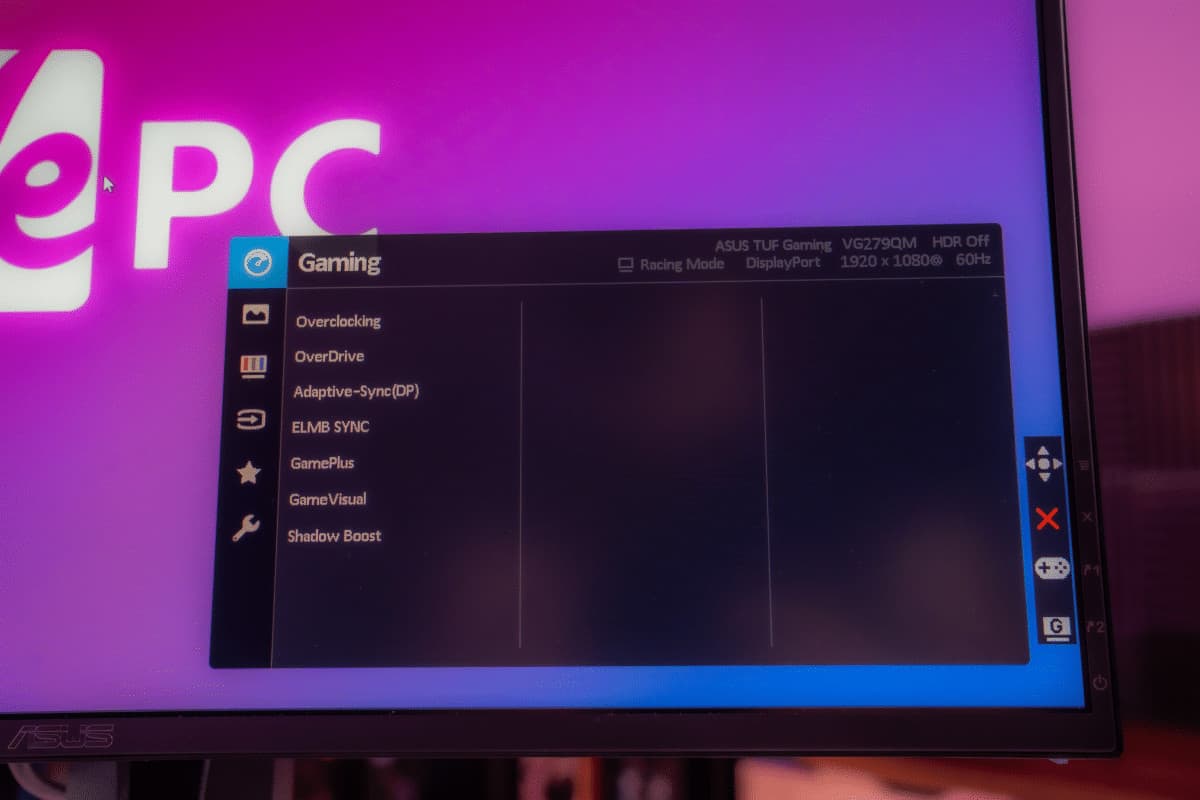
The OSD controls offer easy navigation of all its menus, all of which have been narrowed down to only the important, useful monitor features. Users will have access to a whole host of gaming presets and features, including timers, fps counters, a sniper practice mode, and a crosshair too.
Users will also have access to overdrive, overclocking, adaptive-sync, ELMB, and a ton of other customizable features too. We’re going to touch on the more important gaming features shortly, but as far as the OSD functionality goes, you can’t really knock the simplicity it offers.
Gaming On The ASUS VG279QM
Whilst the picture quality and color accuracy probably aren’t the most important aspects of a gaming monitor, they still sit highly in most people’s priority list when it comes to purchasing a new gaming monitor. With that in mind, it’s time to take a closer look at the picture quality and color accuracy of the ASUS VG279QM.
The following results have been collated using a number of different tests and specialized equipment.
PresetWhite PointBlack DepthContrast RatioAverage ΔE*00Gamma
IDEAL6500K0.000 cd/m²Infinite0.002.20
Racing Mode7083K0.1071 cd/m²1114.5:12.252.19
sRGB6199K0.3161 cd/m²506:11.922.17
Cinema Mode10310K0.1383 cd/m²876.7:14.962.3
F0r the purposes of this test we decided to use three of the monitor’s gaming presets; Racing mode, Cinema Mode, and sRGB. As you’ll soon see, each has its own pros and cons.
For the most part, the VG279QM displayed pretty accurate colors right out of the box. The official preset for default settings were; Racing mode in warm, with both brightness and contrast set to 80. Now, in Racing mode, you could tell straight away that the image felt quite warm and was far too bright for everyday viewing. We recommend cranking the brightness down to around 10 for a more natural, easier viewing experience during daytime usage.
The first thing we did before testing the monitor’s presets was to adjust the brightness accordingly. In Racing mode, we set the brightness to 4 – or 120 cd/m². We try to use this for a more standardized measure of all the monitors we test. However, as you’ll soon find out, that isn’t always possible.
Anyway, we tested Racing mode in warm first, and to no-one’s surprise, the white levels were off by quite a way (7083K). That said, blacks were decent as was the native contrast ratio which measured at 1114:5:1. An average delta of 2.25 was recorded on our first run, alongside a 2.19 gamma which was extremely good. Something you’d expect from an IPS panel, mind.
sRGB mode was next up and we saw a similar average delta and gamma reading. However, the contrast was much worse, as were the black levels. This was due to the fact that you can’t adjust the brightness levels when using the sRGB profile – annoyingly. On the plus side, the white level was much closer to our ideal at 6199K.
Cinema Mode was last and by far the worst of the bunch. Whites were miles away from where they needed to be, measured at 10310K. The black point wasn’t the worst, neither was the contrast ratio, however, that’s pretty much where the positives end. The average delta came back at 4.96, over double the other two presets tested.
As far as peak brightness was concerned, the ASUS VG279QM exceeded the advertised figure of 400cd/m², coming in at an eye-watering 417 cd/m² – even higher when used in certain profiles. Unfortunately, this probably isn’t the greatest monitor for individuals that do a lot of night viewing. We could only manage a low of 106 cd/m²
PresetWhite PointBlack DepthContrast RatioAverage ΔE*00maximum ΔE*00Gamma
Racing Mode In-depth6218K0.3204 cd/m²500.7:12.448.192.17
Calibrated6501K0.1105 cd/m²1067.3:11.0427.82.2
For calibrated results, we set the RGB to 100/97/97 and reduced the brightness down to 4 (120 cd/m²). After doing so, we let the DisplayCal calibrate the monitor and saved the profile – which can be downloaded below. After calibration was complete, we ran a more extensive test for a broader range of results. As you can see, the figures were much more in line with our ‘ideal’ figures.
The white point was perfect and the black depth was pretty good too, measuring in at 0.1105 cd/m². The contrast ratio was pretty much bang on with the advertised 1000:1 rating. I was very impressed with the average delta of 1.04, meaning this monitor displays close to perfect colors on average. That being said, we did find some pretty concerning discrepancies along the way. There were large deltas between certain shades of blue – up to a maximum of 27.8 (the highest we’ve recorded so far). We decided to run the test several times expecting to get different results, but it wasn’t to be.
Panel Uniformity
Panel uniformity is a test we run to check how uniform the luminance and color is across the entirety of the screen. During this test, the center square is used as the reference space. Every other square is then tested to see how far it differentiates from the reference. In an ideal world, we want every square to be green, meaning it hasn’t broken the differential threshold – something we can set at the start of the test.
Note: results will differ from panel to panel.
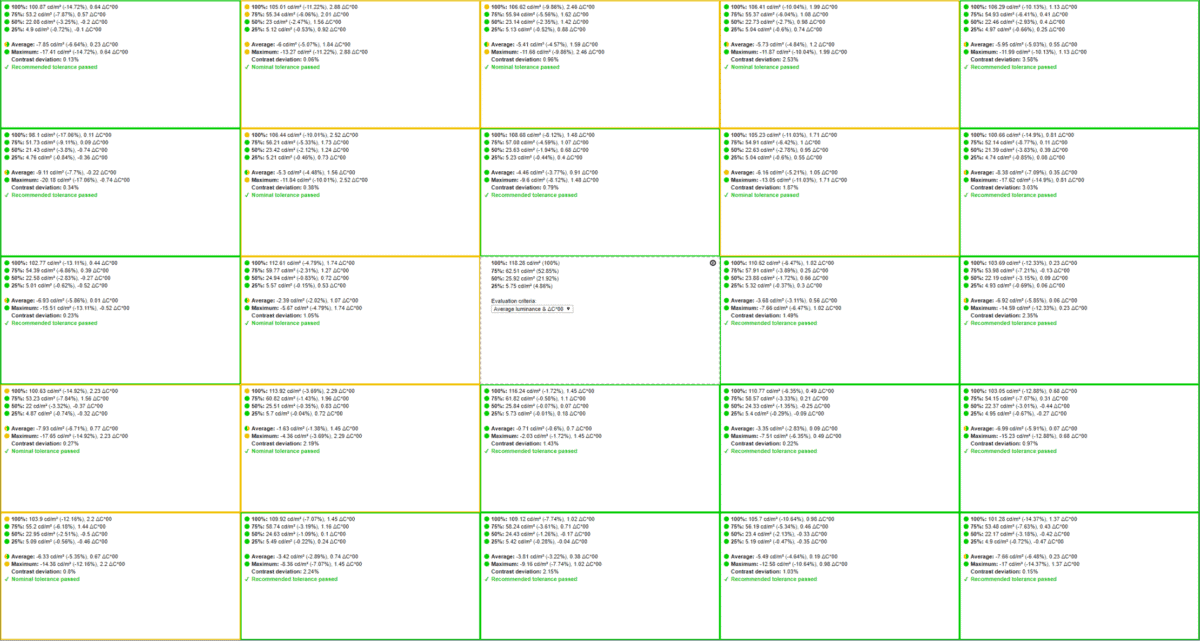
I was very happy with the uniformity of the luminance and the color across this particular panel. It’s by far one of the best monitors we’ve tested so far, displaying only green and amber results across the board – squares that exceeded the maximum threshold would have been colored red.
Potentially even more impressive were the corners. They displayed some of the best results measured on this panel – an area that is notorious for being poor in the uniformity department. Three of the four corners came back with a green reading which, in the greater scheme of things, is extremely good.
All in all, you really can’t knock this panel as far as uniformity goes. It performed to an extremely high level.
Viewing Angles
As far as viewing angles were concerned, this IPS panel, once again, performed very well. Even at wide angles (up to 40+ degrees), there wasn’t a huge amount of deviation in the colors or the contrast. Unlike the ASUS VG278Q, looking at this monitor from top-down posed no real problems in the color department either. I didn’t encounter any color inverting or haloing – even at angles that extend past the norm of daily usage.
Color Gamut
DisplayCal takes a measurement of the color gamut coverage and volume after the calibration process.
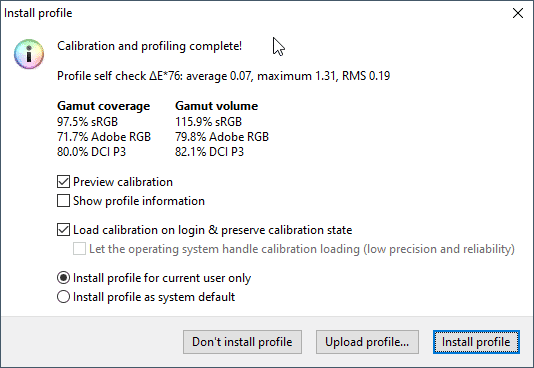
Despite not being the best we’ve seen when it comes to IPS panels, the ASUS VG279QM still showed a good account of itself in the color gamut department. It offered up 116% sRGB volume with a 97.5% coverage – falling short in the blues. On a more positive note, however, better volume and coverage of the Adobe RGB (79.8%) and DCI P3 (82.1%) color gamuts were recorded.
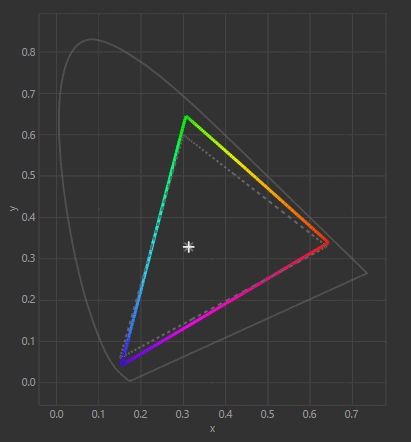
Overall, color gamut recordings were extremely positive for the ASUS VG279QM. Whilst this monitor has clearly been tailored towards gaming, you could most certainly make a case for people using the VG279QM for editing – especially in the sRGB color spectrum.
Final Thoughts
The next stage of testing will focus more on response time, refresh rate, and general responsiveness of the ASUS VG279QM. We’ll be putting the ASUS VG279Q through a series of gaming scenarios to see how it stacks up.
Like always, I loaded the first game in out the box settings to get a taste of what the monitor could do, pre-calibrated. First impressions were solid, gameplay felt smooth and I noticed no initial ghosting or color shifting. I was extremely impressed with the smoothness of the monitor, but that’s to be expected from a monitor that has a 240Hz out the box refresh rate.

I boosted the monitor’s refresh rate to 280Hz via the overclock settings in the OSD. This was a fairly simple process, requiring only a couple of clicks to do so – don’t think this monitor requires a physical overclock, it does not. Once we overclocked the refresh rate I jumped back into the game and, to be honest, didn’t really notice a massive difference from when the monitor was set to 240Hz. That said, it was still incredibly smooth and a pleasure to play on.
On a less positive note, let’s not forget that this monitor is still a 1080p panel. Whilst that is great for some scenarios, like extracting the most FPS from your system, it’s still not the best when it comes to picture clarity. We got the usual granulated picture that you’d expect from a monitor of this standard. However, thanks to the less taxing resolution, we were able to achieve 300FPS – allowing us to get the best out of this monitor and fully utilize the variable refresh rate (G-Sync in this scenario).
We tried all the different monitor settings we had available to us, including overdrive, ELMB (extreme low motion blur), shadow boost, and a number of the gaming presets which weren’t really to my color tastes. Overdrive was adjustable in increments of 20, ranging between 0-100, with 60 being the sweet spot for the games I was playing. ELMB is a feature that pulses the backlight to increase the response time of the pixels. Whilst it wasn’t overly apparent how this affected the picture quality, but it did drop the brightness quite dramatically. Furthermore, you can’t use the ELMB feature alongside Overdrive, it’s one or the other.
After playing a whole host of games on this monitor, it’s safe to say I was extremely pleased with the results that it provided. Pairing the excellent color accuracy with rapid response time and refresh rates is a gamer’s dream come true. The only minor downside was the fact this monitor was 1080p. Whilst 1440p is always more desirable when it comes to picture quality and general immersion, it’s kind of unrealistic in the greater scheme of things. I mean, you’d need a seriously good PC to reach 280Hz on a lot of modern titles, that’s for true.
So, there you have it, our comprehensive review of the hugely impressive ASUS VG279QM gaming monitor. Comparing this monitor to the VG279Q is like night and day, literally. It has better color accuracy, better picture clarity, and much better input lag and gaming performance. And for all that, you’d expect to have to fork out a sizeable amount more, but you don’t!
The best thing about this monitor is that it’s still affordable. Currently retailing for just under $400, the ASUS VG279QM showcases extremely good value for money. It not only provides you with lightning-quick response, but it also offers a full range of colors that are pretty damn accurate right out the box. That makes this monitor ideal for individuals that are not only looking to take their gaming to the next level, but also like to dabble in content creation using the sRGB color gamut. Quite frankly, one of the best gaming monitors on the market.


