How to Delete a Facebook Group
Mục Lục
Deleting a Facebook group is simple, but this guide will help you navigate the lengthy process.
Sometimes, Facebook groups run their course. If you are an administrator of a Facebook group, and you would like to permanently remove your group from Facebook, you can do so by deleting your Facebook group.
Deleting a Facebook group is simple and requires just a few easy steps. However, as you will learn, this simple process can also be time consuming depending on how many group members you have.
What to know about deleting Facebook groups
There are a few things that you should know about deleting a Facebook group before you take this action. Consider the following:
-
Deleting a group is permanent. Once the deletion process is complete, you cannot recover this group.
-
You can only delete a Facebook group if you are the creator of the group, or you are an administrator of the group and the original creator left the group.
-
You cannot delete a group until the group has zero members—you will have to manually remove every member of this group before you take the action of permanently deleting it. (Read on to learn how to do this.)
-
Group members will not be notified that the group has been deleted.
-
You also have the option of pausing a Facebook group rather than deleting it. (You will learn more about this later in the article.)
How to delete a Facebook group (desktop)
If you’re using your computer, follow these steps to delete your Facebook group:
-
From any page on Facebook, click the “Groups” icon located on the left menu.
![]()
Click the “Groups” icon located on the left-hand menu.
-
Under “Groups you manage,” select your group.
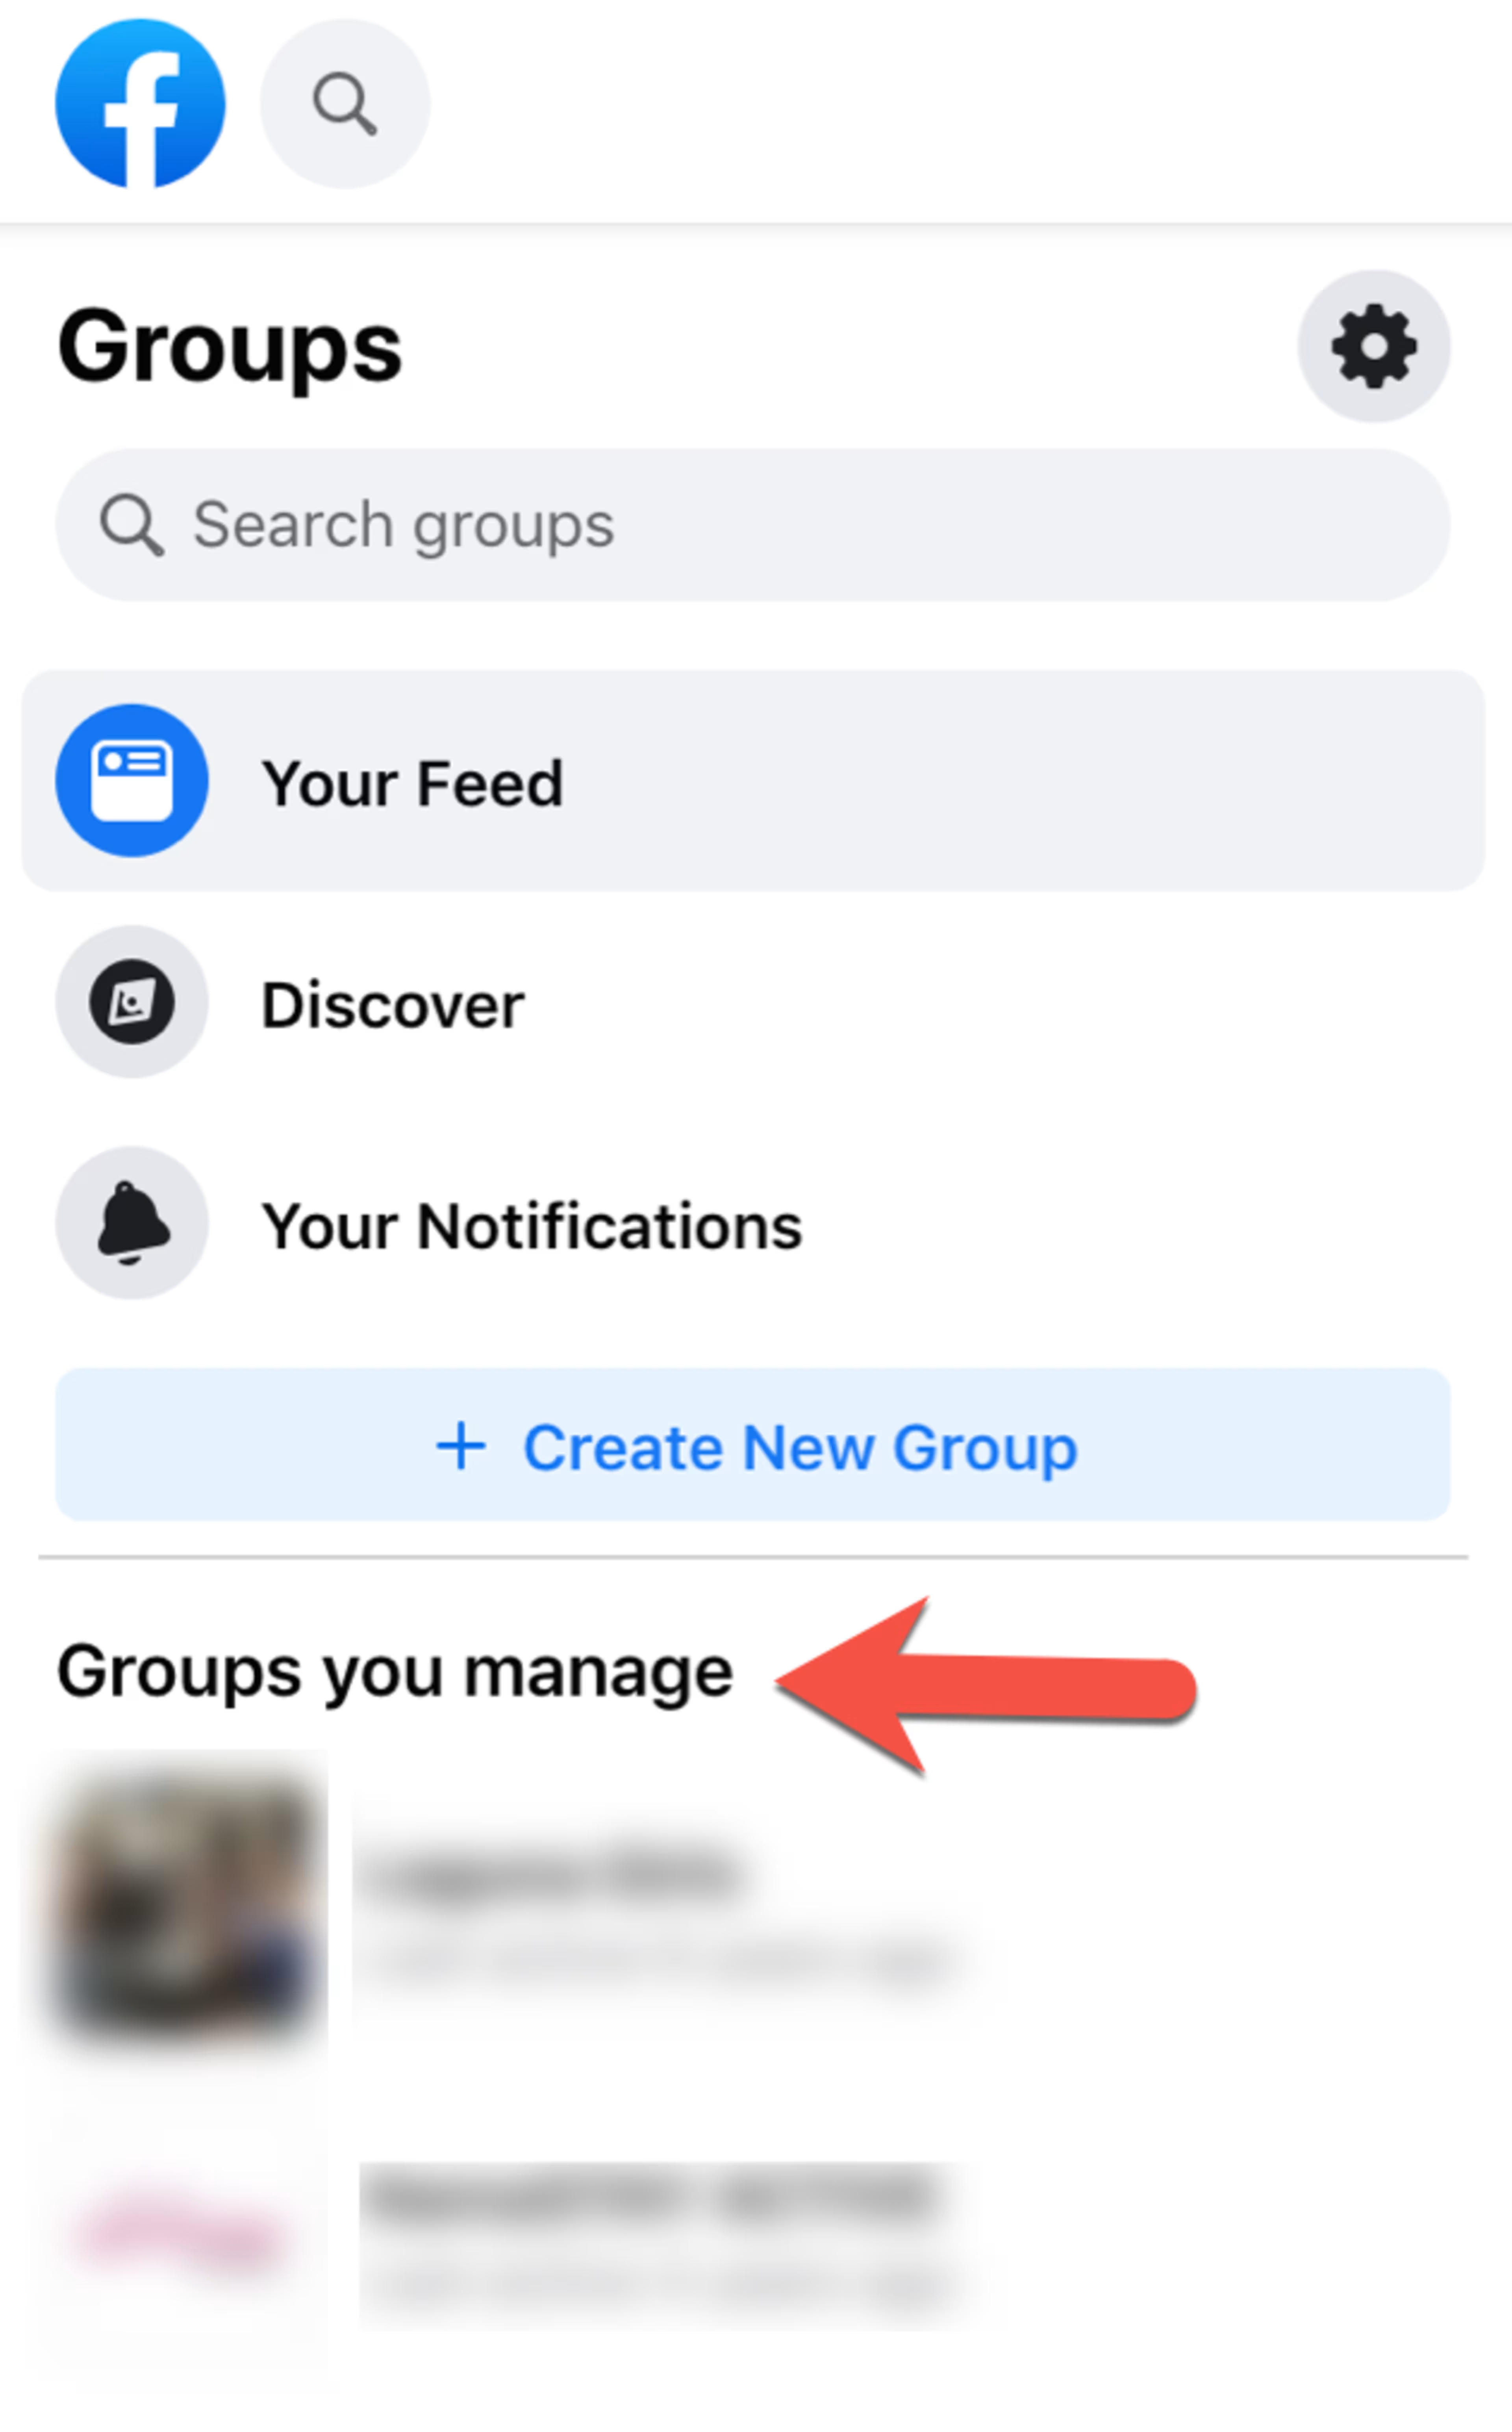
Under “Groups you manage,” select your group.
-
Click “Members,” which is in the group’s main menu.
-
Click on the three dots next to each member’s name, then choose “Remove member.”
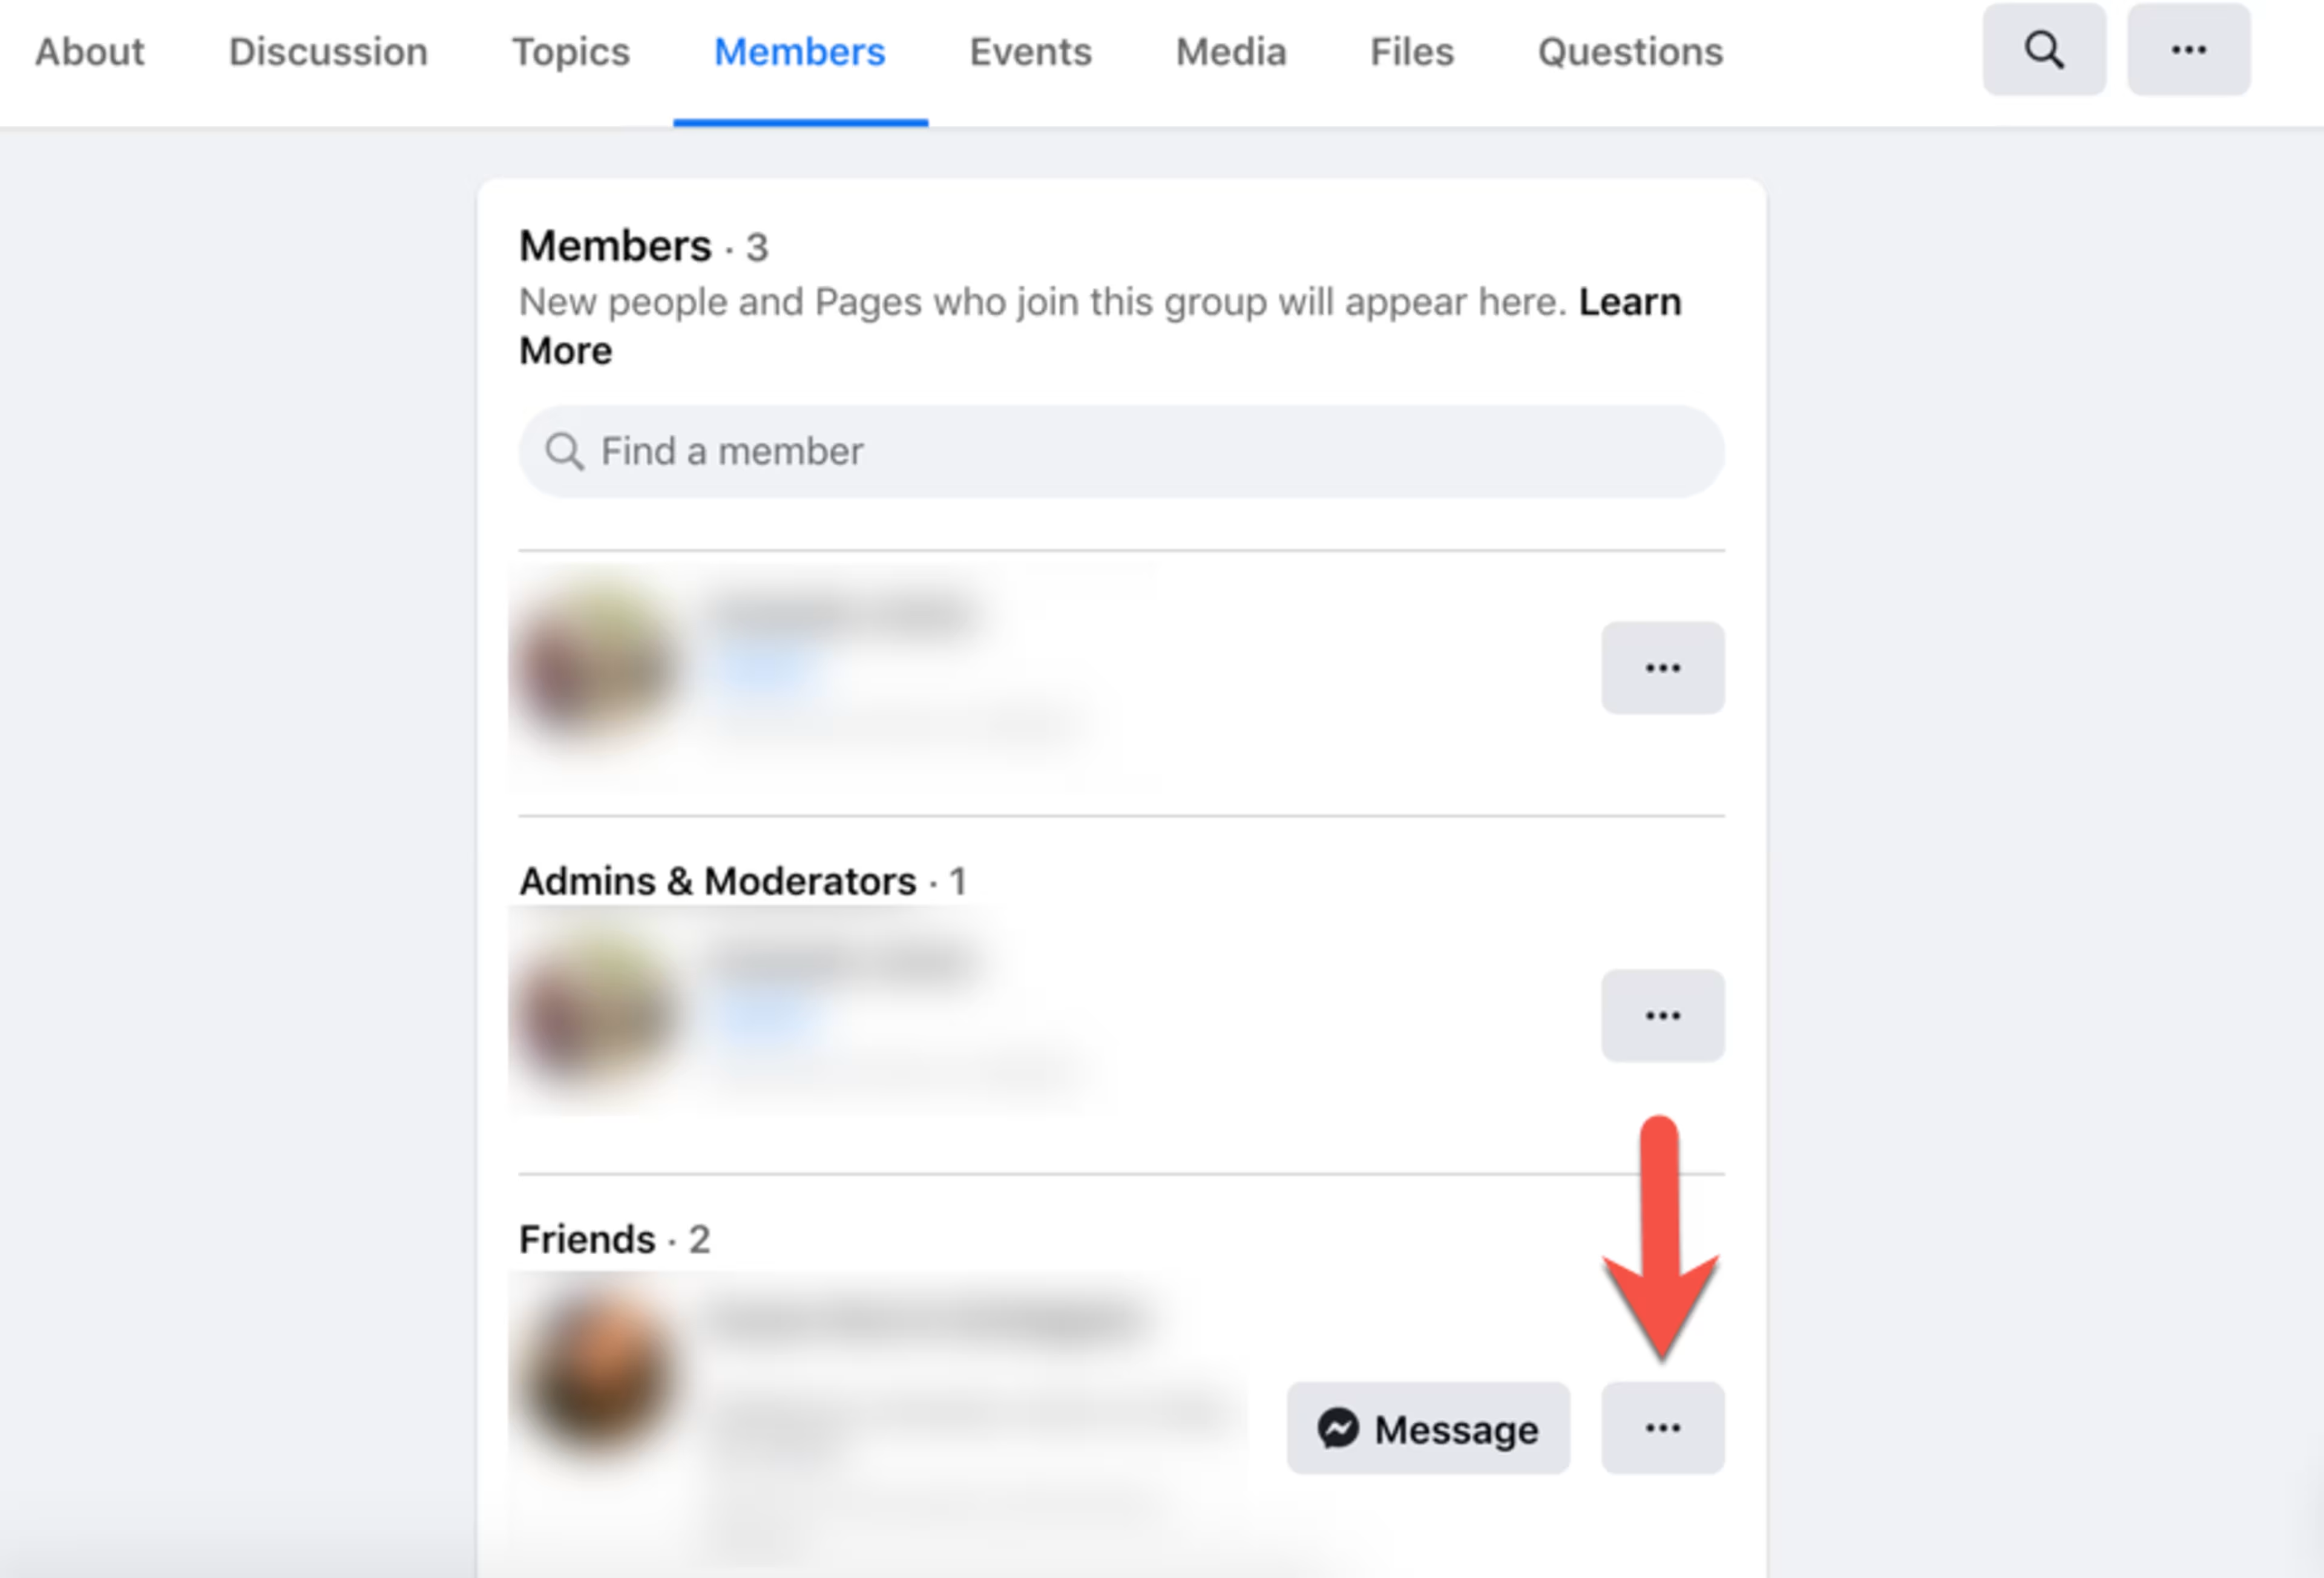
Click on the three dots next to each member’s name.
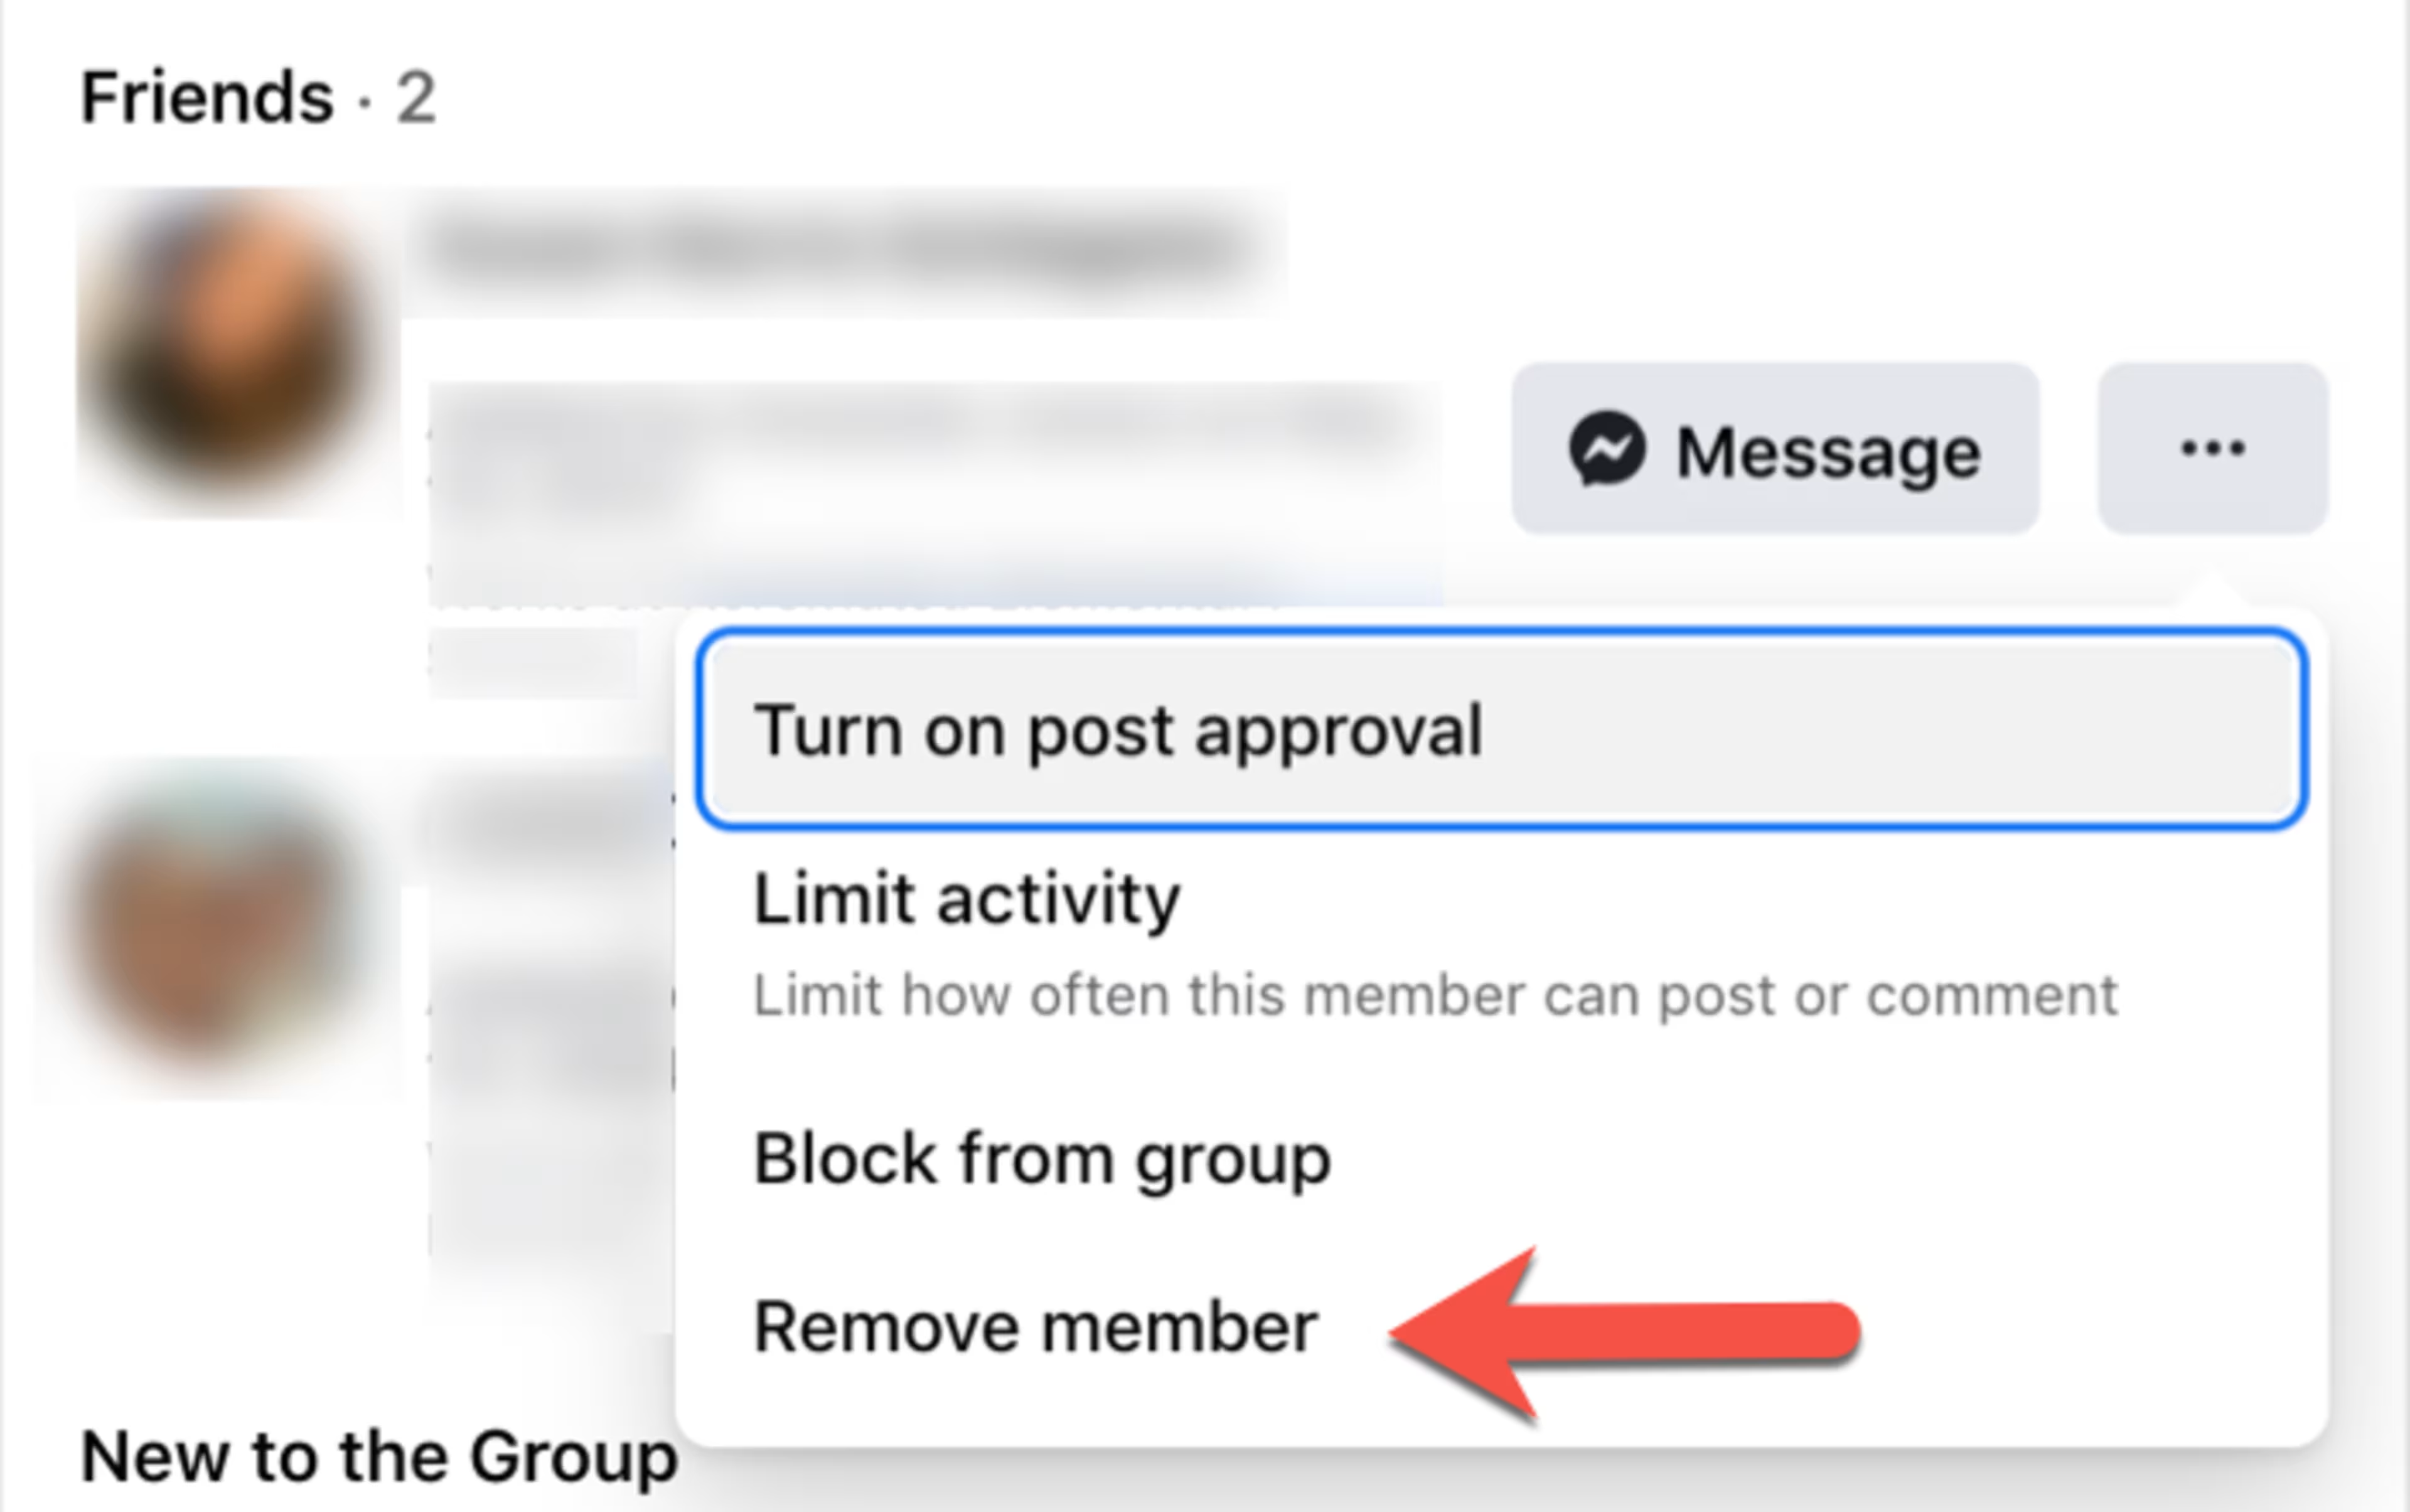
Click “Remove member”.
-
Click “Confirm.”

Confirm removal of this group member.
-
Continue this process until you have removed all members of the group.
-
After you’ve successfully removed all group members, click on the three dots icon next to your name.
-
Click “Leave group” and confirm. The group will automatically be deleted.
How to delete a Facebook group (mobile)
If you’re on your mobile phone, follow these steps to delete your Facebook group:
-
From the bottom menu, tap the Groups icon.
![]()
From the bottom menu, tap the “Groups” icon.
-
Click “Your Groups” at the top of the Groups page.

Click “Your Groups” at the top of the Groups page.
-
Under “Groups You Manage,” select your group.
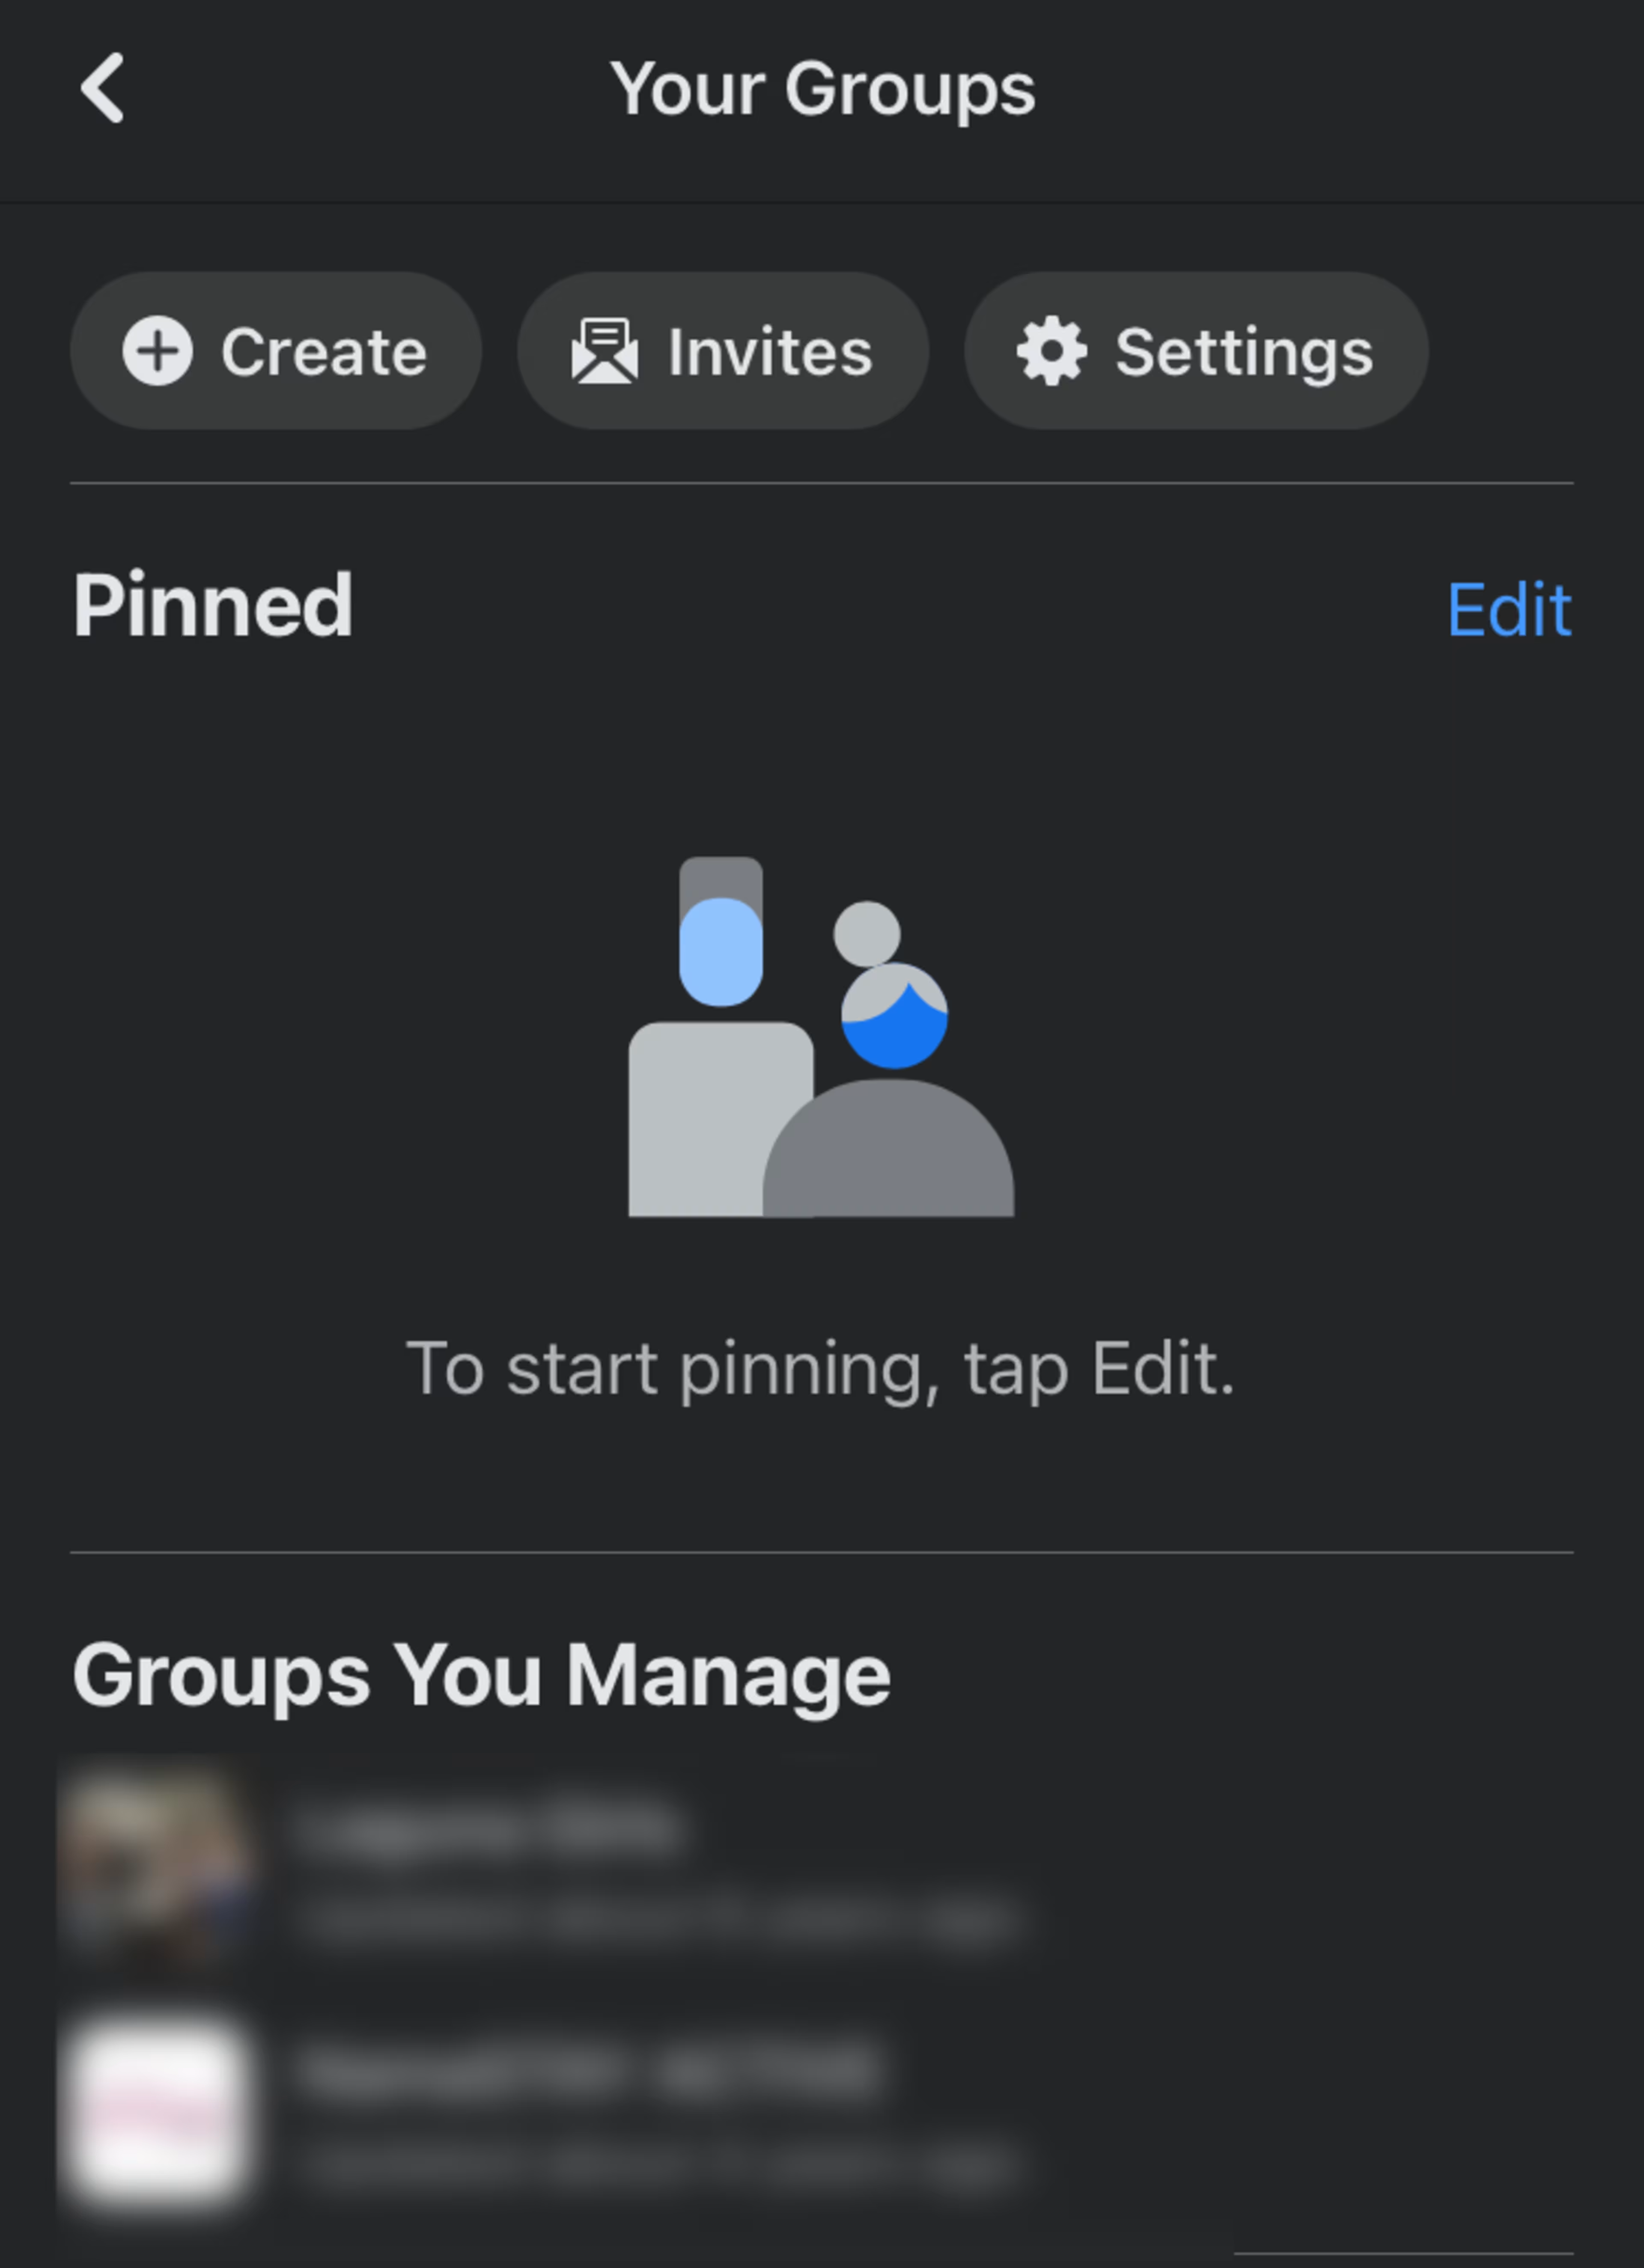
Under “Groups You Manage,” select your group.
-
Under the group name, tap “X members.” (The X indicates how many members the group has.)
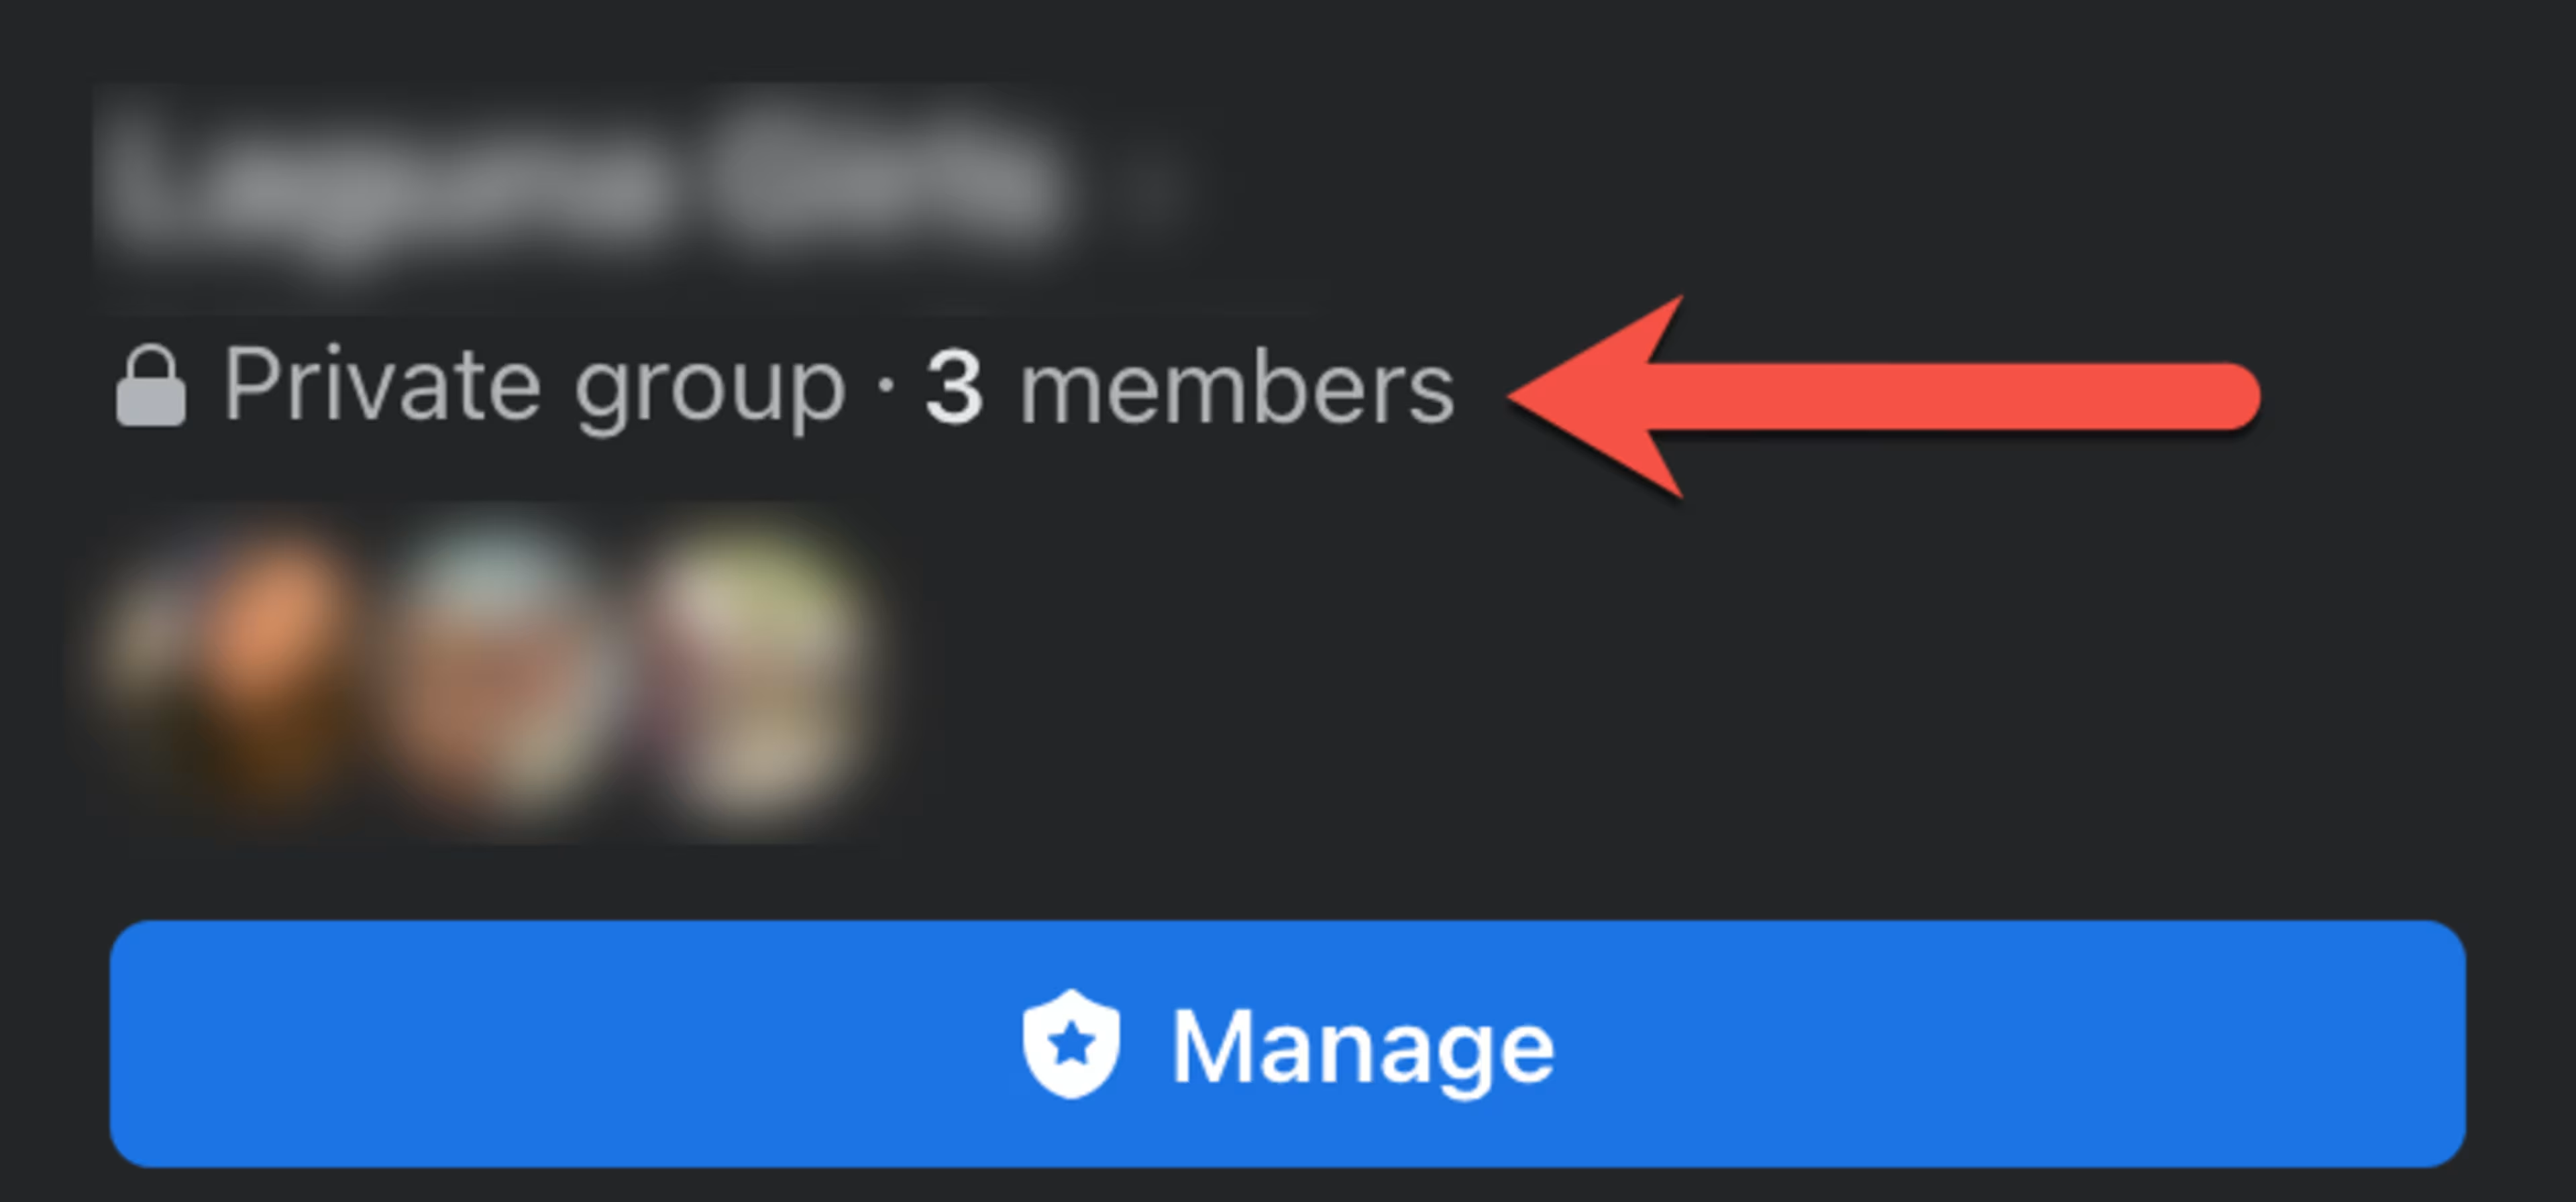
Under the group name, tap “x members”.
-
In the new page, click “See All” next to Members.
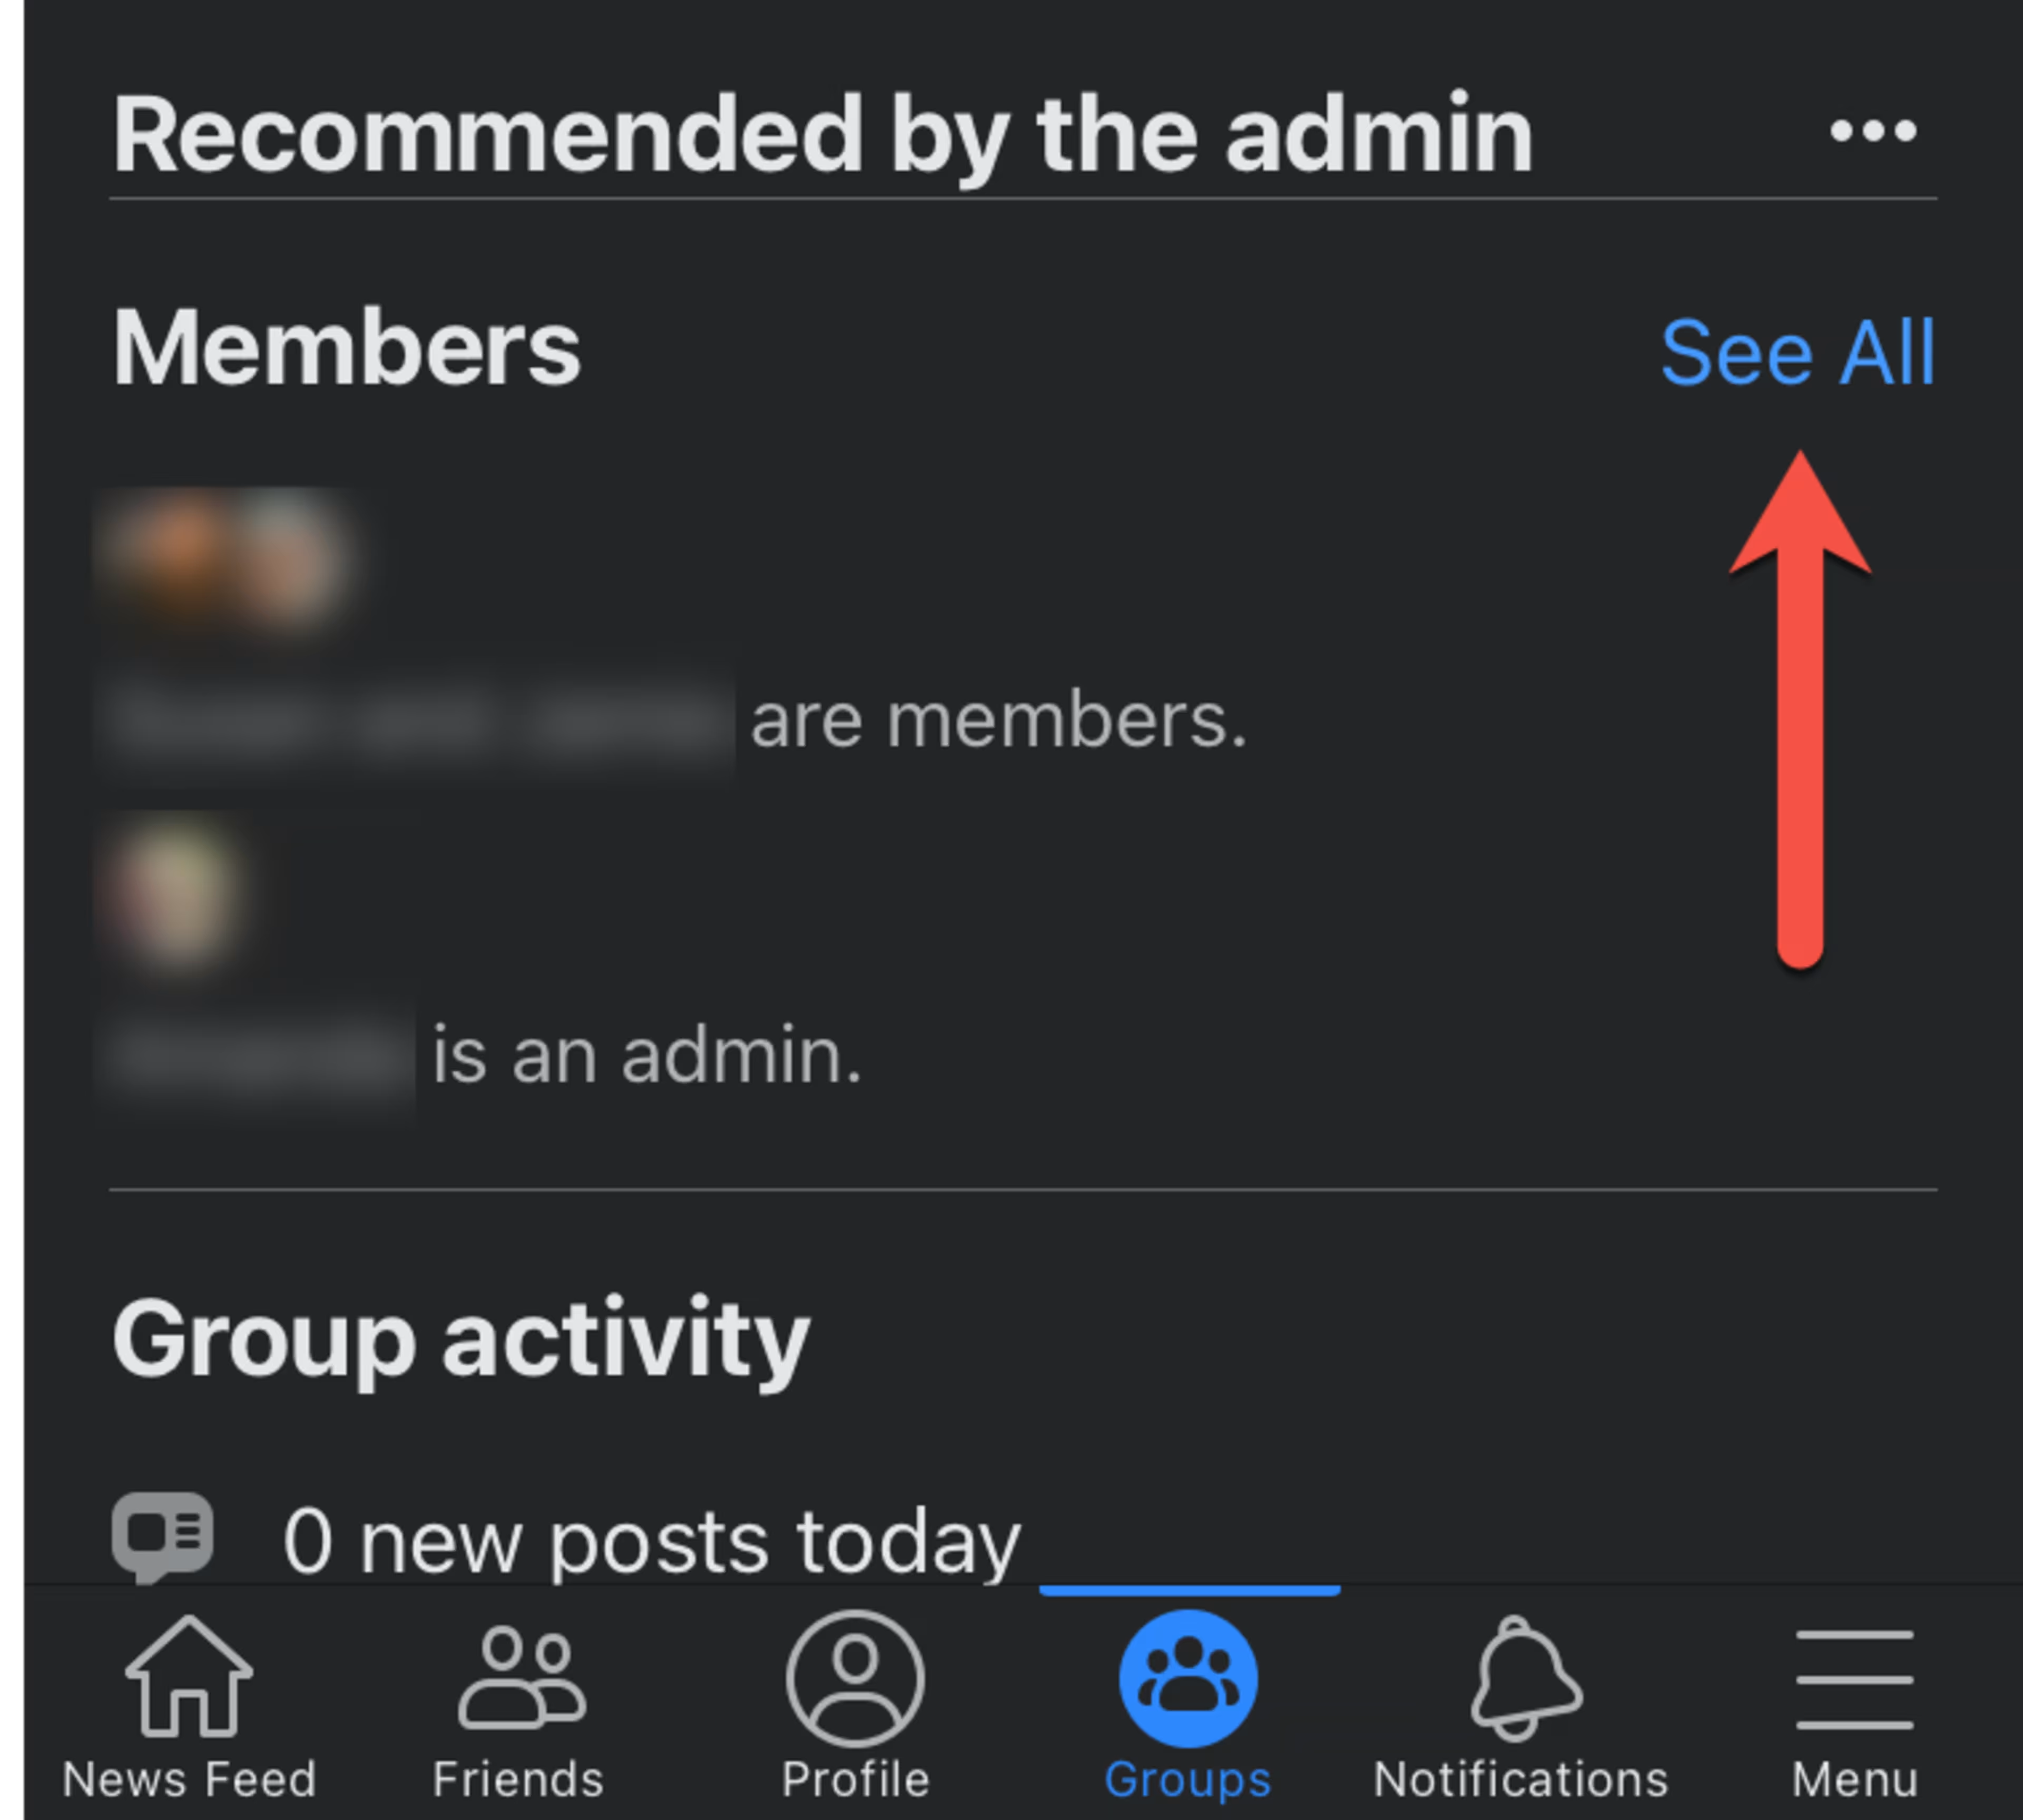
Click “See All” next to Members.
-
Click on a group member’s name.
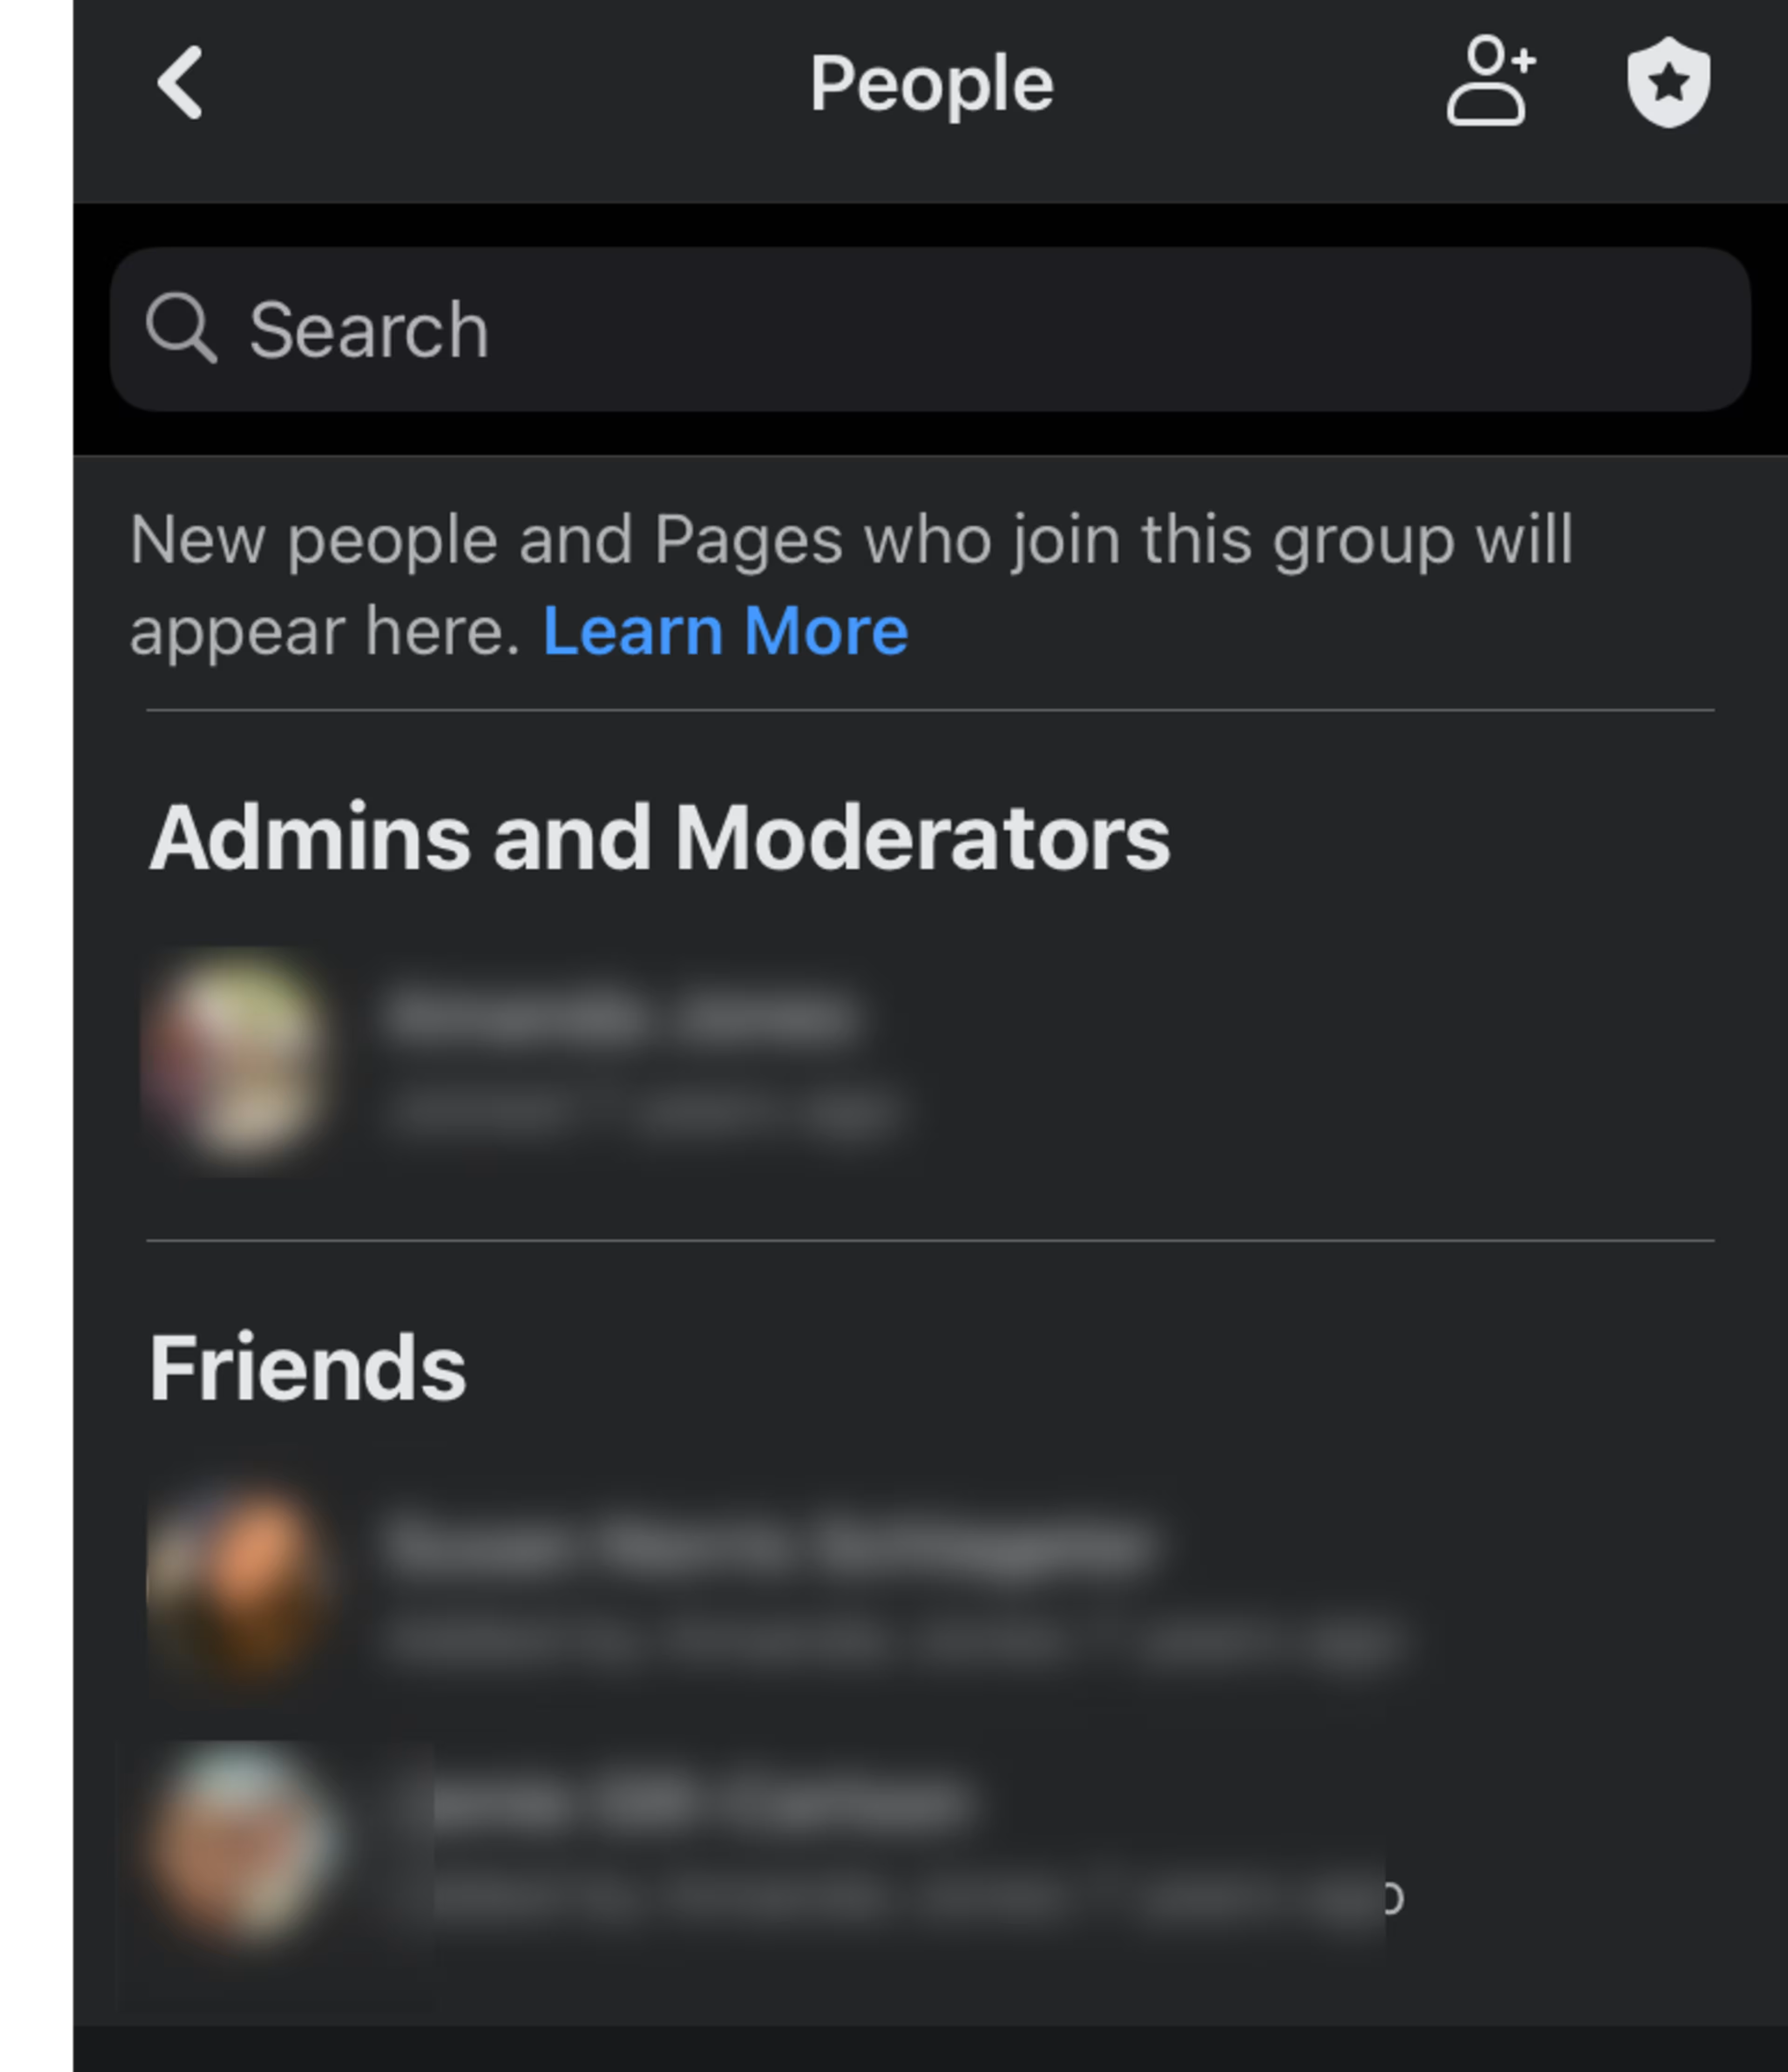
Click on a group member’s name
-
In the new page that pops up, tap “Remove [person’s name] from group.”
-
Click “Confirm.”
-
After you’ve successfully removed all group members, click on the three dots icon next to your name.
-
Click “Leave group” and confirm that you would like to remove yourself from the group. The group will automatically be deleted.
Pausing a Facebook group
As a group administrator, you also have the option of pausing your Facebook group rather than deleting it. When you pause a Facebook group, a message appears at the top of the group that explains that all activity (posts, comments, and reactions) is paused for all group members and admins. Members can still delete their activity or remove themselves from the group during this time. Administrators can add members who requested to join before the pause.
To pause a Facebook group, complete the following steps:
-
Navigate to the group you want to pause.
-
Click on the three dots below the group’s cover photo.
-
Click “Pause group.”
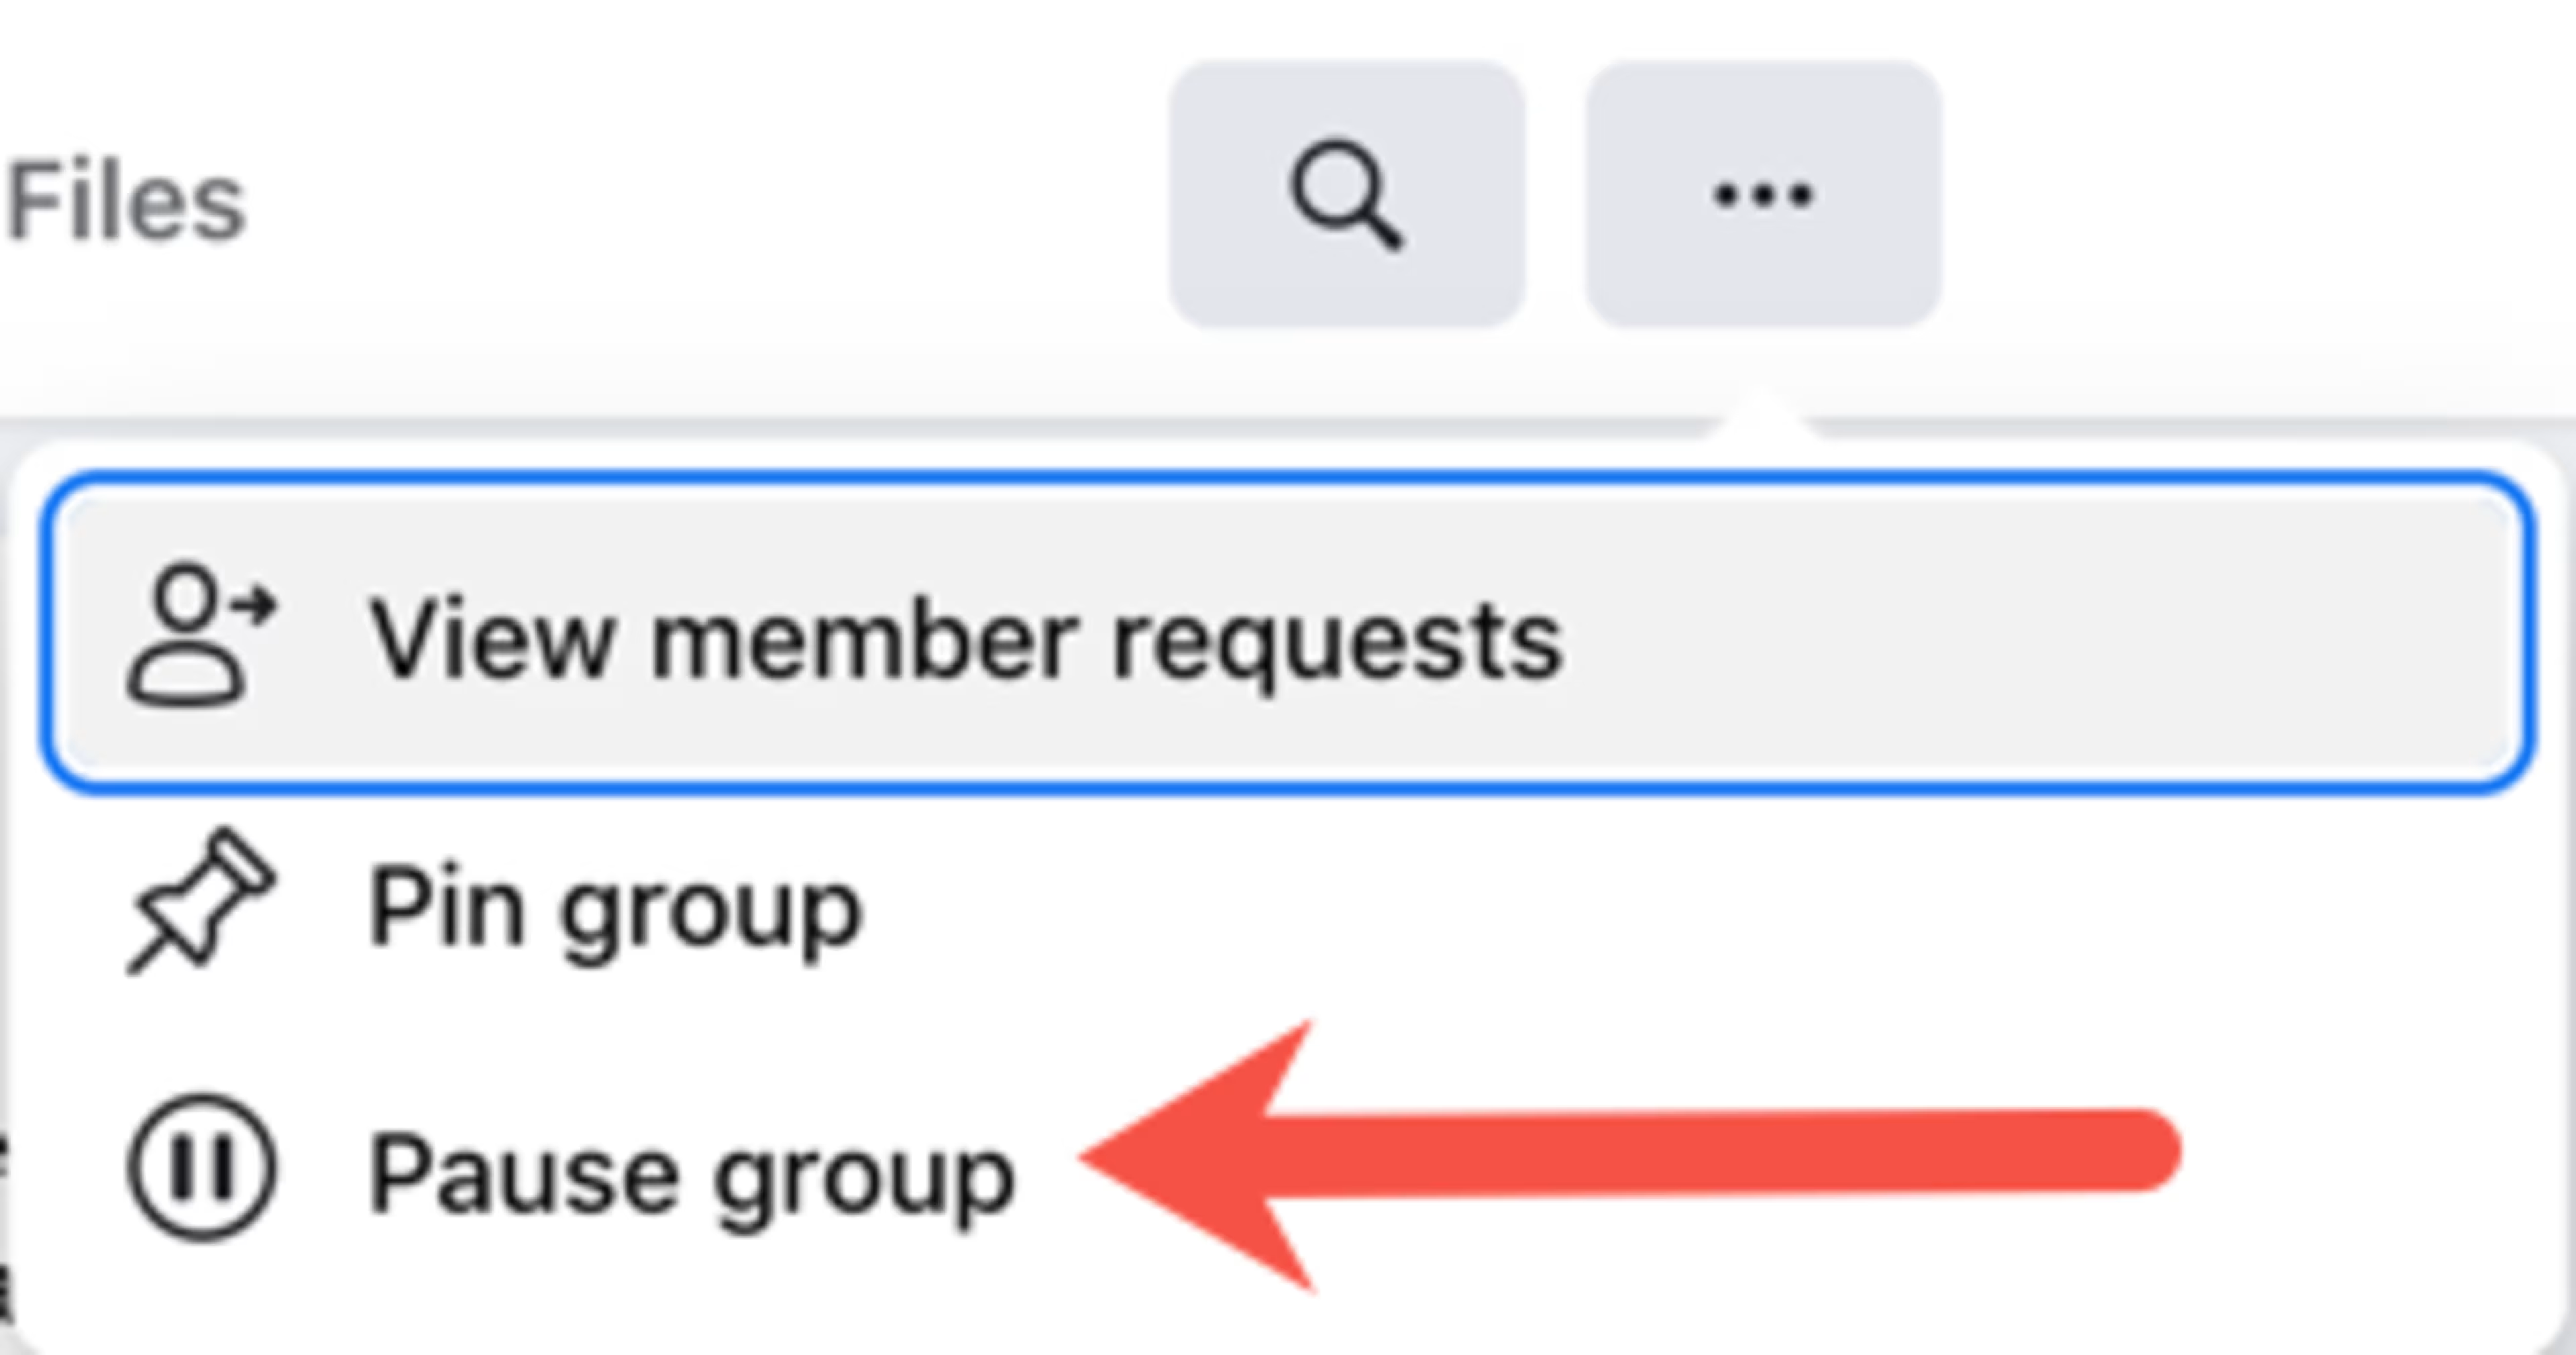
Select “Pause group” to begin the process.
-
Select your reason for pausing the group and click “Continue.”
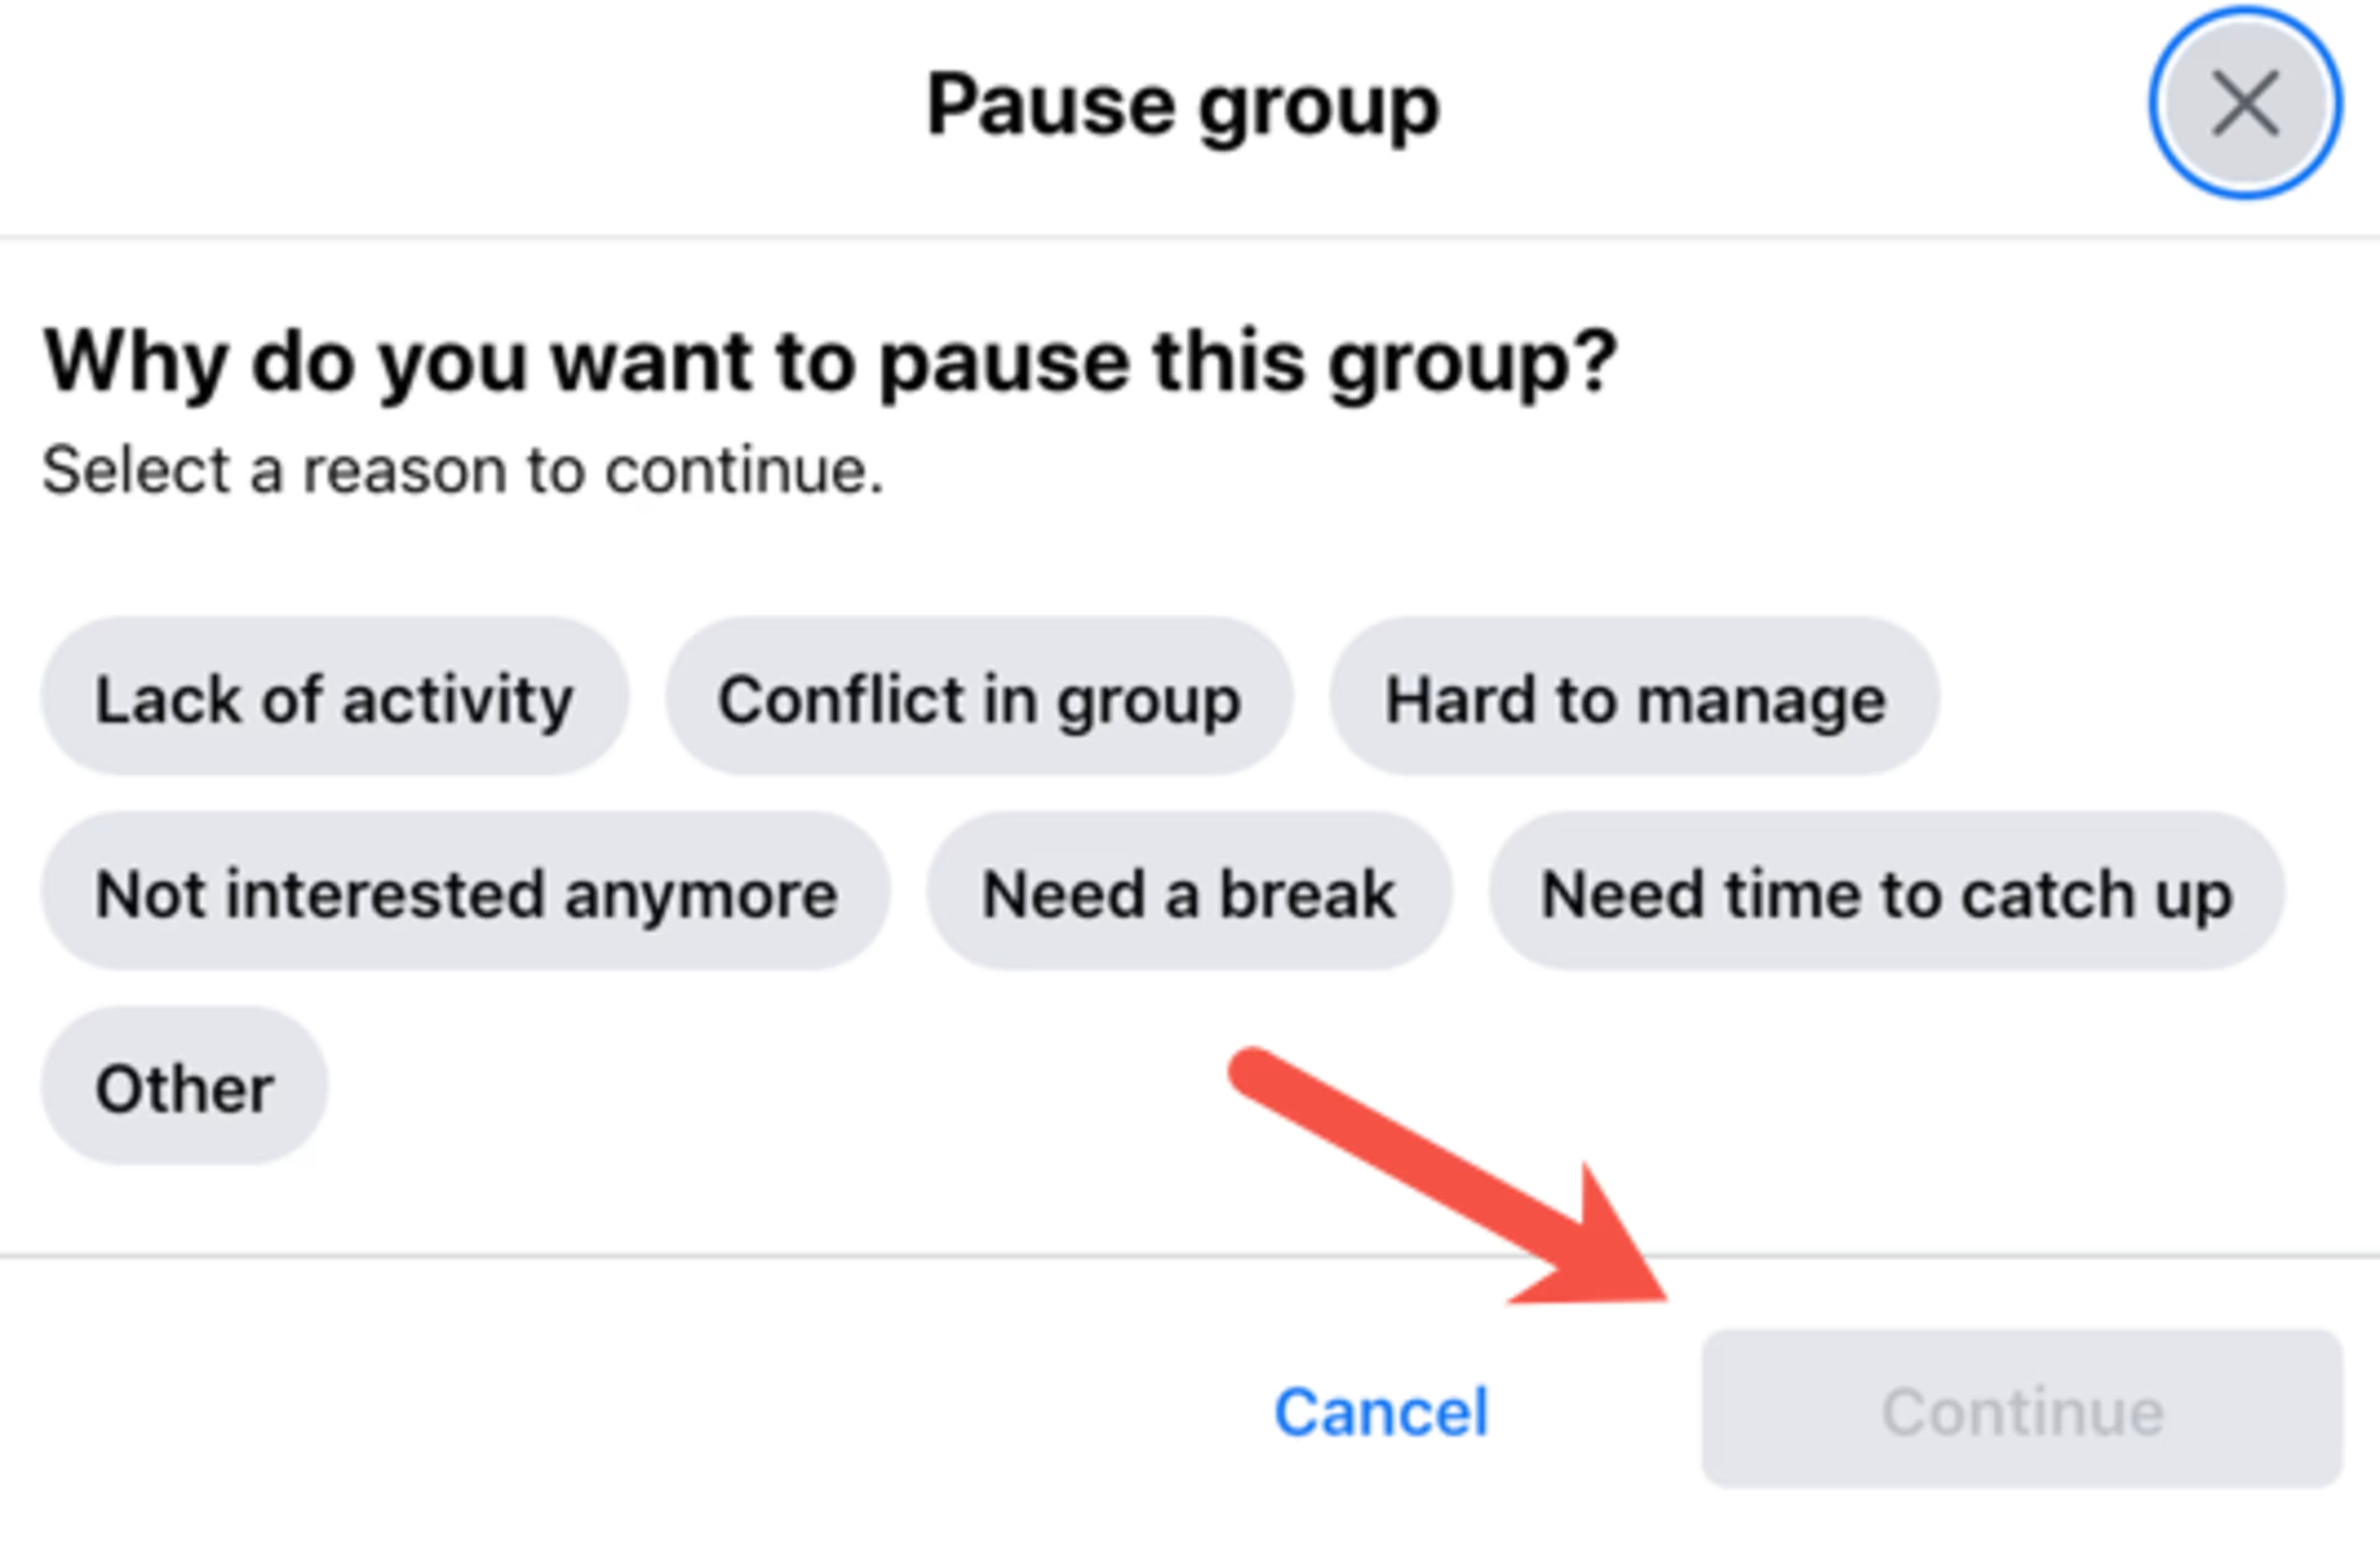
After selecting your reason for pausing the group, press “Continue”.
-
Based on the reason you selected for pausing your group, another box will appear offering you resources to deal with the issues you are having with the group. (For example, if you selected “Conflict in group,” the box will provide conflict resolution resources.) Select one of these resources, or “Continue” to proceed.
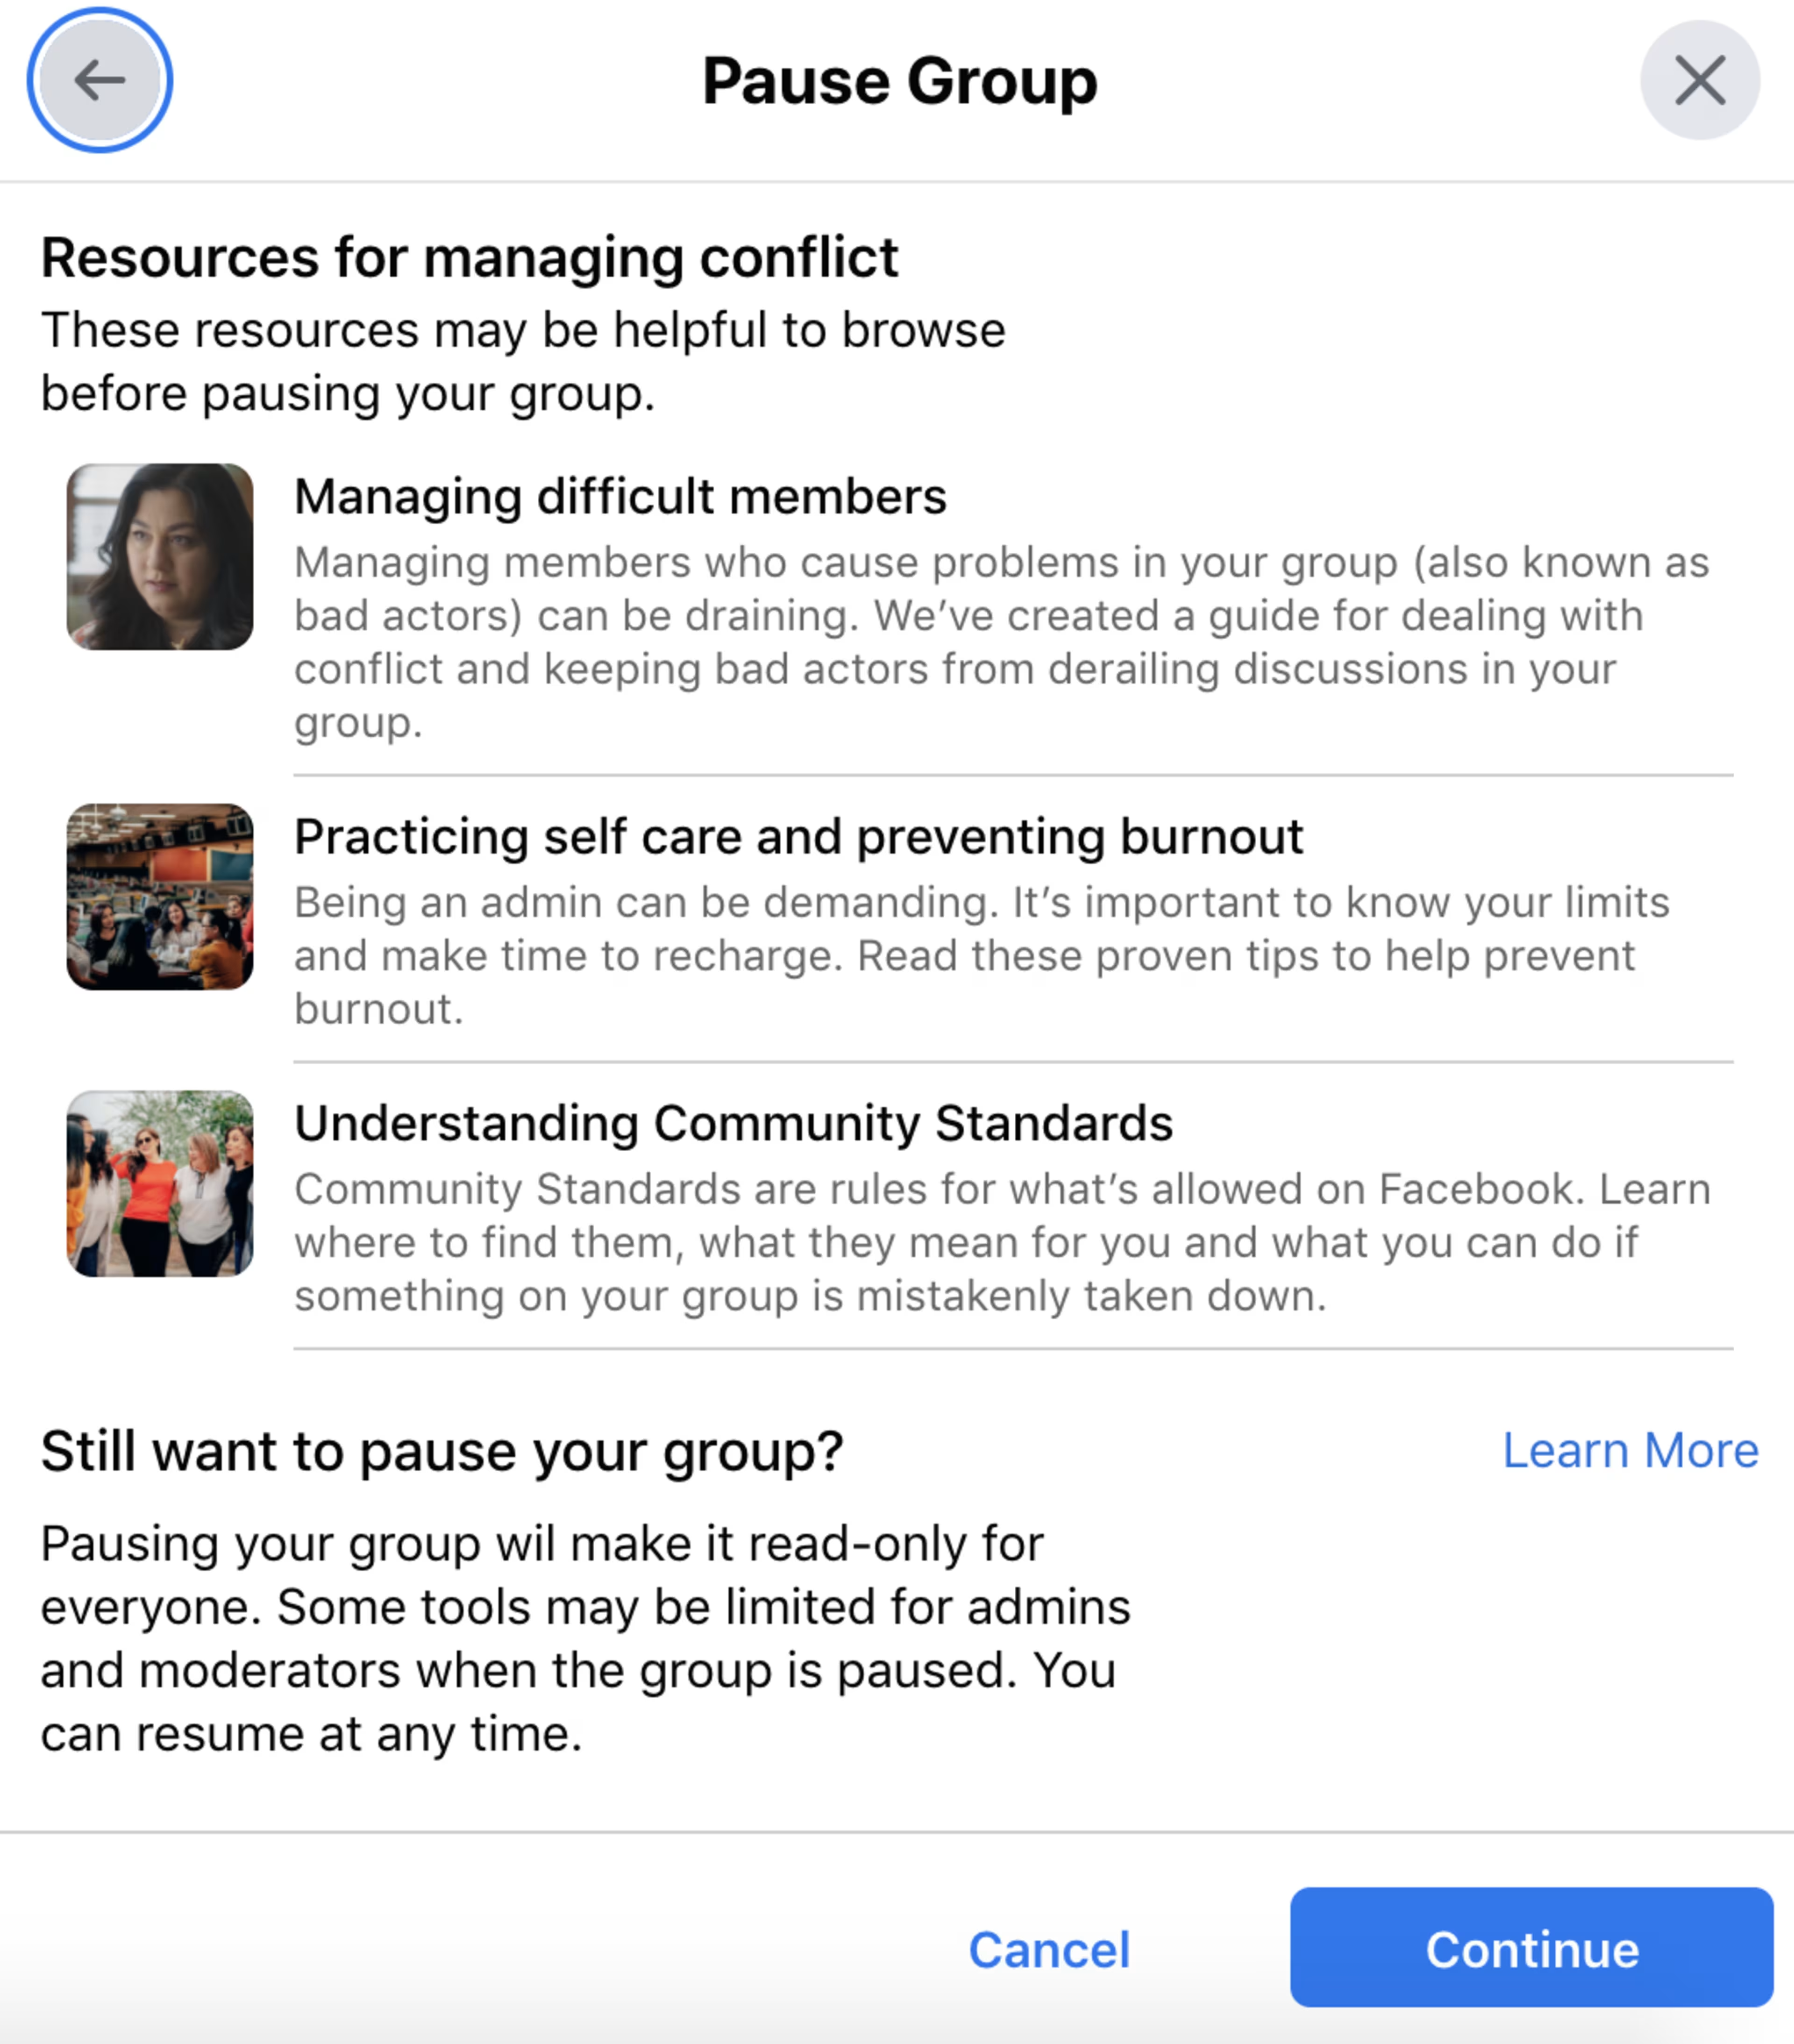
Utilize Facebook’s resources for dealing with your reason for pausing the group, or select “Continue” to go to the next step in the group pause process.
-
If you’d like, write the group pause announcement and select a date when the group will become active again.

Write an optional announcement for group members stating the reason for your pause, then press “Pause Group”.
-
Select “Pause Group.”
Utilizing Facebook groups for your business
Have you considered using Facebook groups to market your business? With Facebook groups, you can tap into interest groups (and through customer feedback regarding trends and products, learn more about your market). In some cases, you may even be able to promote your business for free.
Check out “Reach Customers With These 5 Hyperlocal Marketing Strategies” to learn more about using Facebook and other unexpected channels to gain customers.
The steps to delete a Facebook group were researched in October 2021, and desktop and mobile platform screenshots reflect the app layout on a desktop computer and an iPhone. Applications and layouts are liable to change; see Facebook’s Help Center for additional information.

