How to Transfer Files to your Apple II, II+, or IIe
If you’re new to this whole 8-bit or retro-computing revival that is going on around us, or if you’ve just so happened upon your old Apple IIe (commonly stylized as Apple //e) while cleaning out your mother’s attic, then you might have found yourself in an interesting situation (that is assuming you want to actually use it). How do you get files on the old machine? Some might say stick one of your old disks in and start going. Unfortunately, more often than not these old disks won’t read. After decades in a hot steamy attic (or even a cold one) floppy disks just deteriorate and quit working. Never store anything you actually care about in an attic! Antiques and keepsakes should be stored in climate controlled storage, especially if they are electronics or computer related. I can’t stress this enough!
So here you are with the computer you grew up with sitting right in front of you, and all of your disks are dead. So how do transfer files to an Apple II? There’s great news! It’s easier than you could ever imaged!
Mục Lục
Before Transferring Files to an Apple II from your PC, Mac, or Smartphone
You’re going to need a few things to make this work properly. As with any project there are few prerequisites! You might already be able to guess what a few of them are! We’re going to be using the tape input port to transfer files to an Apple II from the internet! You’ll need a few accessories to make that happen.
Buy Some New Floppy Disks
![]()
![]()
Amazon has a great deal on boxes of diskettes. Grab a new box or two. I can’t stress this enough. Do it.
Get a Quality 3.5mm to 3.5mm Audio Cable
![]()
Grab this quality 3.5mm audio cable. It’s only 4 bucks and will save you a lot of headache. Additionally, if you are using an iPhone 7, you’ll need to use a lightning to headphone adapter. One should have been included with your iPhone 7, but if you’ve lost it, grab a new one here.
Prepare the Apple II for File Transfer
Now that you’ve got everything you need, it’s time to set everything up and plug it in. Start of course by setting your Apple II, Apple II+, or Apple //e up on your desk:
Connect the Apple II Monitor
The Apple II connects to a monitor or TV set using a composite connection. A composite connection uses a single RCA connector (many times they are color coded yellow). If your cable has three RCA connectors (yellow, red, and white) just leave the red and white connectors disconnected at both ends.

Apple II Composite Out

Apple Monitor Composite In
Connect the Apple Disk II Drive
The Apple II uses several style of disk drives. It either has a ribbon cable or a DSUB style cable. If it is a ribbon style it will connect internally to the Disk II card inside the Apple II. For a DSUB style it will connect to the back of the Apple II in the only open 19-pin DSUB connector. If you have more than one drive they will daisy chain to each other using the 19-pin DSUB on the back of the Apple Disk II unit.

Disk II Connector

Optional Daisy Chain
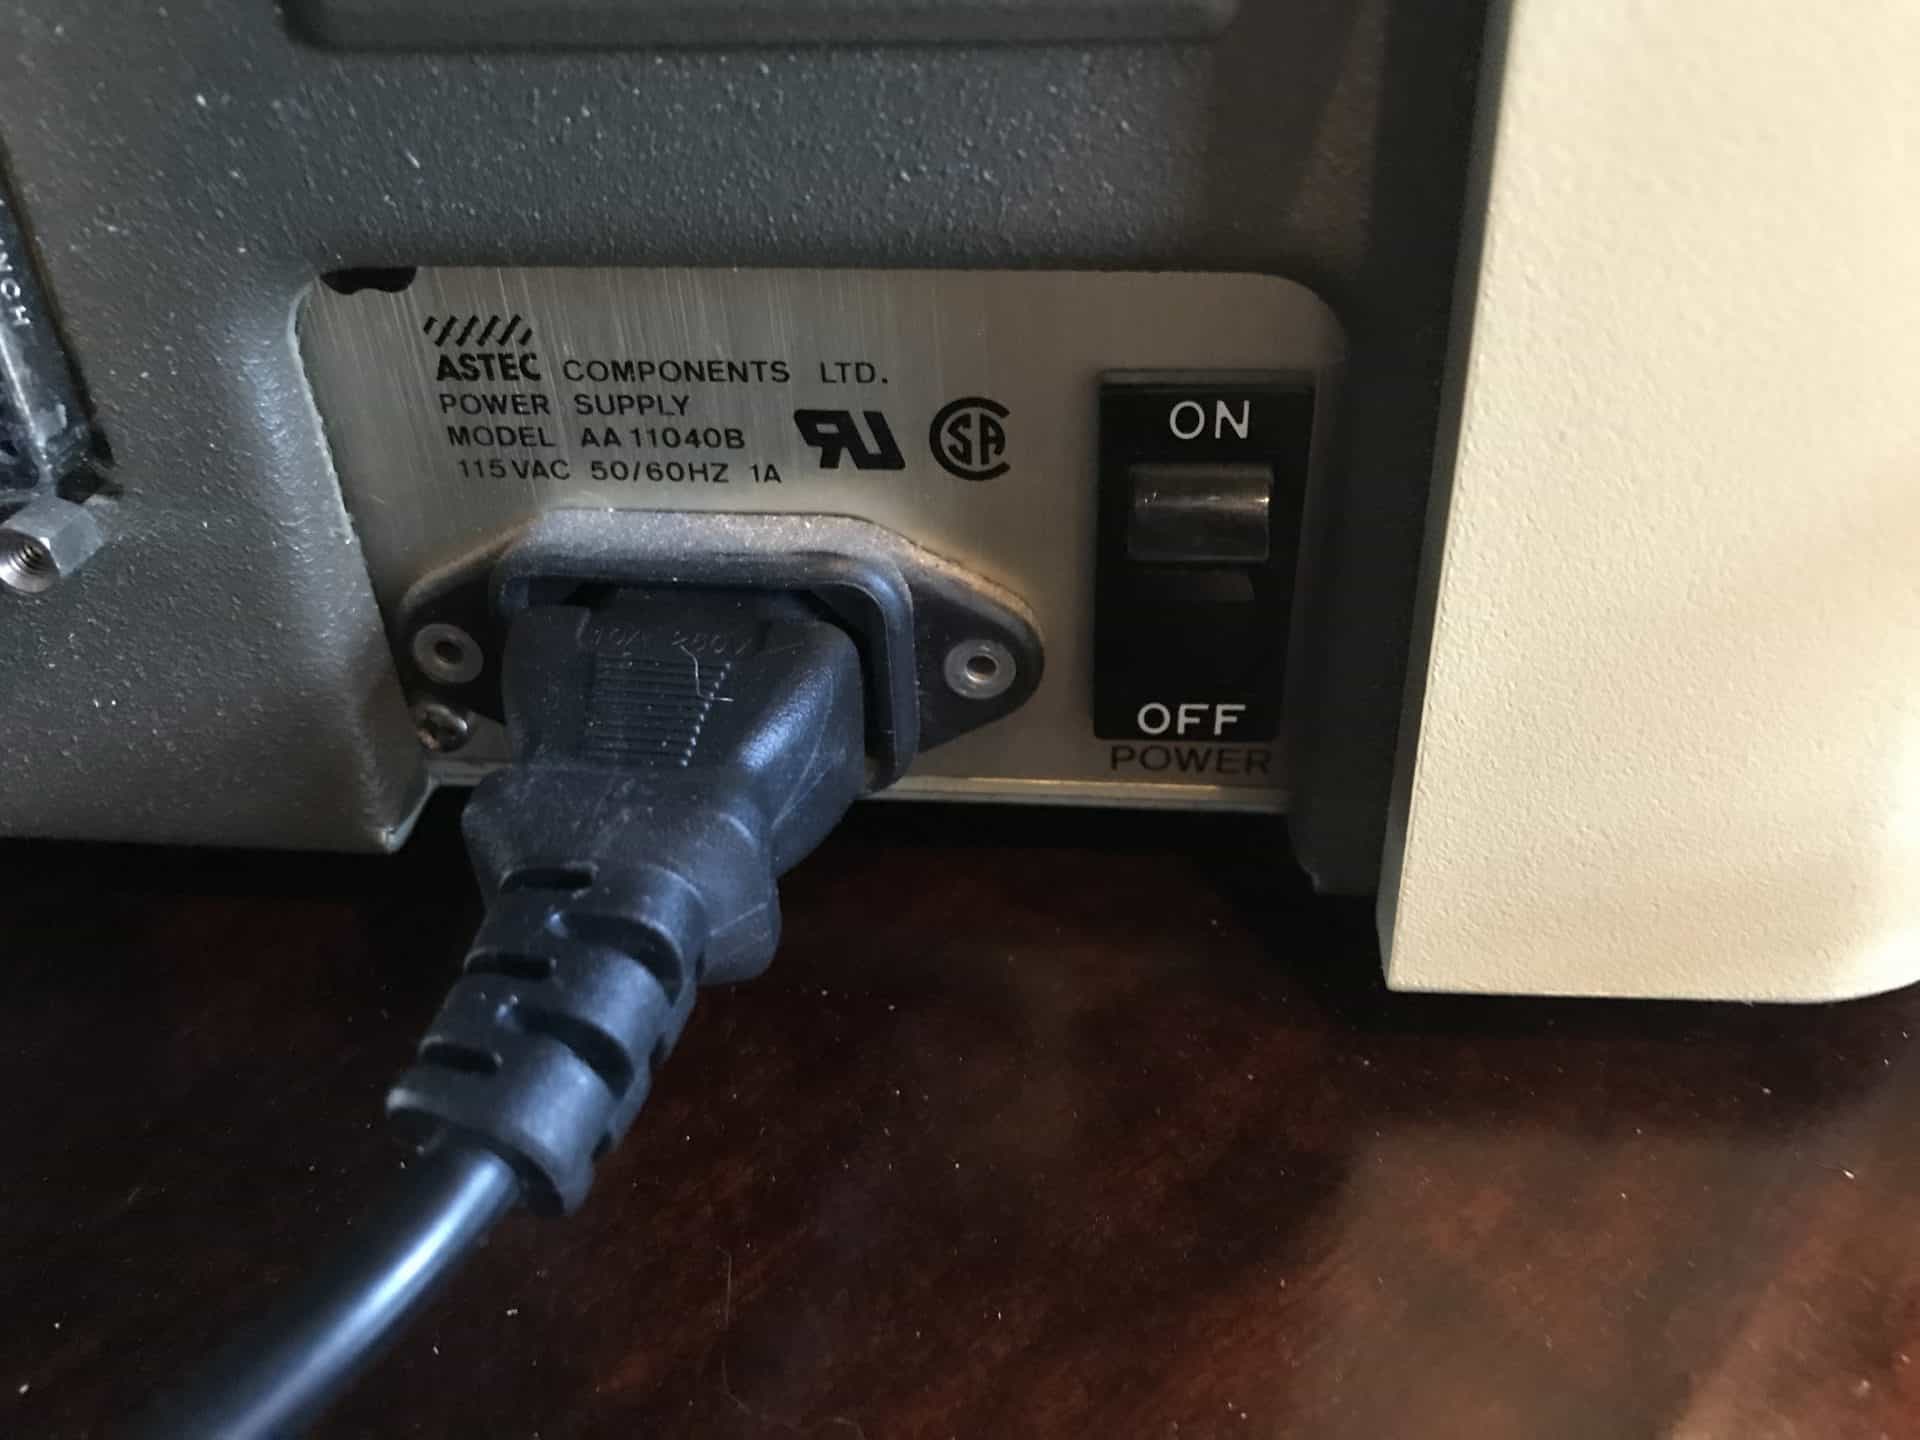
Connect the Power Supply
The Apple II uses the same power cables that modern computers use called an IEC-C13. If you can’t find the one that came with your Apple II, and PC power cord should do the job nicely. Don’t forget to make sure the monitor is also plugged into power!
Connect the 3.5mm Audio Cable to your Smartphone, PC, or Mac Headphone Jack
On the back of the Apple II you will find two 3.5mm audio jacks. One has an arrow pointing in, the other has one pointing out. Connect your 3.55 mm audio cable to the jack with the arrow pointing in since we will be transferring data to the Apple II from the internet. Connect the other end of the 3.5mm audio cable to the headphone jack on your PC, Mac, iPhone/iPad or Android device.

Apple II Tape In

iPhone 7 Audio Out
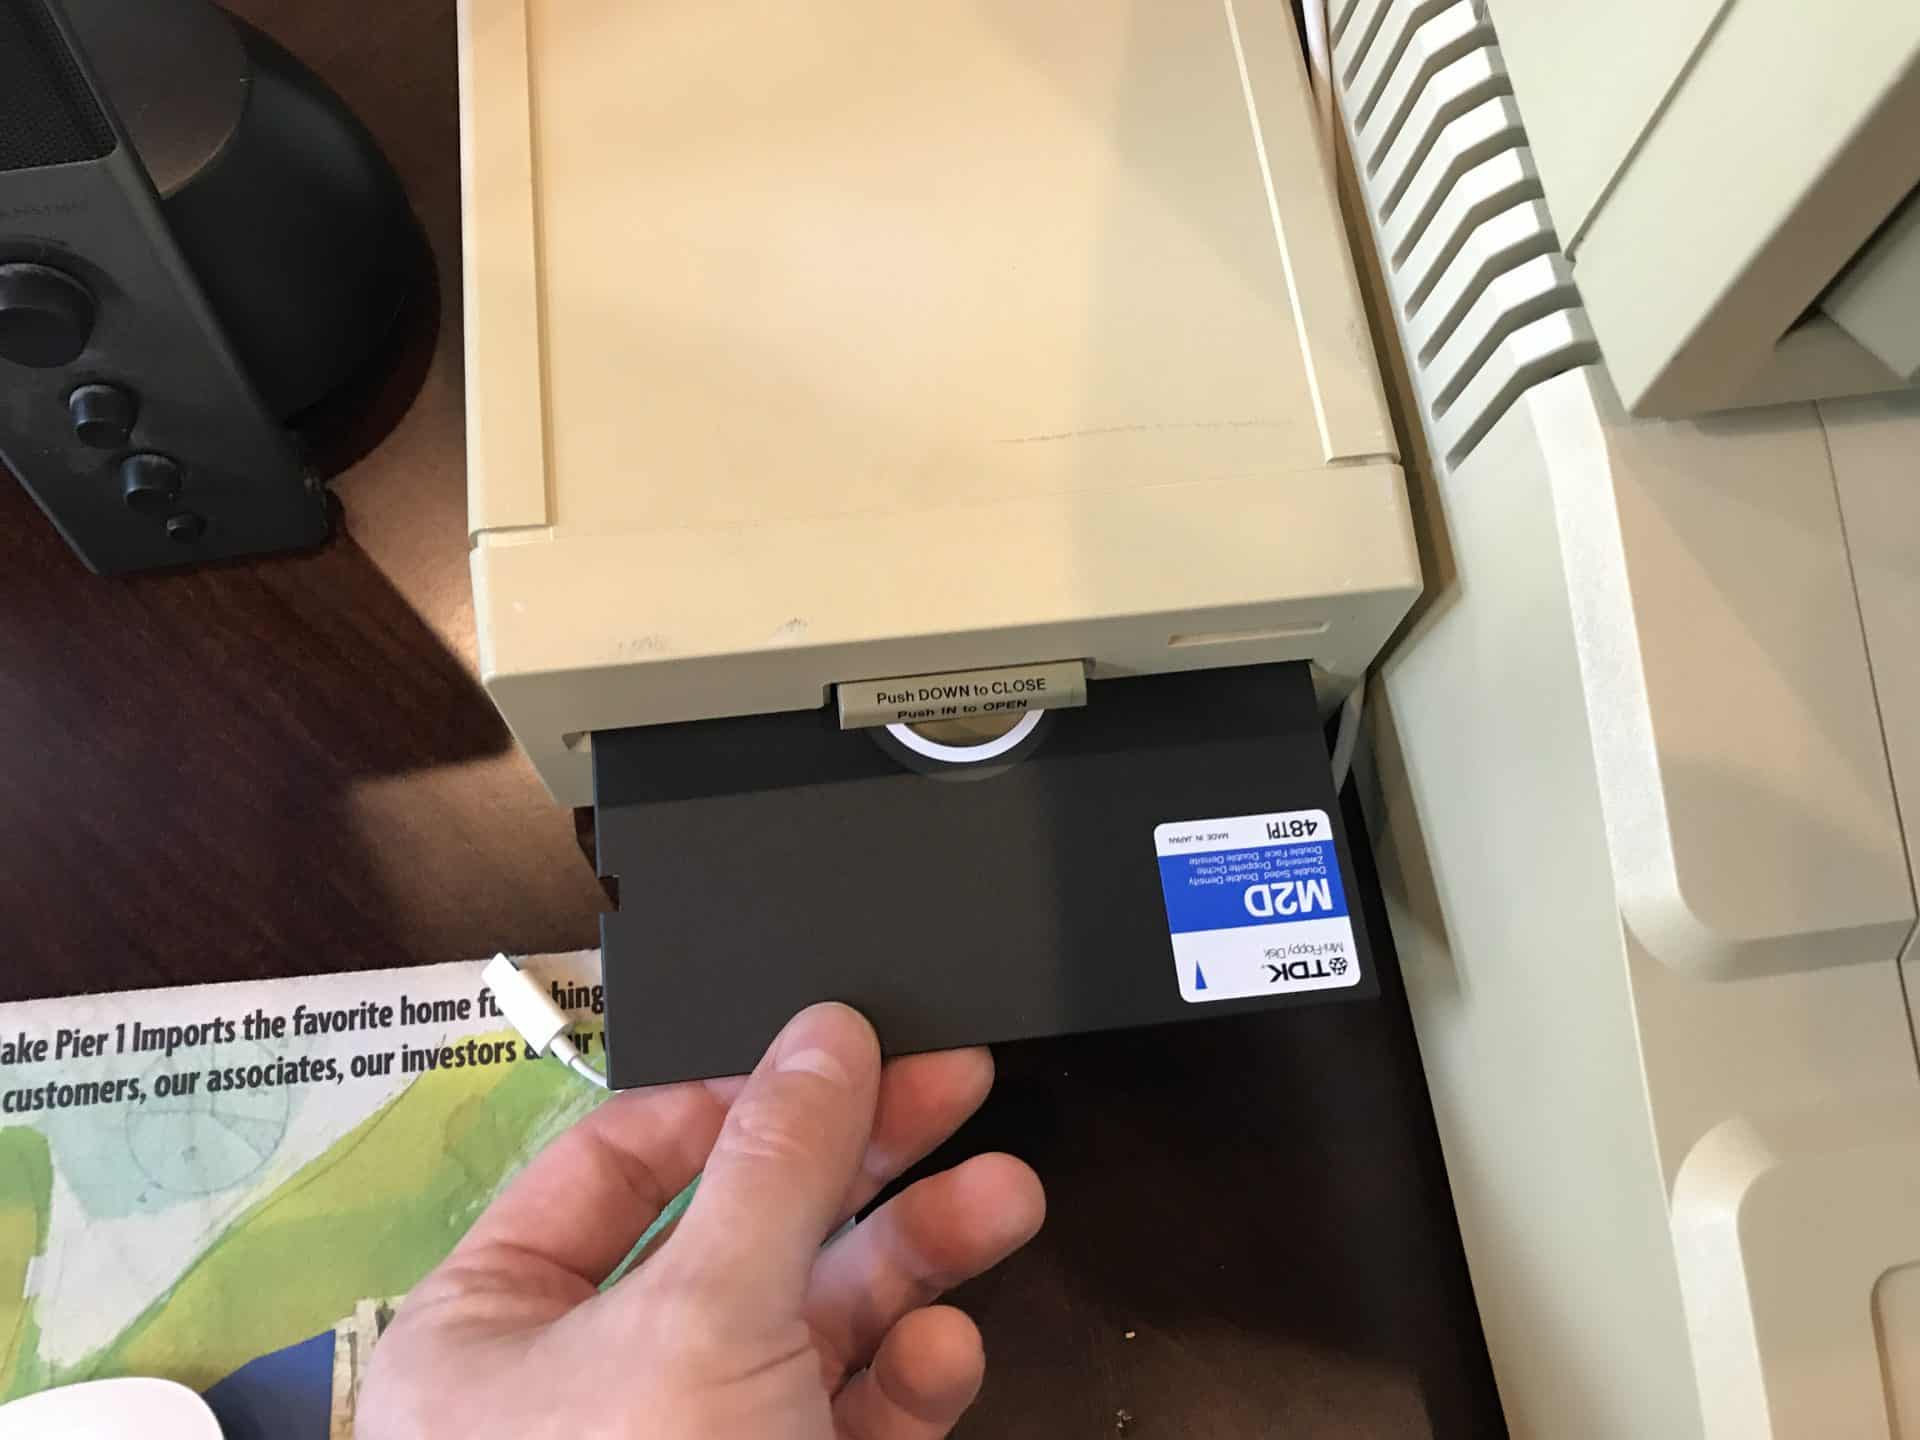
Insert a Blank non-formatted disk into the Apple II Disk Drive
Insert a black non-formatted disk into the Apple Disk II Drive.
Transfer Files to an Apple II from a PC, Mac, or Smartphone
Now we’re ready to actually make the magic happen. The process to transfer files to an Apple II is is super simple and fun! One note of caution, if you’re using a smartphone for this, you may want to set your device on Do-Not-Disturb mode. Any call, text message, or application alert that happens during the transfer process will cause the transfer to fail and you’ll have to start over. Make sure to turn the volume up (both the master and the audio player). The most common reasons for failure are volume being too low (or too high), and the interruption of audio alerts from your device.
Turn on the Apple II Computer and Monitor
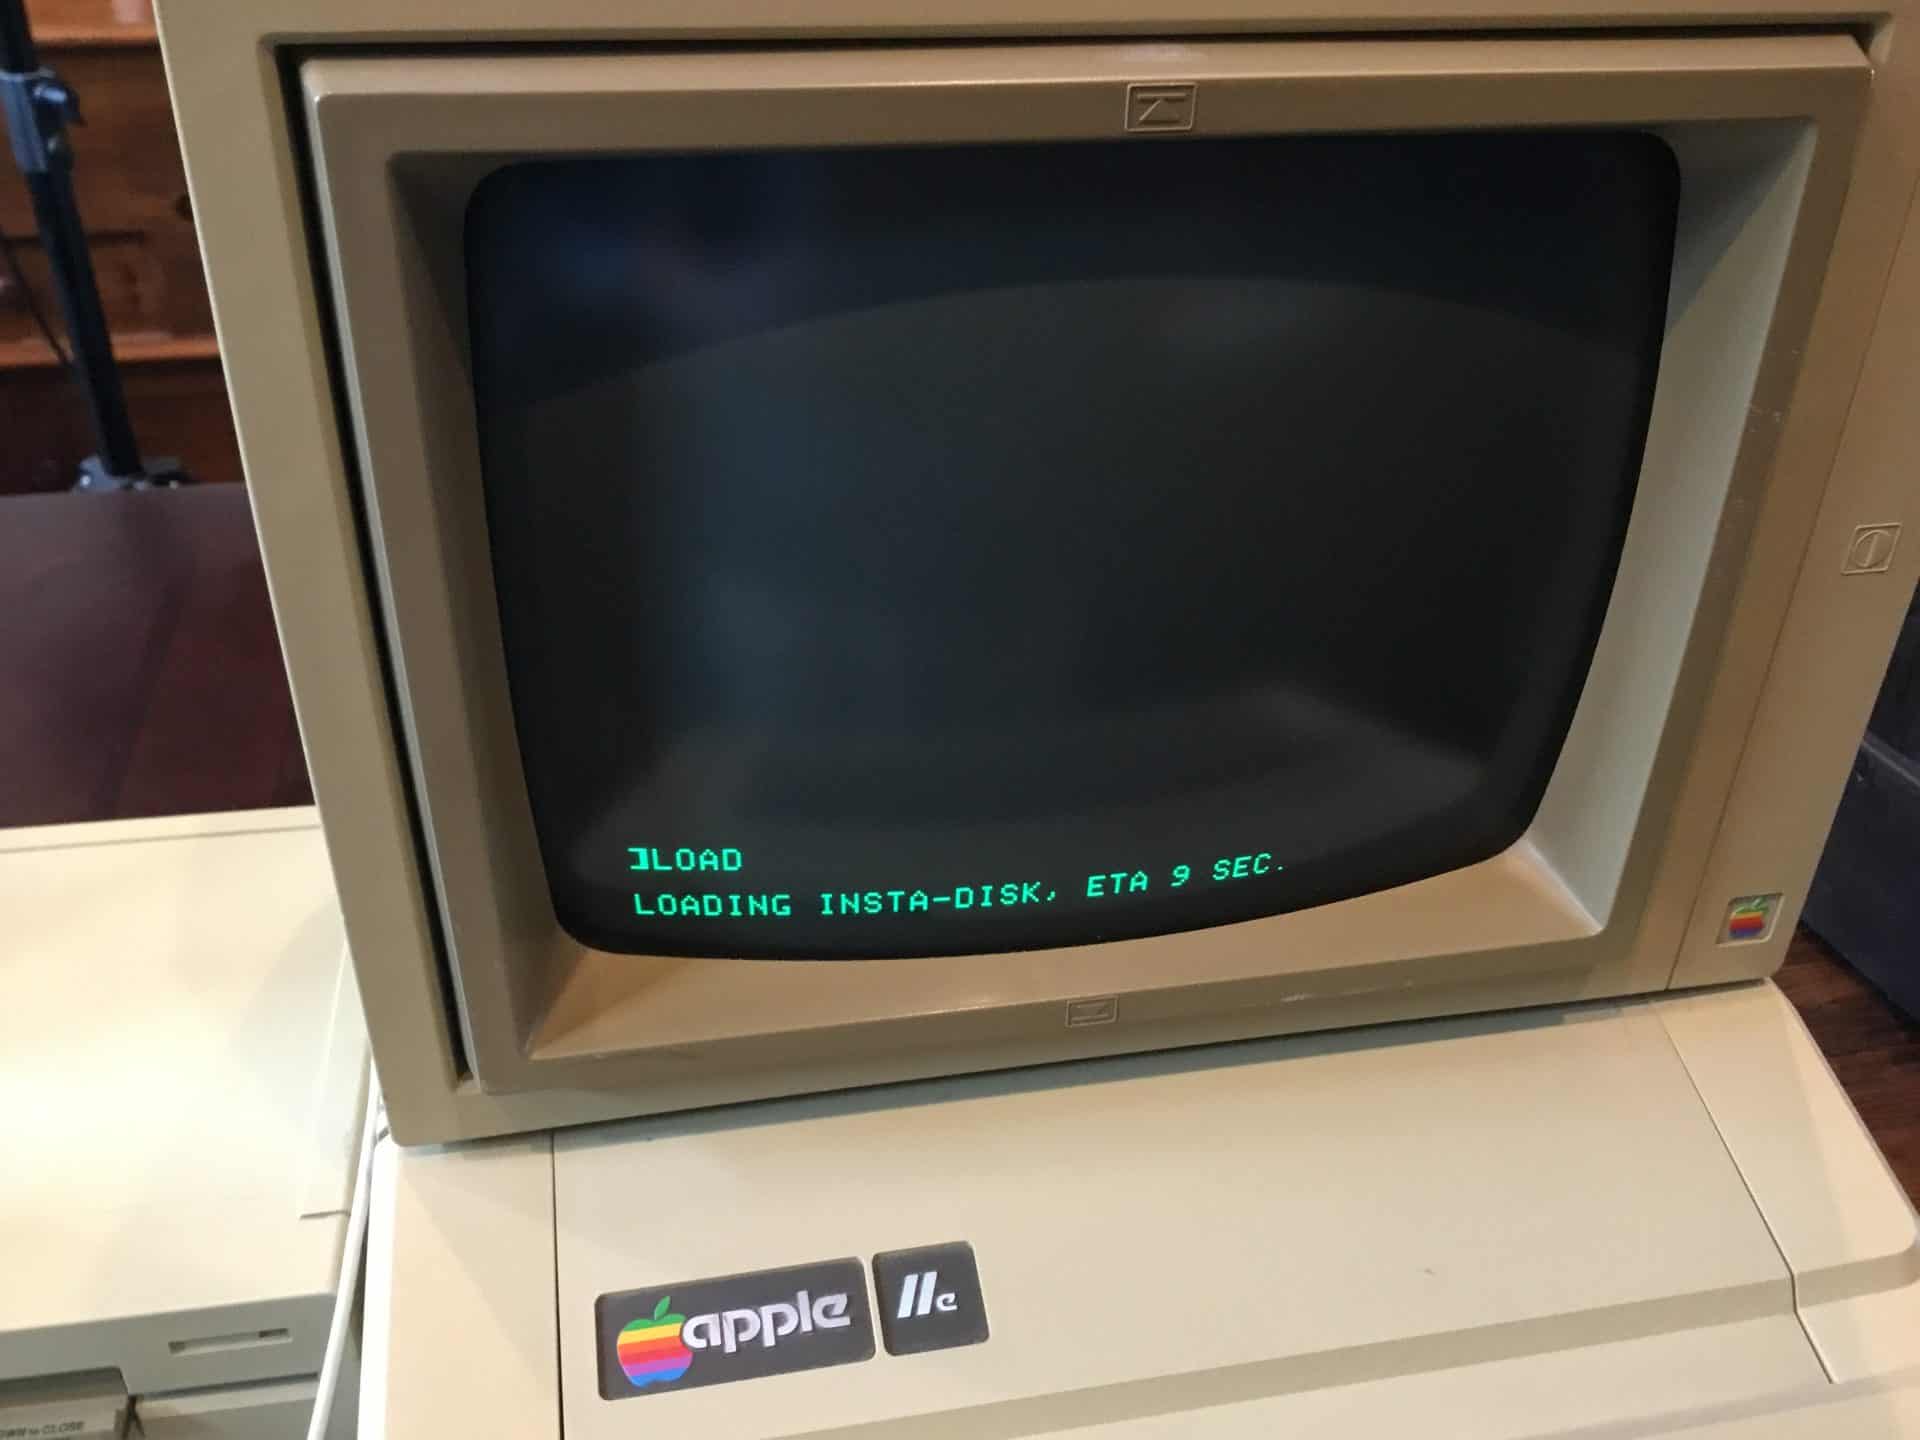
The Apple II will start, but since the disk in the drive is blank and not formatted it will not boot. You should however see the Apple II logo at the top of the screen. Press CONTROL+RESET to stop the Apple II boot process and deliver you to the ] prompt. At the Apple II ] prompt type: LOAD and press enter.
Go to the Apple Disk Server Website
In your browser open the Apple Disk Server website. If you’re on a mobile device click the link for the mobile version. In my example, I will be using my iPhone 7 in the Safari browser. The game disk image I have selected is Impossible Mission. Simply tap impossible mission and you’ll be presented with a screen with four option. Format Disk (HIFI or 8KFI) and Do Not Format Disk (HIFI or 8KFI).
You’ll want to select one of the first two options under Format Disk. HIFI will load the disk images much faster, but isn’t always compatible. If you’ve tried adjusting the volume, and you know everything else is right (an you didn’t get any text messages, or alerts during the transfer) then you’ll need to use 8KFI. HIFI is about twice as fast as 8KFI, but some machines and board revisions just won’t work with it. If all else fails, 8KFI usually works. Basically put your Mac, PC, or Smartphone is emulating a tape drive to transfer files to an Apple II.
If it works the Apple II will beep within 2-3 seconds of pressing play on HIFI or 8KFI. Followed just a 5-6 seconds later by the message:
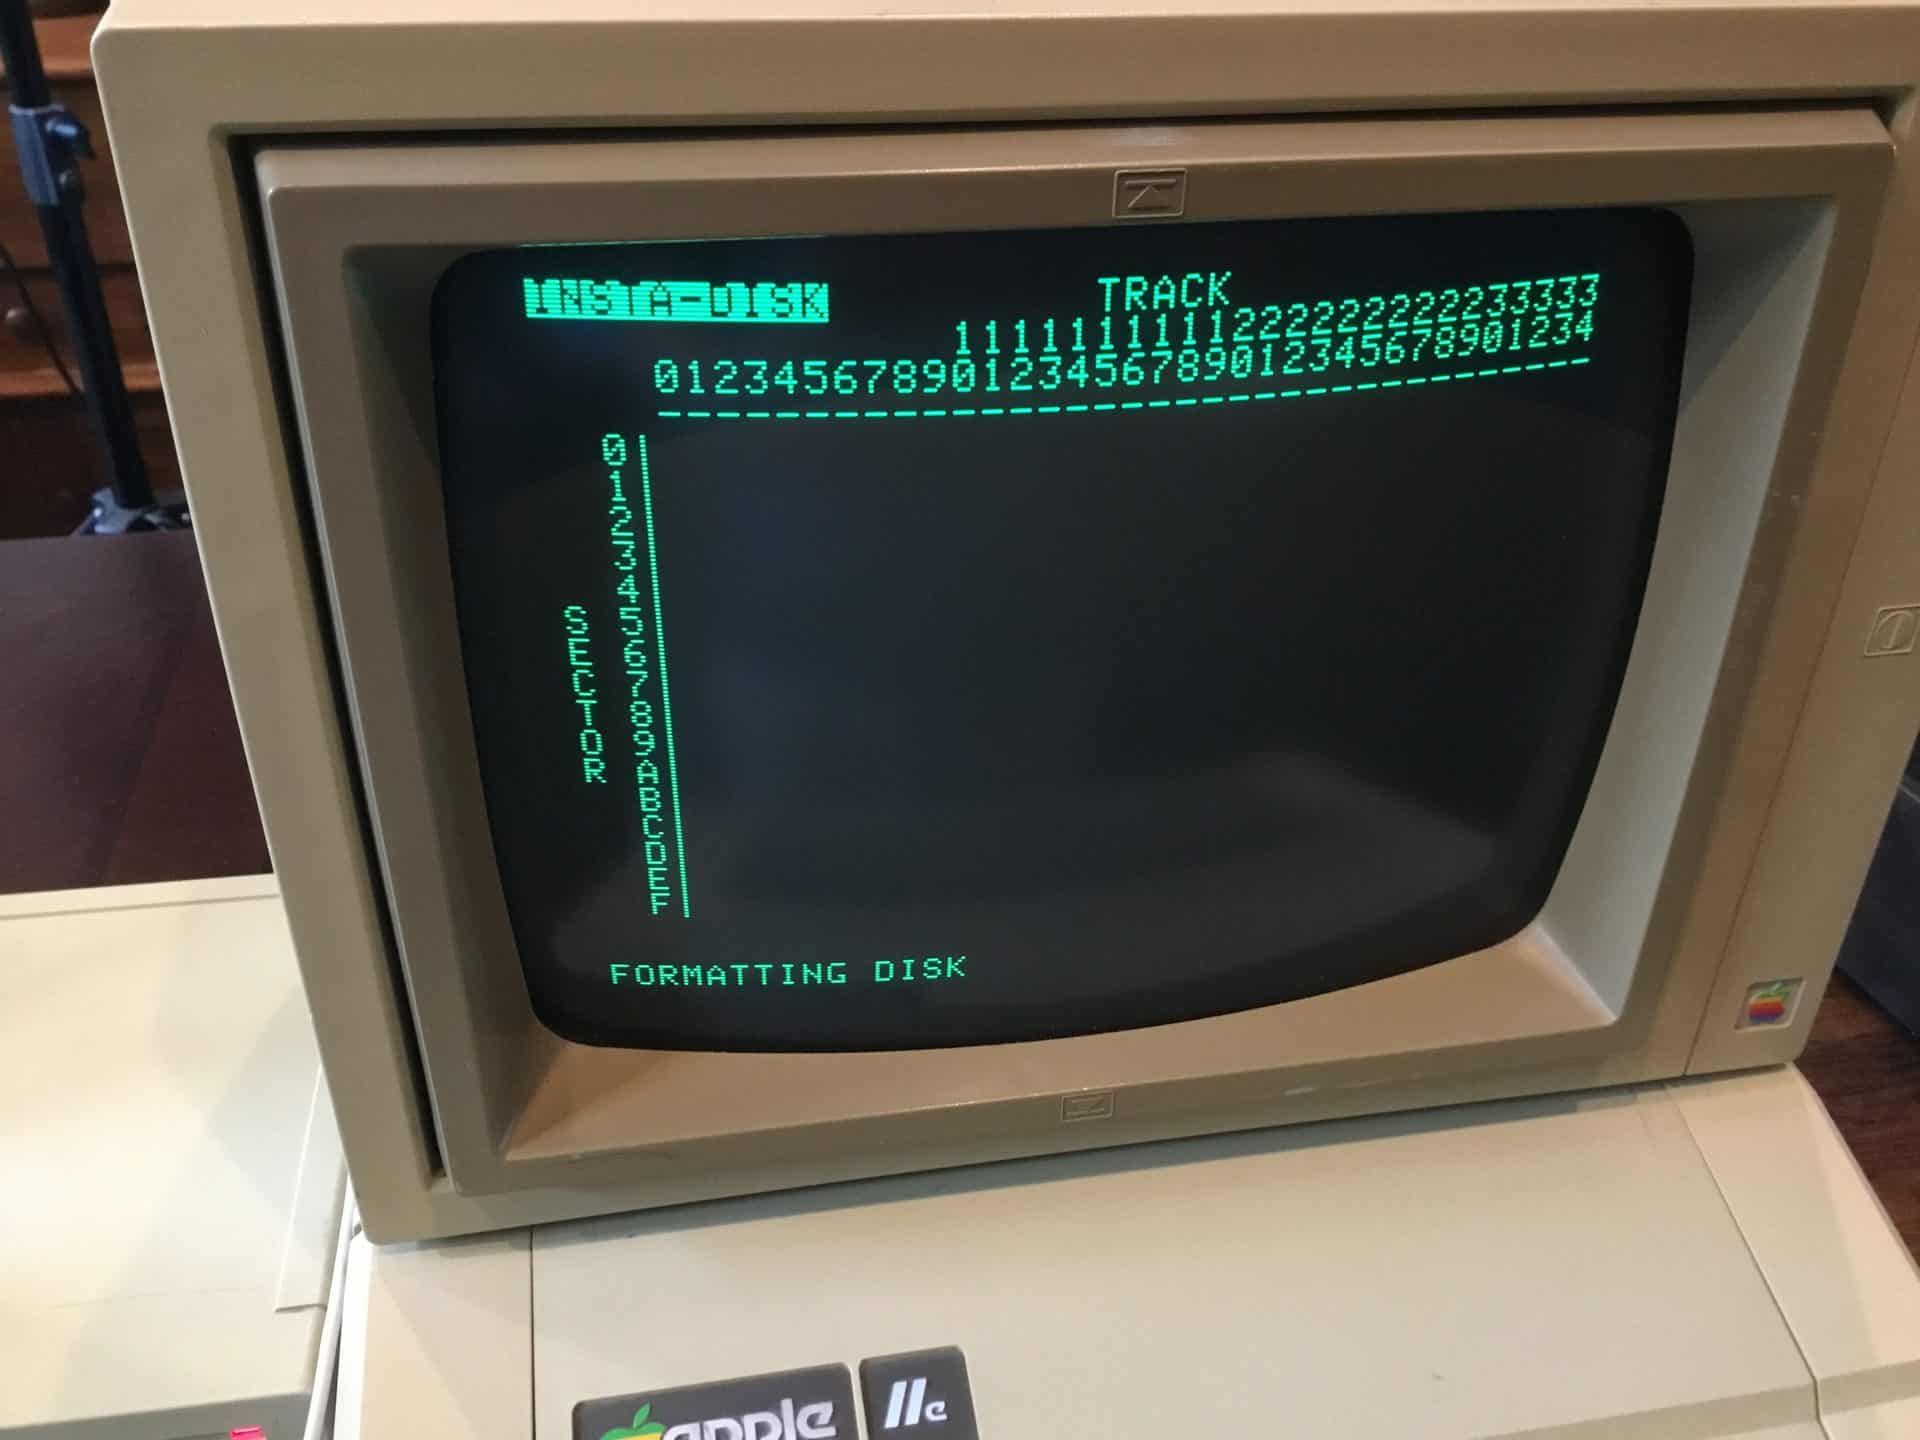
The Disk will Format Automatically
After the initial program load, the disk will be formatted. This will take about 20-30 seconds and will display its progress on the screen.
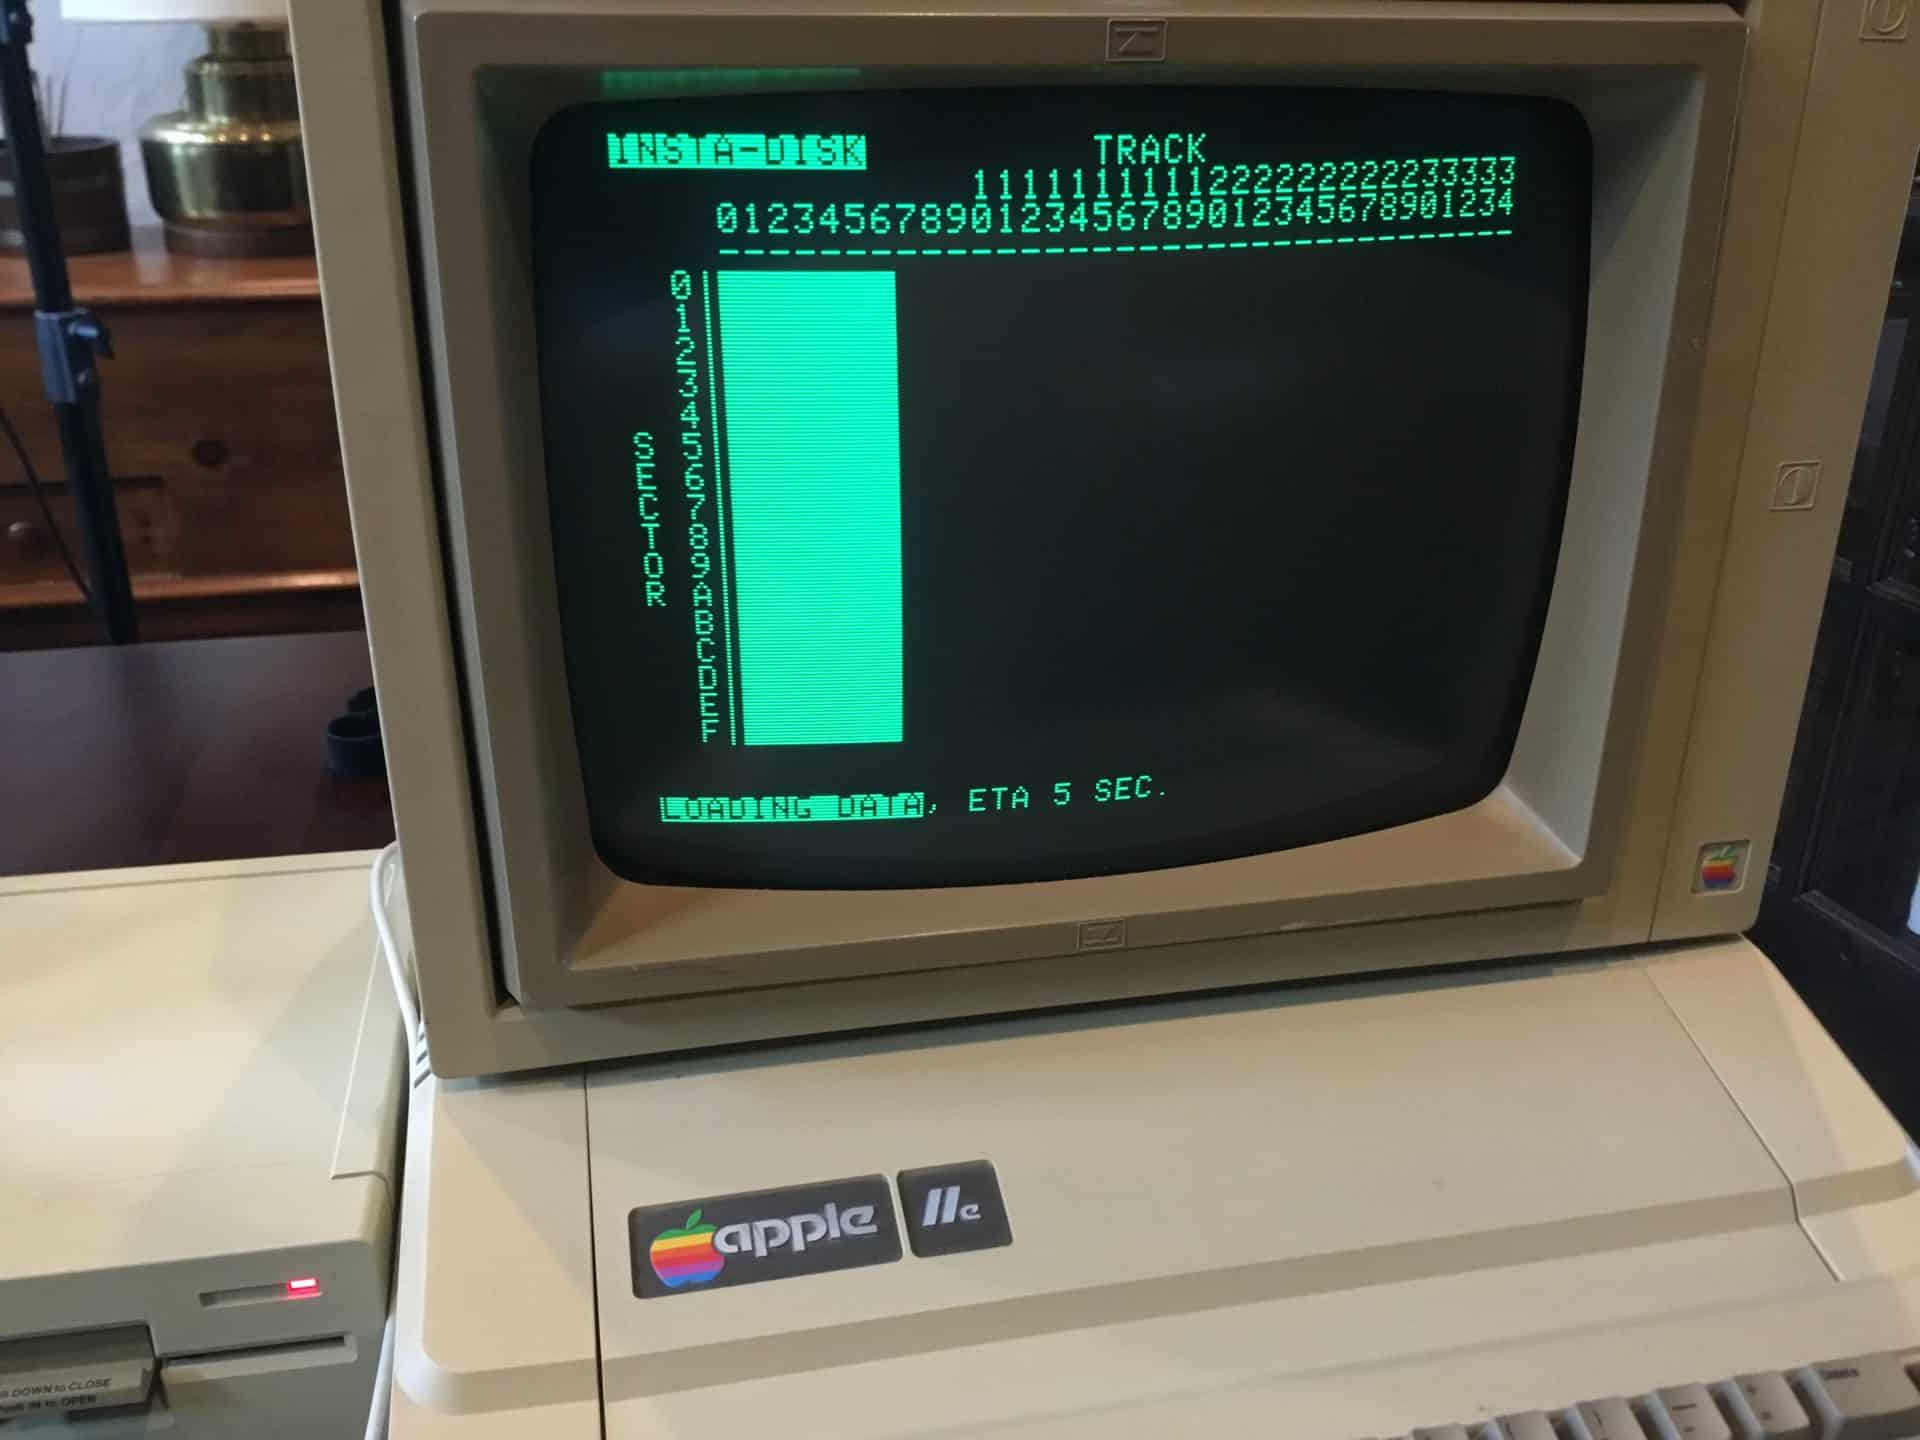
The Insta-Disk Transfer Will Run
Once the format completes the Insta-Disk app will transfer the disk image from the internet (via the tape-in port) and expand the compressed image to the disk. This will happen in a few short bursts as the tape interface is slower than the floppy interface.
Final Steps for Your Apple II Disk Transfer
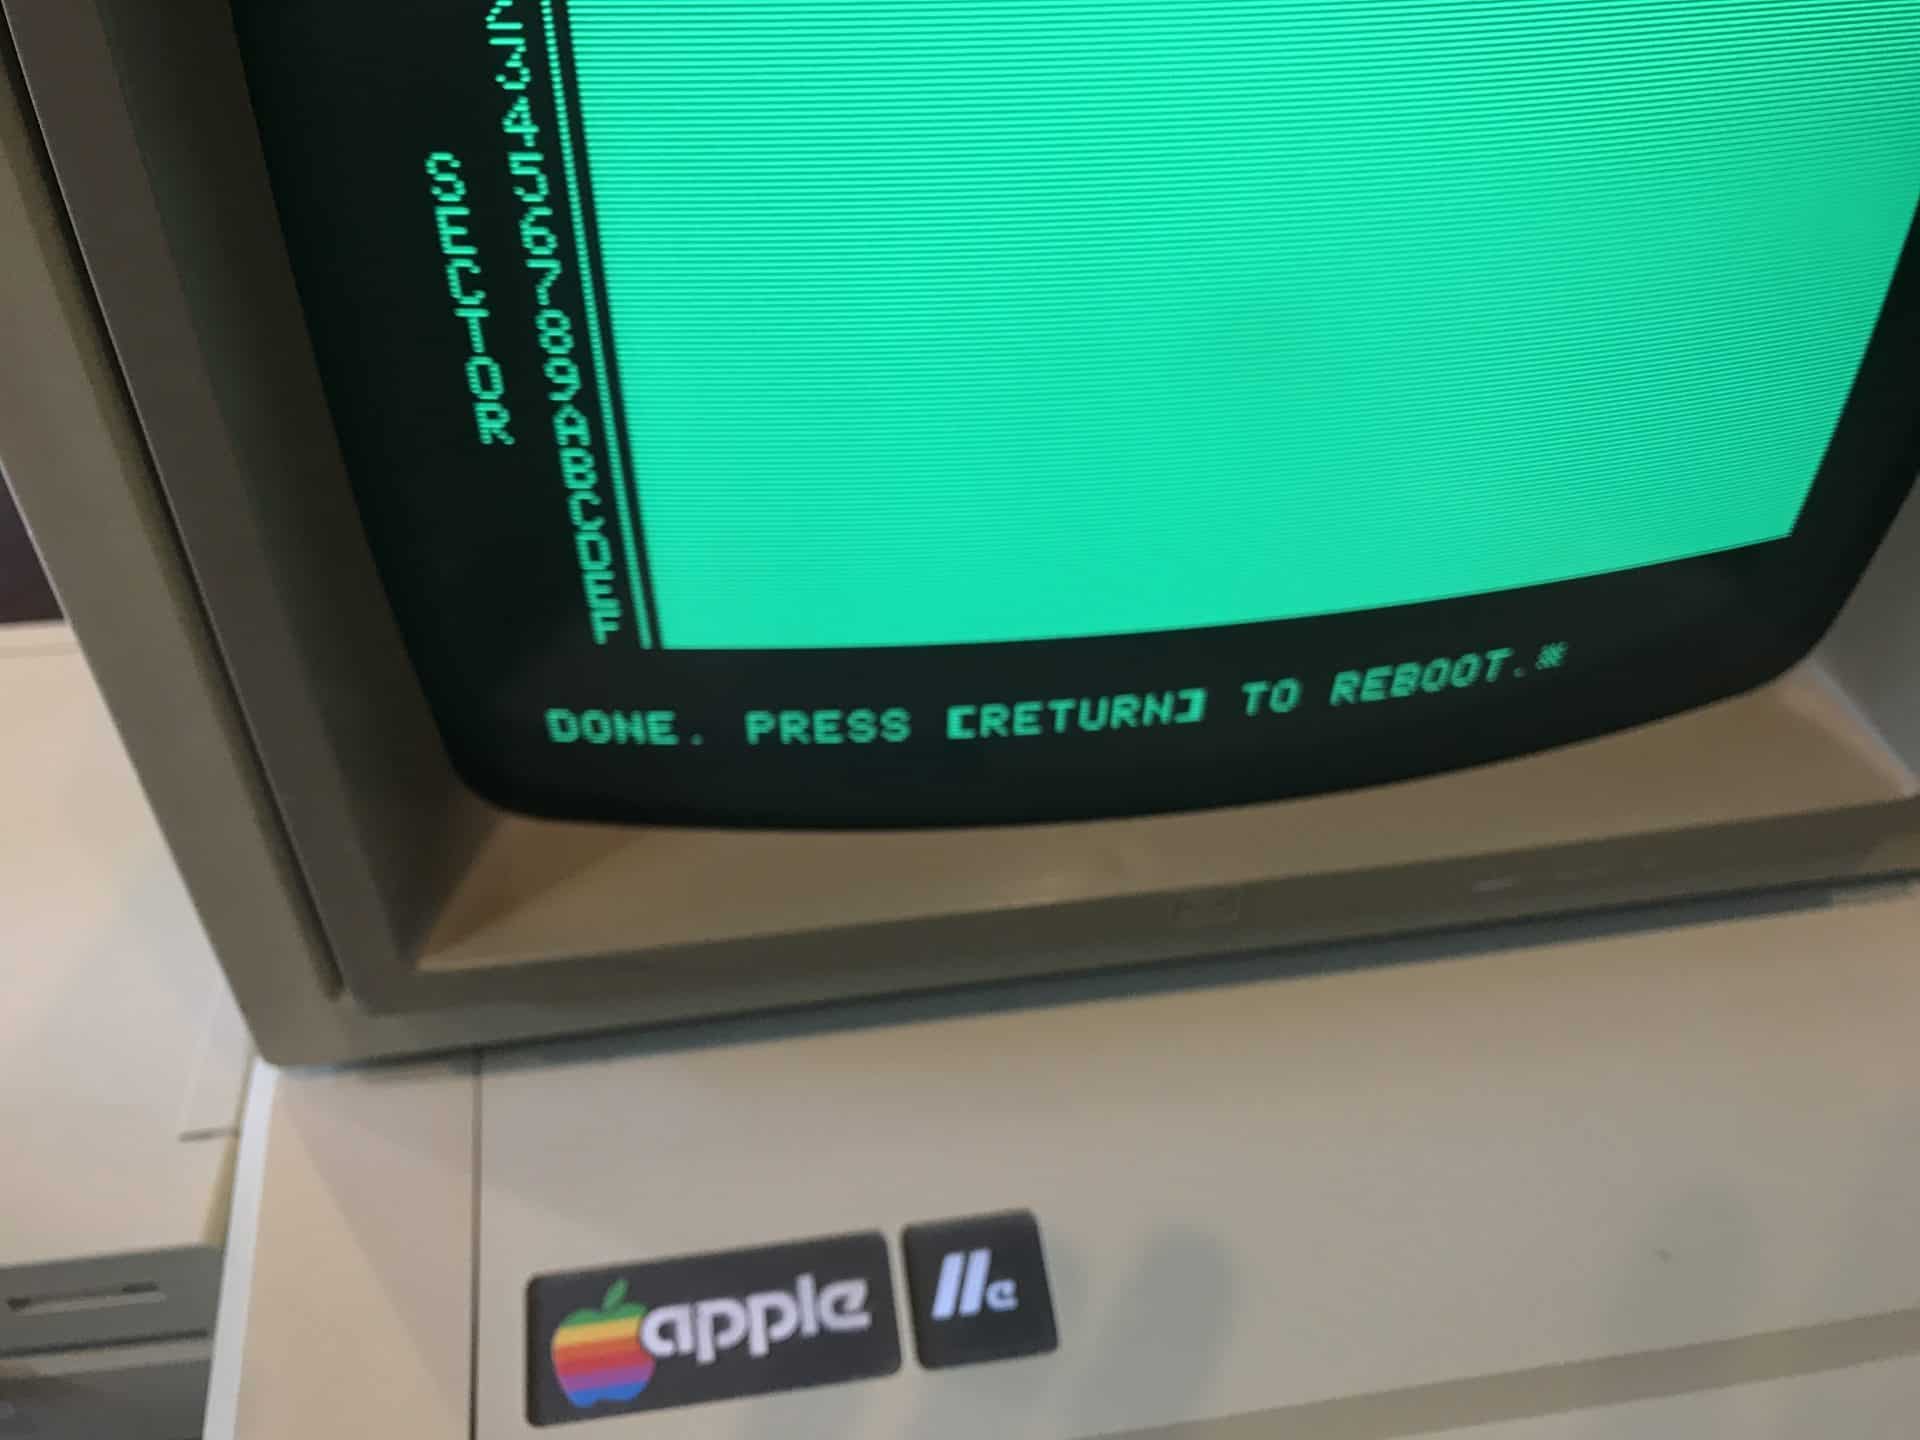
Reboot Your Apple II
Once the disk image transfer is complete you will be prompted to press return to reboot your PC.
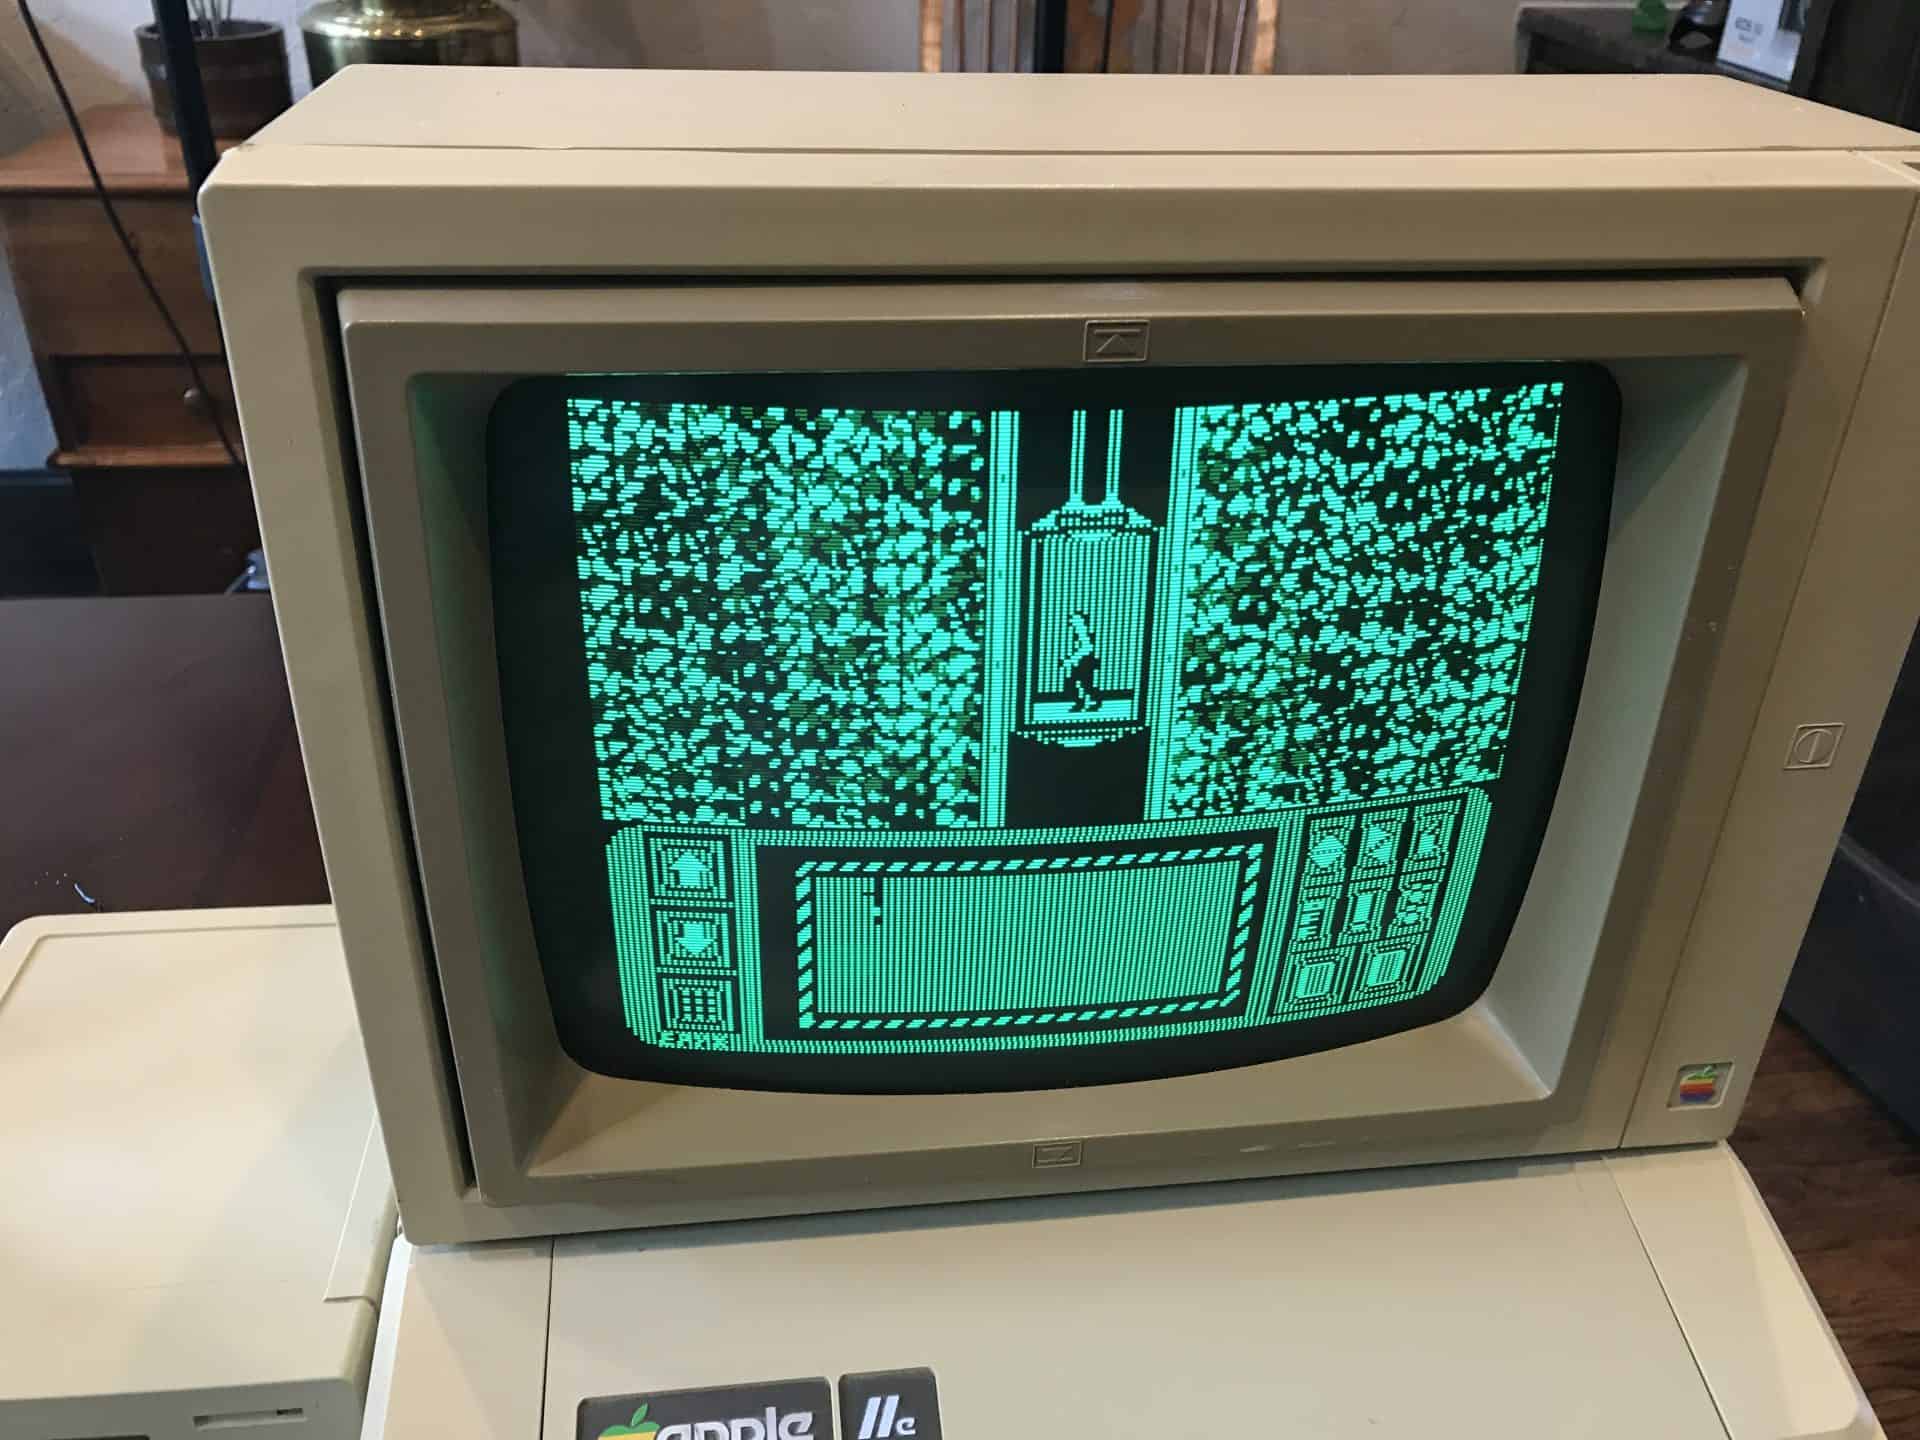
Play Your Game!
Leave the newly created disk in the Apple Disk II Drive and press return. Occasionally this reboot will fail to work, if that happens, just power the computer off and then on again. If everything worked correctly your game will boot directly from the disk and you’ll be playing your old favorite games again. See its not that difficult to transfer files to an Apple II from your PC, Mac, or smartphone!