Change the boot order of the BIOS of the Asus X551C laptop – BIOS – Tutorials
Change the boot order of the BIOS of the Asus X551C laptop
When you want to change the boot order on a desktop PC, it’s quite simple.
However, on laptops, it can be more complicated.
This is particularly the case with this Asus X551C laptop PC that we repaired for a friend.
1. Change the boot order in BIOS
As is often the case with Asus laptops, all you have to do is press the F2 key at startup to enter the BIOS.
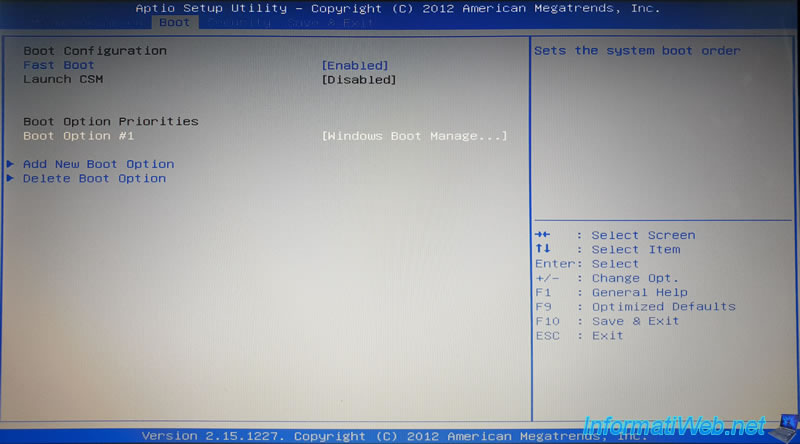
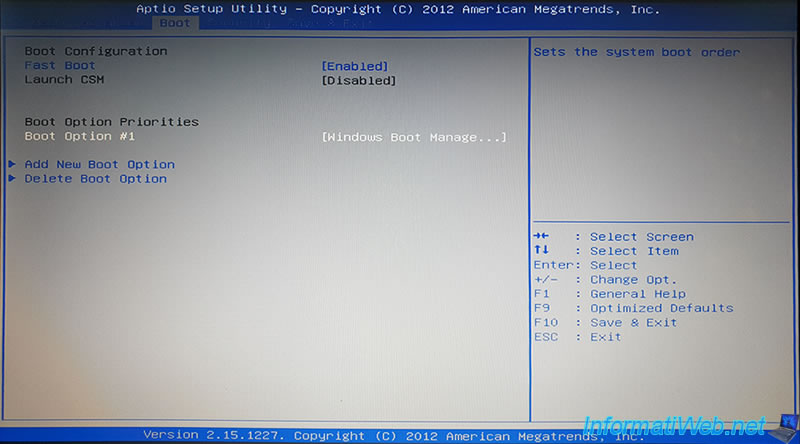
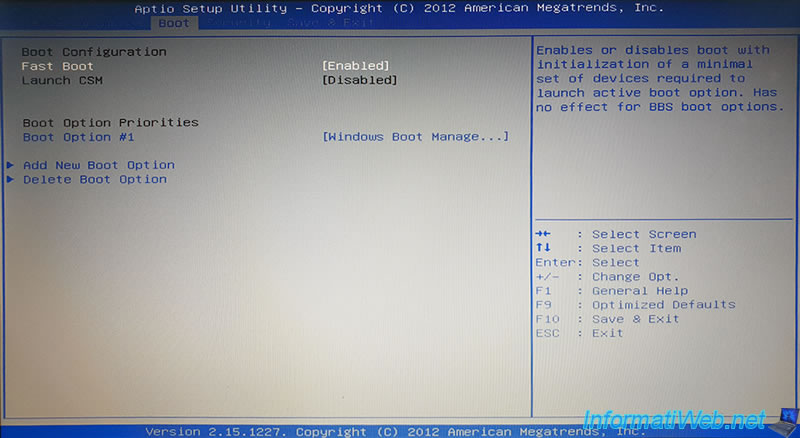
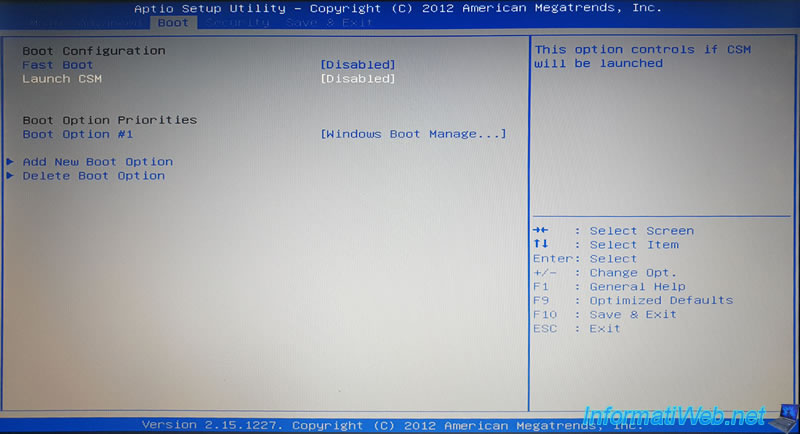
However, once you go to the “Boot” tab of the BIOS of this laptop PC, the only boot option available is : Windows Boot Manager.
In other words, the laptop PC only wants to start on the Windows pre-installed on the computer and nowhere else.
If you want to fix it with a live CD like Ultimate Boot CD or Hiren’s BootCD, then that will not be possible at this time.
If you select the line “Windows Boot Manager” and press Enter, you will see that the BIOS doesn’t display any other boot option.
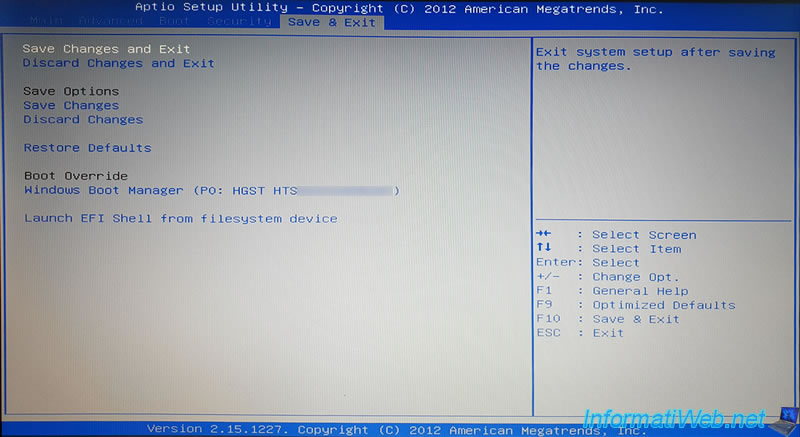
Note : “HGST HTS” refers to the Hitachi (Hitachi Global Storage Technologies) hard drive present in this laptop PC.

If you look just below, you will see an “Add New Boot Option” line.
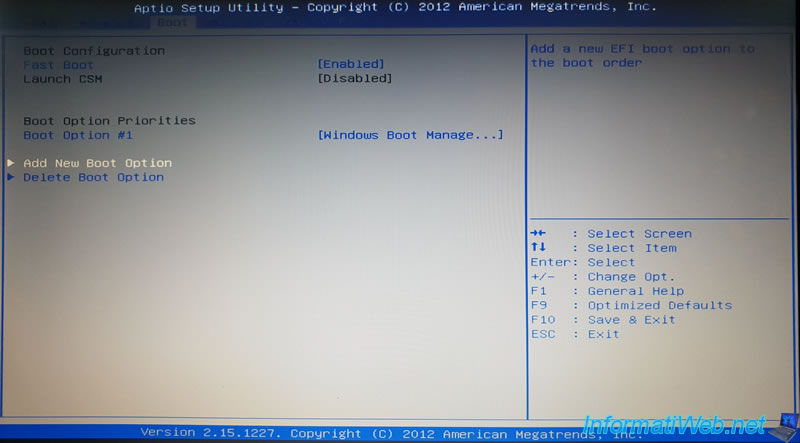
Then, the “Add boot option” line.
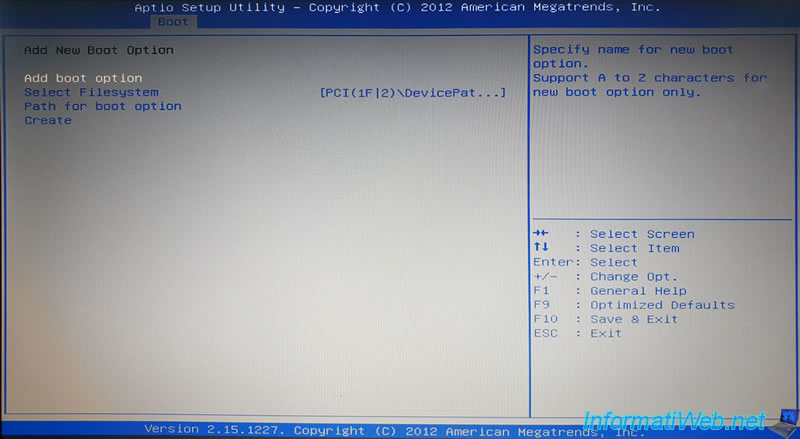
Except that this option will be of no use to you. Pity.

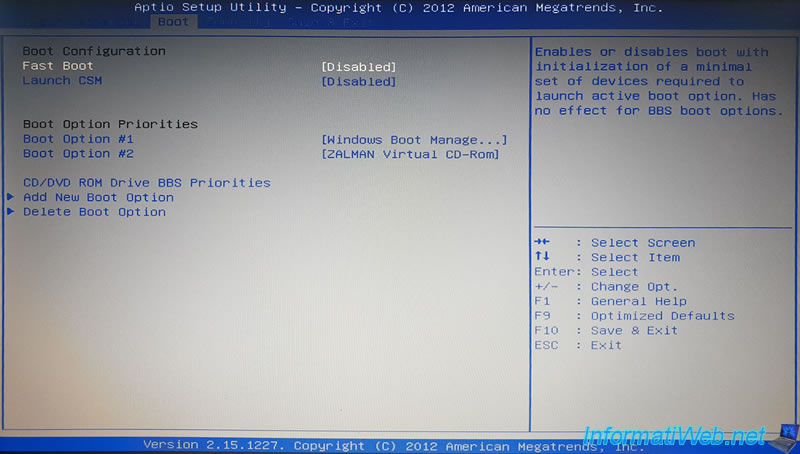
In reality, the real solution consists in deactivating the fast boot of this laptop PC present in the “Boot” tab of the BIOS.
To do this, select the “Fast Boot” line and press Enter.
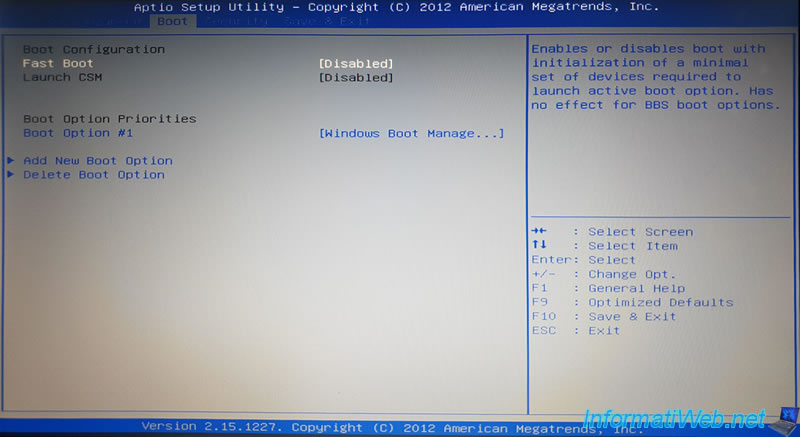
Then, select “Disabled” and then press Enter again.

Now, fast boot is disabled.
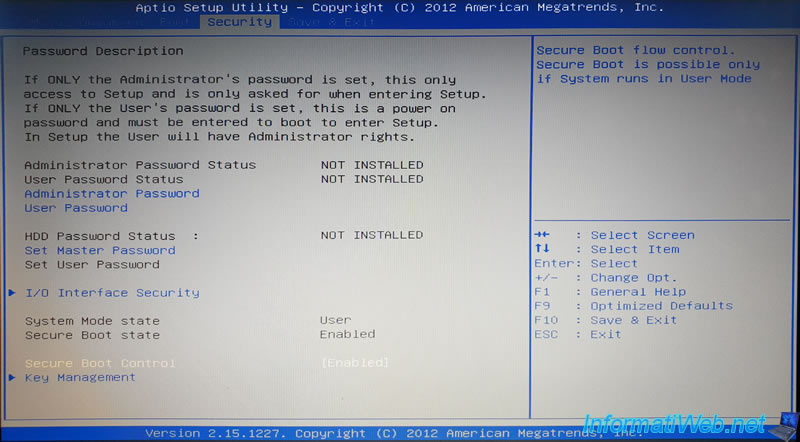
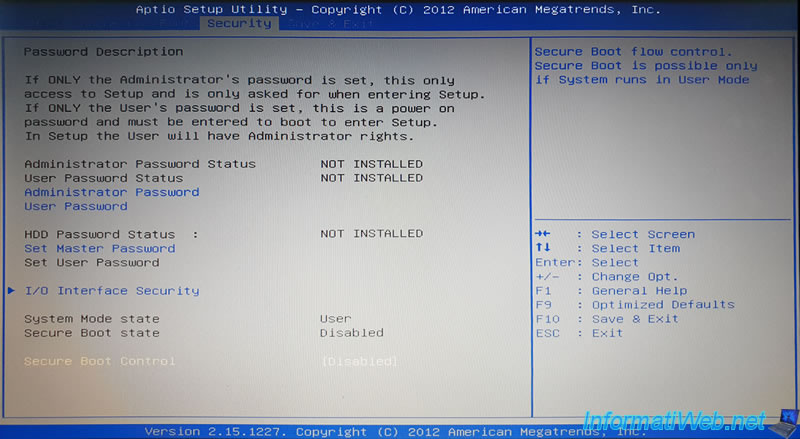
Then, in the “Security” tab, locate the “Secure Boot Control” line (located at the bottom of the screen) and press the Enter key.
This option refers to secure boot supported by recent versions of Windows.
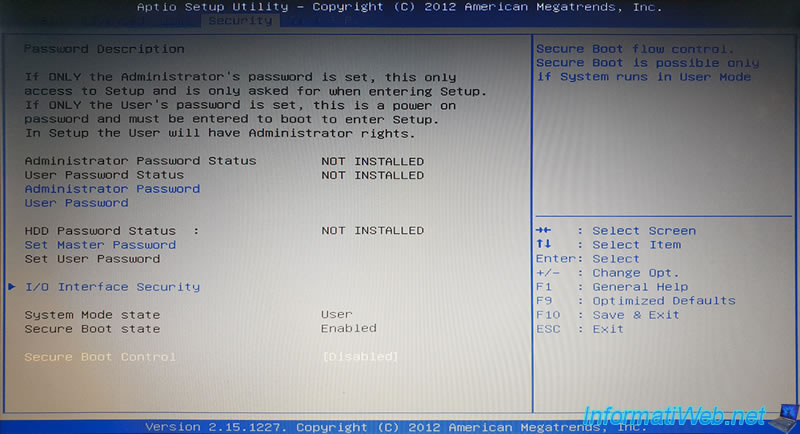
Select “Disabled” and press Enter.

Now, Secure Boot is also disabled.
To continue the procedure, you must first save these changes.
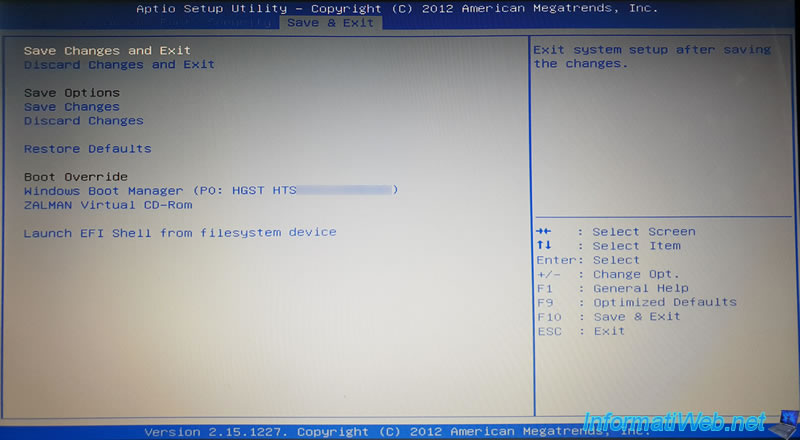
To do this, go to the “Save & Exit” tab, select the “Save Changes and Exit” line and press Enter.

Confirm saving the configuration.

Press the F2 key on your keyboard again to reenter the BIOS of the laptop PC.
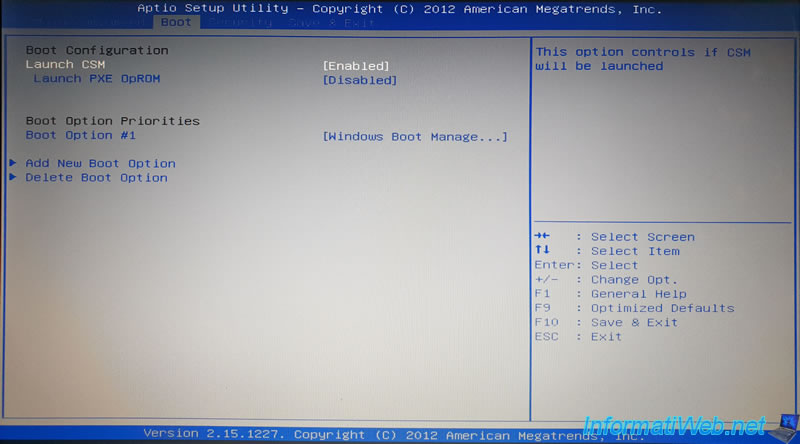
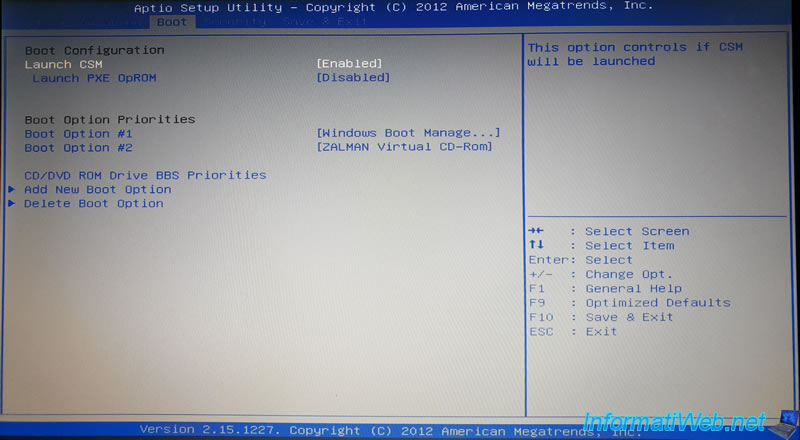
Go back to the “Boot” tab and you will see that the “Launch CSM” option has been unlocked.
This option allows you to start a computer in normal mode (Legacy BIOS, so NOT the EFI).
Enable this option.

Enabling the “CSM” option will remove the “Fast Boot” option previously disabled.
Save the changes again by going back to the “Save & Exit” menu and use the “Save Changes and Exit” option.
Confirm saving the configuration.

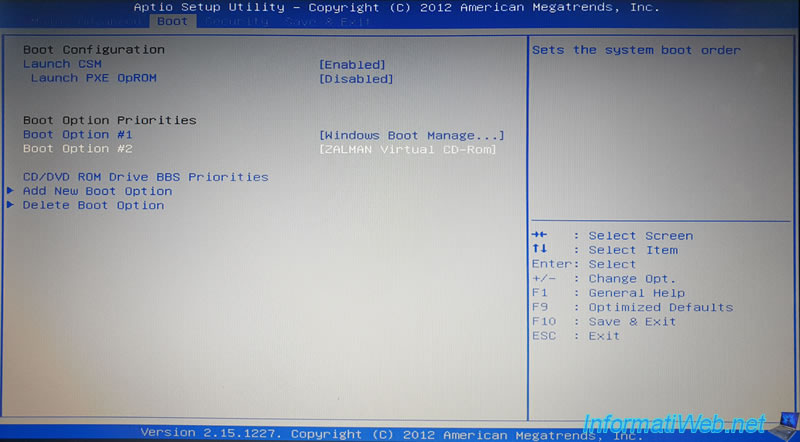
Enter the BIOS again by pressing the F2 key when starting the laptop and by magic, one or more additional boot options will appear in the Boot tab.
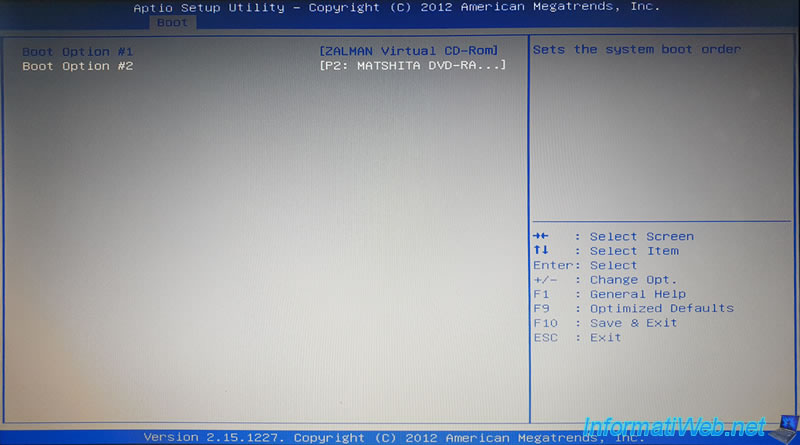
In our case, the 2nd boot option corresponds to our Zalman ZM-VE300 hdd case which allows you to emulate a virtual CD/DVD drive (even outside of Windows).
If you select the 1st boot option, you will see that several boot options will appear.

In our case, we select our : ZALMAN Virtual CD-Rom.

If you are looking for your CD/DVD drive and it doesn’t appear at the moment, it’s because you have to manage the boot order of the CD/DVD drives separately.
To do this, in the “Boot” tab, select the “CD/DVD ROM Drives BBS Priorities” line and press Enter.
Here, you will see all CD/DVD drives recognized by your laptop PC.
Note that it’s the CD/DVD drive selected here in number 1 that will appear in the boot options of the “Boot” tab.
For example, in our case, our “ZALMAN Virtual CD-Rom” appears first in this list.

If we want to boot from the internal CD/DVD drive, we will select the “MATSHITA DVD-RAM UJ8E1” device.

Then, also choose this CD/DVD drive directly from the “Boot” tab.
Now, you can repair your computer easily with live CDs or bootable USB keys.
2. Restore BIOS to factory settings
As you have probably noticed, this BIOS requires several manipulations before you can boot to whatever you want.
If you want to restore the changed settings to their original values, here’s how.
Good news, it’s faster than before.
First, you must disable the “Launch CSM” option present in the “Boot” tab of the BIOS.

Once the “Launch CSM” option is disabled, the “Fast Boot” option will reappear.
Re-enable this option to benefit from fast boot again.

Then, in the “Security” tab, you will have to reactivate secure boot.
To do this, select the line “Secure Boot Control” and press Enter.
Select : Enabled.

Save the changes by going to the “Save & Exit” tab.
Confirm saving these changes.

As expected, if you return to your computer’s BIOS, you will only have access to the original boot option : Windows Boot Manager.