Configure your computer’s BIOS to boot in UEFI mode (firmware) – BIOS – Tutorials
On all recent PCs, you now have an UEFI firmware instead of the legacy BIOS that was present in motherboards of older computers.
In this tutorial, you will see how to configure the UEFI firmware of your computer (or more precisely of your motherboard) so that your computer starts in UEFI mode and not in “BIOS LEGACY” mode (old BIOS).
Mục Lục
1. Differences between old BIOS and UEFI firmware
In short, UEFI firmware is the successor to BIOS.
But, if you want to know more about the differences between these 2 technologies, refer to our article : What are the differences between a BIOS and an UEFI firmware ?
2. Asus UEFI BIOS (blue/green)
One of the advantages of UEFI is to offer a more modern and accessible interface with keyboard, as well as mouse.
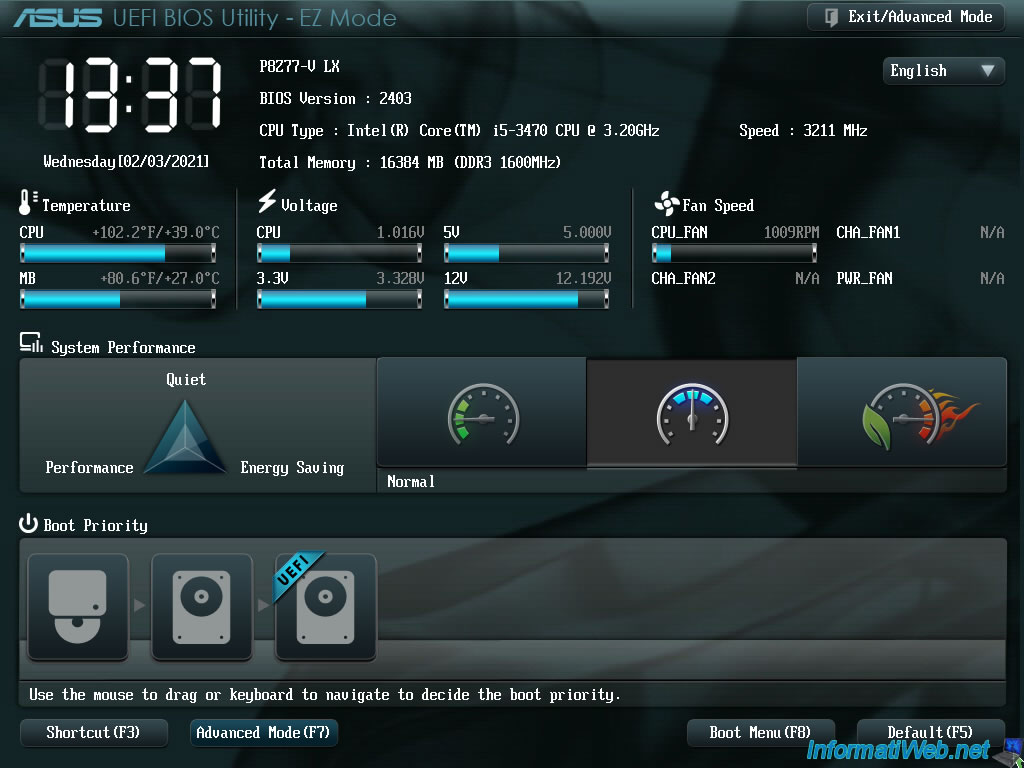
If you have an Asus P8Z77-V LX motherboard or another model of this brand, you may have a blue/green BIOS like this.
To access the BIOS of your Asus motherboard, press the “Delete” or “Del” key when starting your computer.
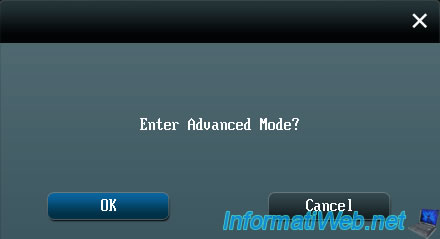
Then, click on “Advanced Mode (F7)”.
Click OK.
2.1. Boot in UEFI mode
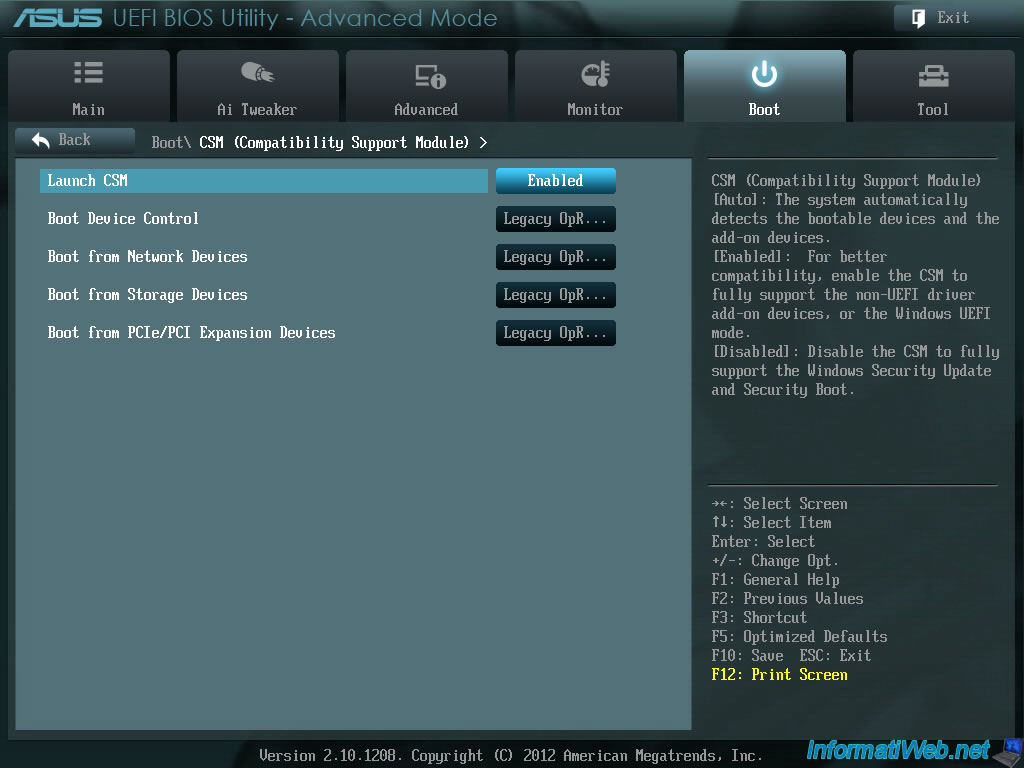
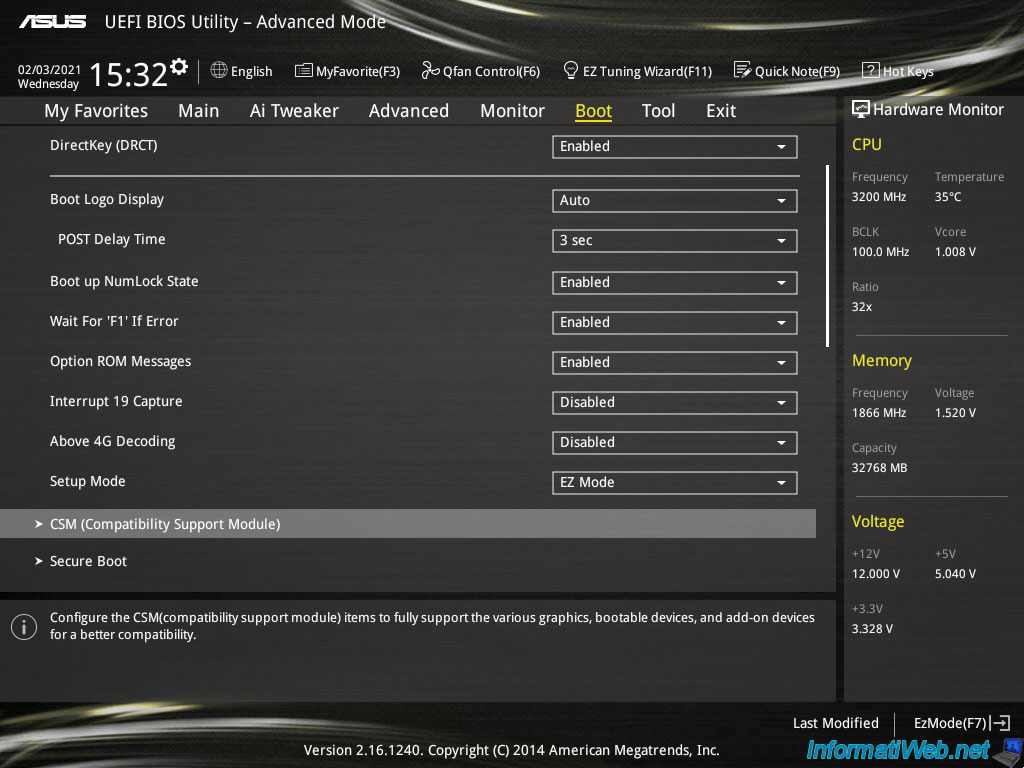
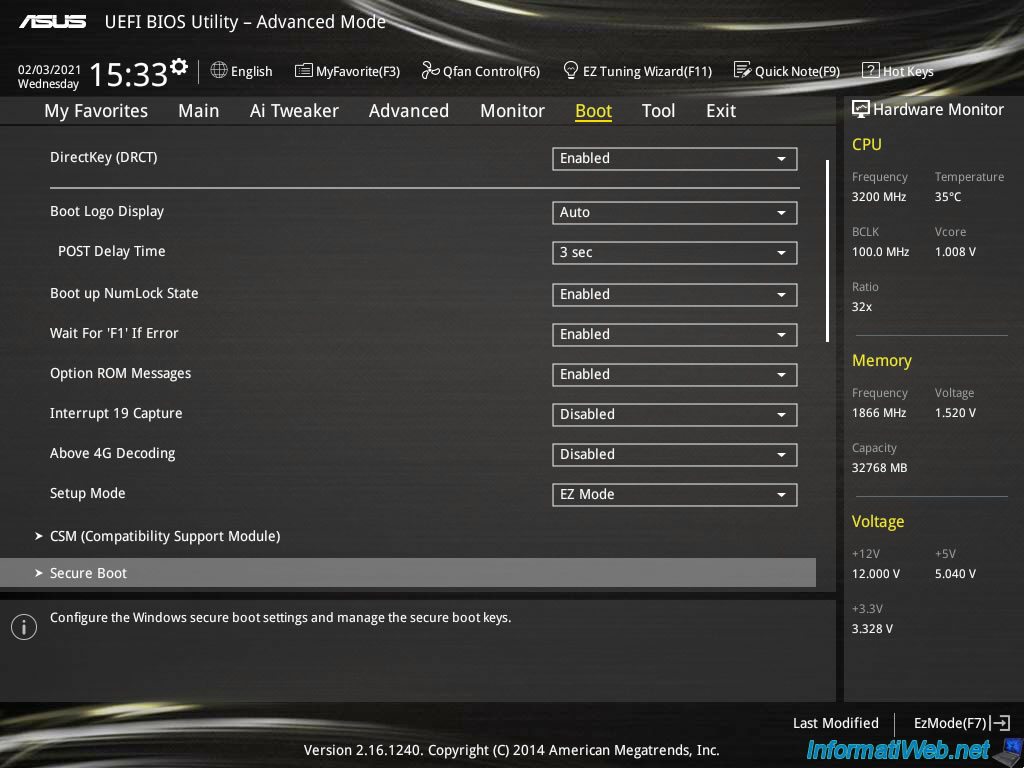
Once in Advanced Mode, go to the “Boot” tab and click on the “CSM (Compatibility Support Module)” option.
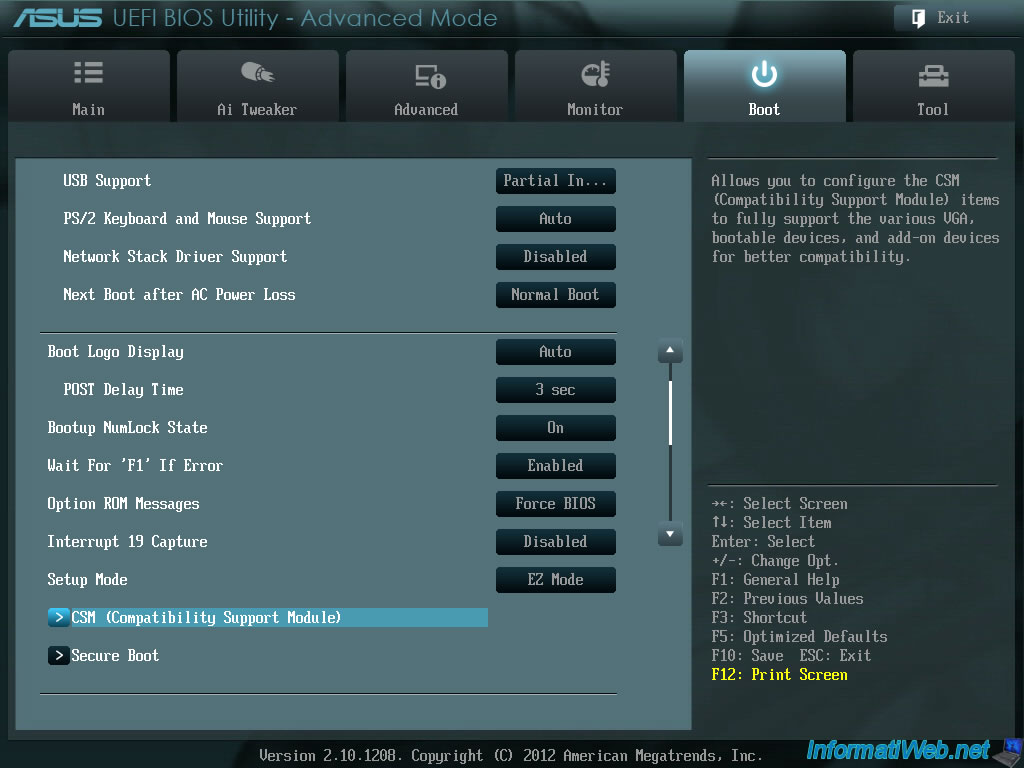
The “CSM (Compatibility Support Module)” option allows you to boot in “BIOS LEGACY (old BIOS)” mode from UEFI firmware.
Since we want our computer to boot in UEFI mode, we must disable this “CSM (Compatibility Support Module)” feature.
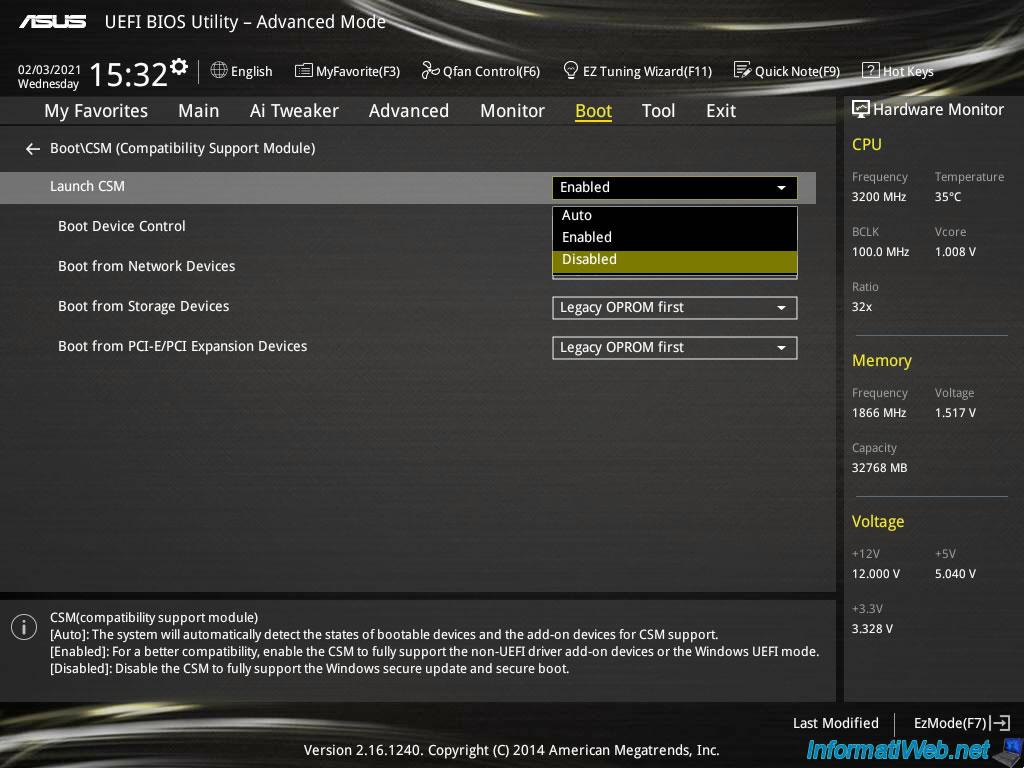
To do this, change the value of the “Launch CSM” option by clicking on the button to the right of this option.
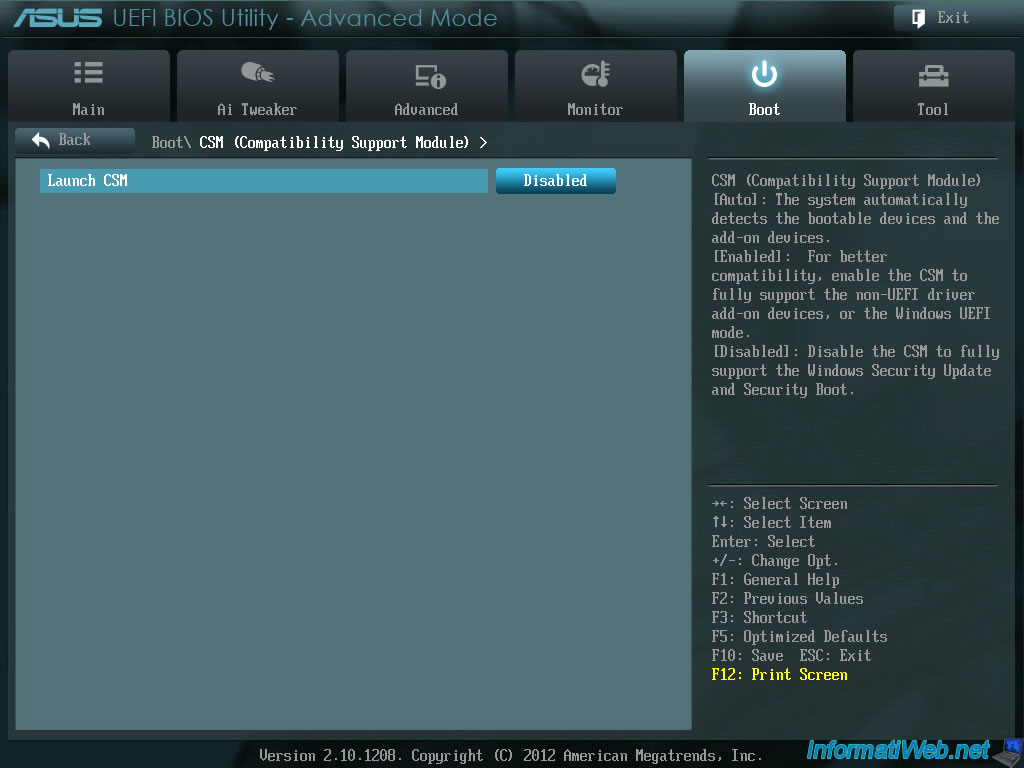
Click “Disabled”.

Disabling this “CSM (Compatibility Support Module)” option will hide the other options that were displayed below.
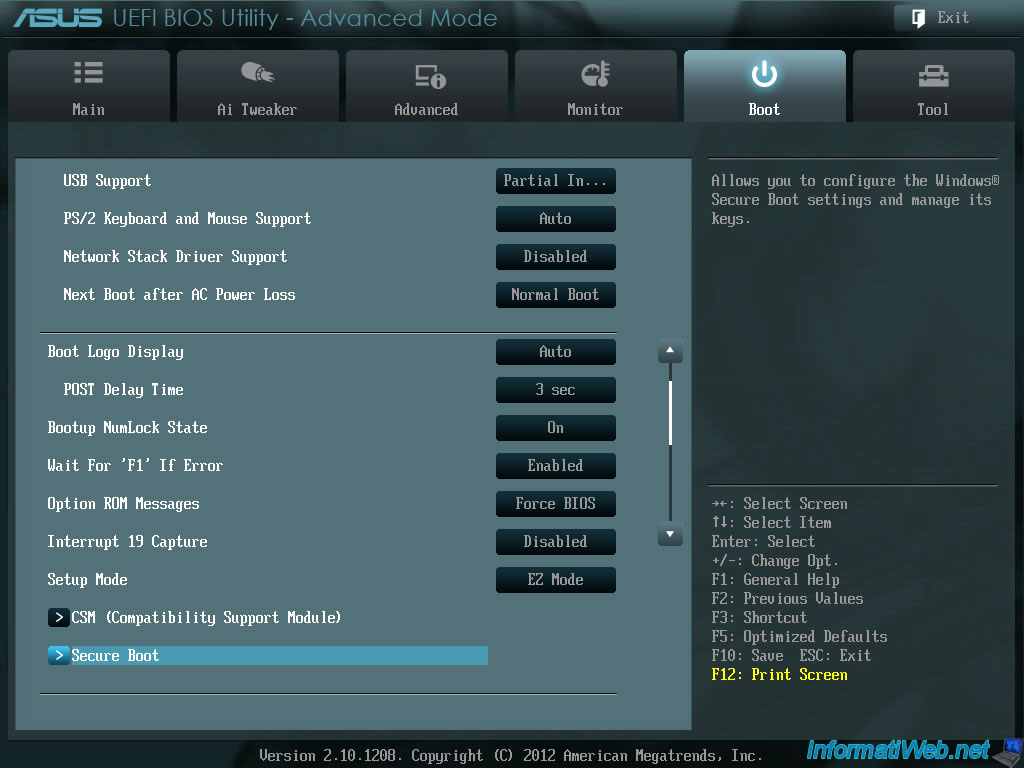
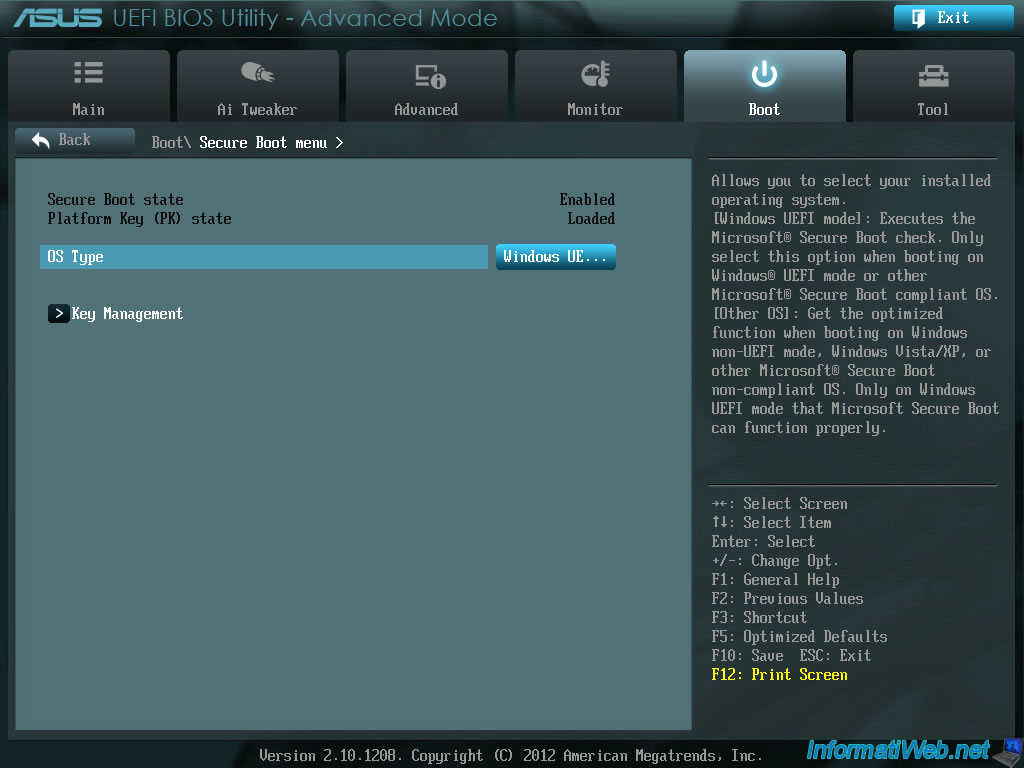
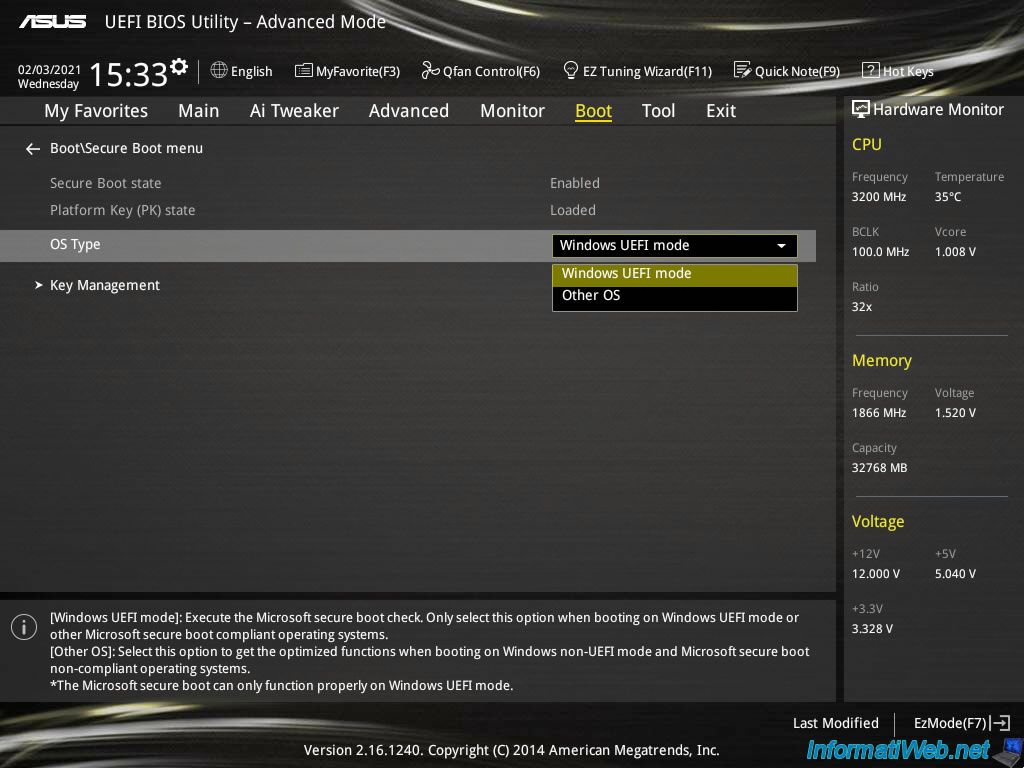
Go back to the “Boot” tab by clicking on the “Back” button at the top left, then click on “Secure Boot”.
A big advantage of UEFI is to be able to secure the boot of your computer.
Indeed, when your computer boots in UEFI mode, all the files used for booting must be signed which prevents viruses (and more particularly rootkits) from being executed while your computer is starting up.
To enable Secure Boot with Windows, you must select the value “Windows UEFI mode”.
Warning : Secure Boot is only supported with Windows 8, 8.1 and 10.
If you enable it with Windows 7, Windows 7 will not start.
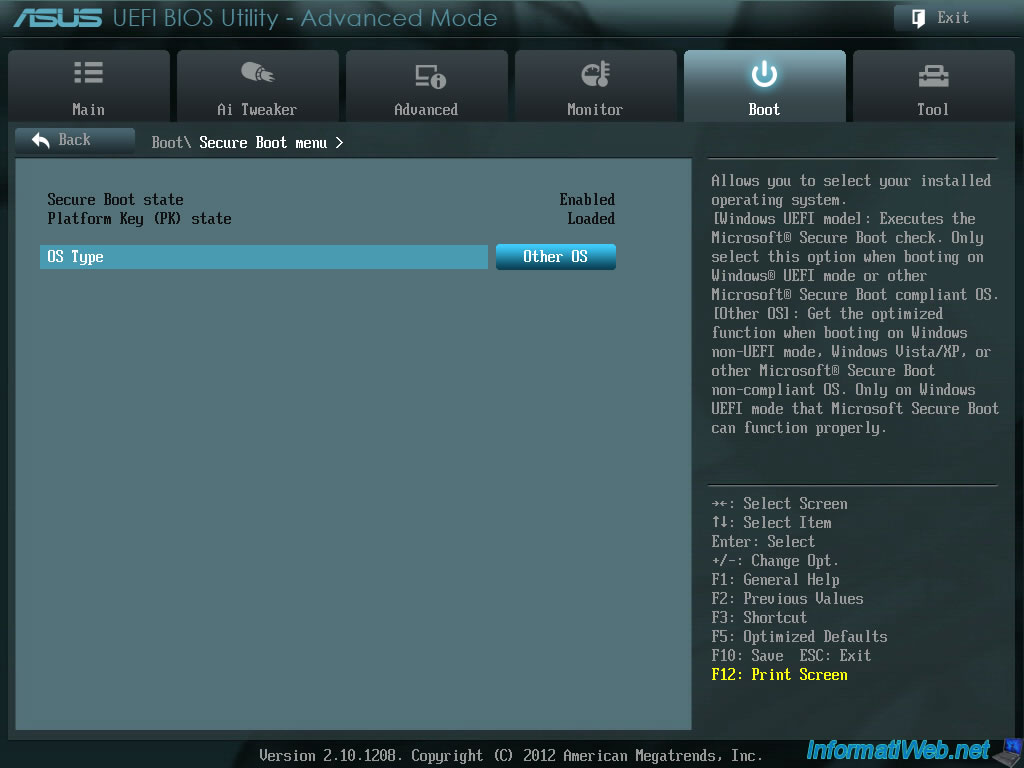
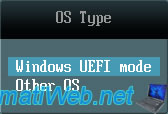
Now, the selected OS (operating system) type is : Windows UEFI.
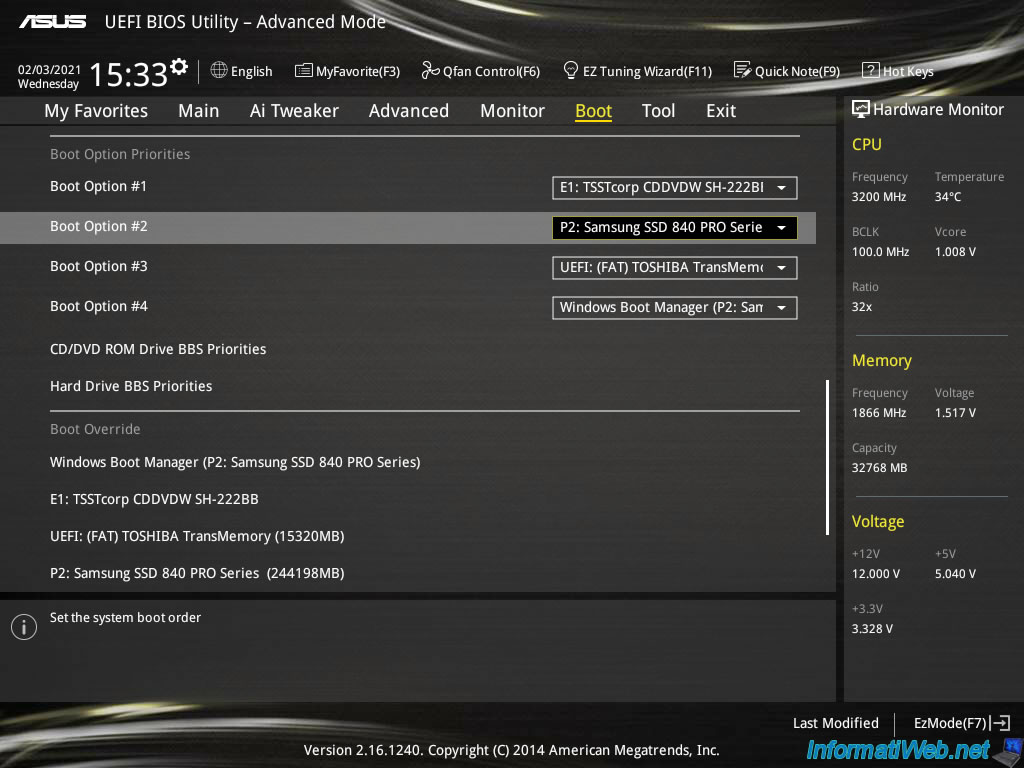
2.2. Change the boot order
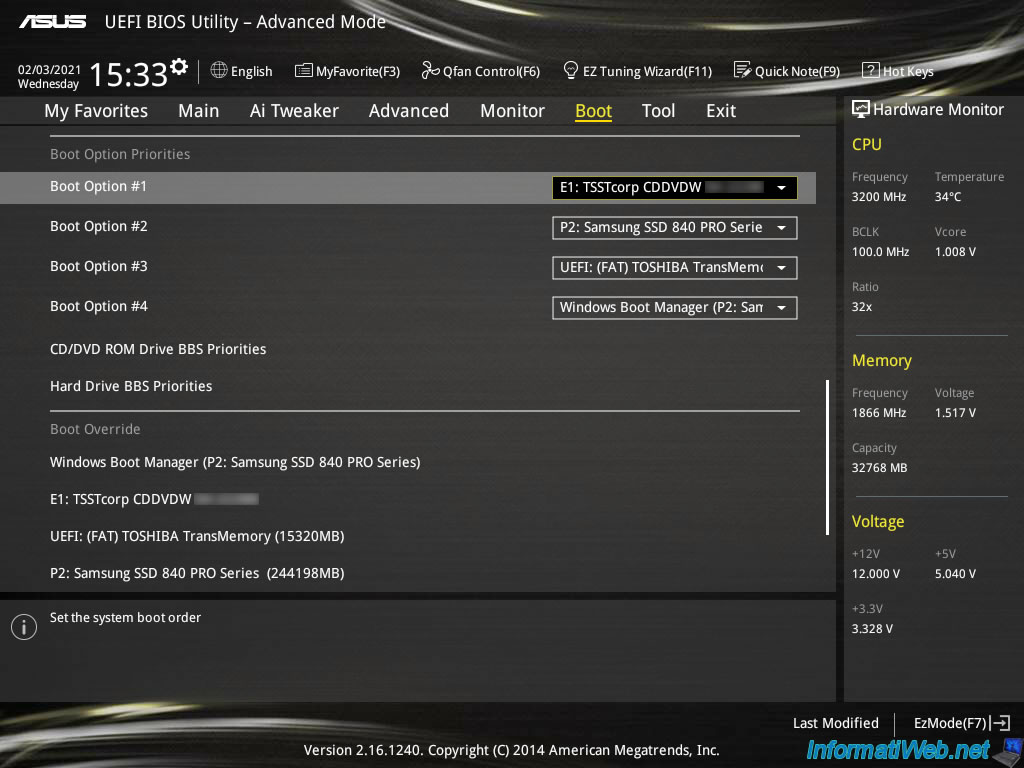
Now that your computer is configured to boot in UEFI mode, you need to change the boot order so that it boots first to your CD/DVD drive and then to your hard drive.
To do this, in the “Boot” tab, locate the “Boot Option Priorities” section.
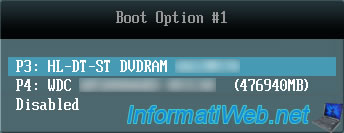
Click the button to the right of “Boot Option #1”.
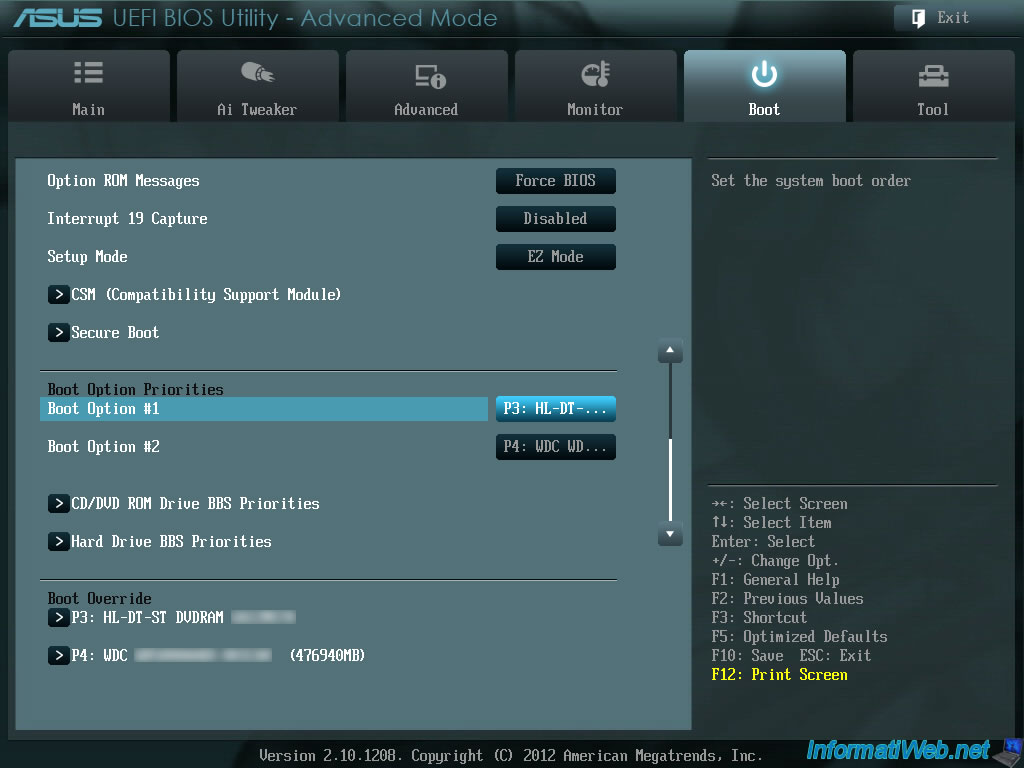
Click on the name of your CD/DVD drive.
In our case : HL-DT-ST DVDRAM …
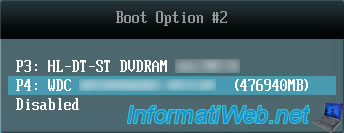
Then, click on the button to the right of “Boot Option #2”.
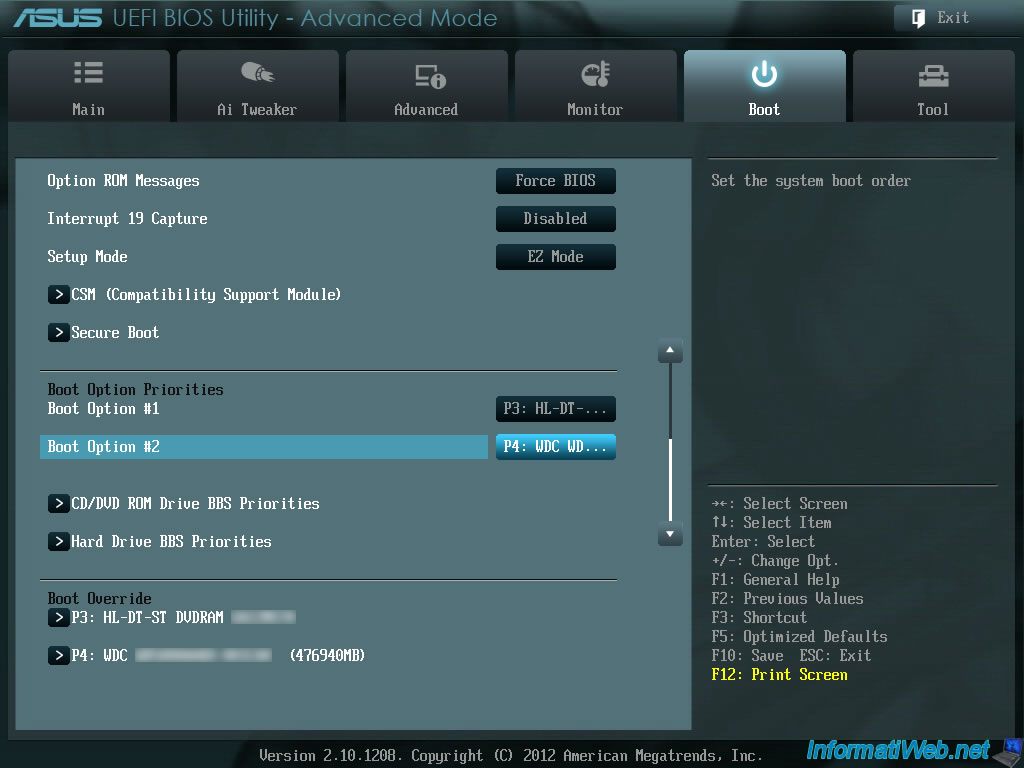
Click on the name of the hard drive or SSD on which you are going to install Windows.
In our case, our Western Digital hard drive : WDC …
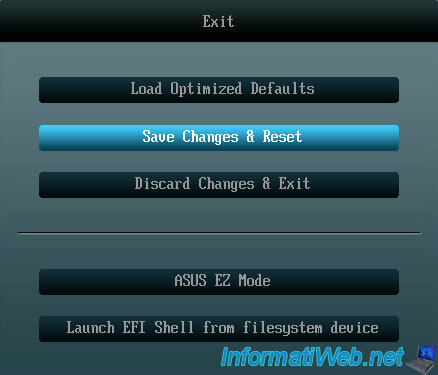
Finally, click on Exit at the top right, then on the “Save Changes & Reset” button to save the changes and restart your computer.
3. Asus UEFI BIOS (yellow/gray)
If you have a newer Asus motherboard (example : Asus Z97 Pro Wi-Fi ac), it’s possible that the interface has changed and is yellow and gray.
To enter the BIOS of your Asus motherboard, the technique is the same : press the “Delete” or “Del” key several times when starting your computer.
3.1. Boot in UEFI mode
Once the BIOS appears, click on “Advanced Mode (F7)” at the bottom right.
The advanced mode appears.
In the “Boot” tab, go down a bit and click on : CSM (Compatibility Support Module).
This “CSM” feature allows you to boot in LEGACY mode from UEFI firmware.
So you don’t need it and therefore you should turn it off to be sure your computer will always boot in UEFI mode.
To disable this “CSM” feature, change the value of “Launch CSM” to “Disabled”.
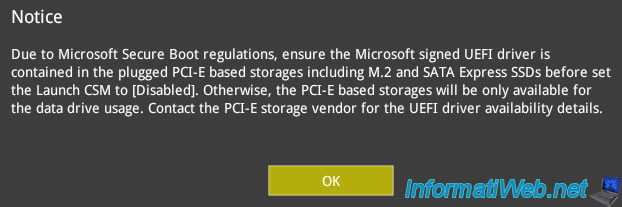
Warning : if you want to install Windows on an M2 or NVMe SSD, DO NOT disable this option. Because this can be a problem in some cases (depending on your motherboard, the BIOS version of it and the model of SSD used).
This warning doesn’t apply to SSDs connected via SATA (therefore via a SATA cable).
Click OK to ignore the warning.
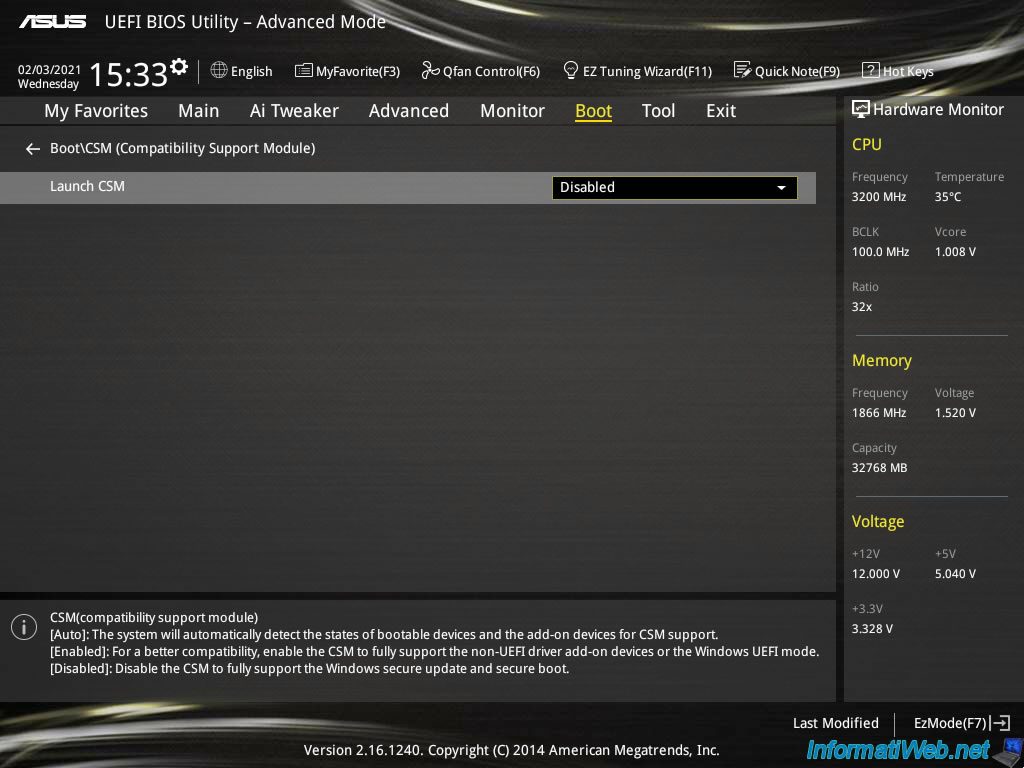
Now, CSM is disabled.
One of the big advantages of UEFI is to be able to secure the boot of your computer.
For this, you need to enable Secure Boot in your motherboard BIOS.
In the “Boot” tab, click on : Secure Boot.
Then, select “OS Type : Windows UEFI mode”.
Warning : although Windows 7 supports booting in UEFI mode, it doesn’t support the secure boot.
If you want to install this version of Windows, you must therefore leave Secure Boot disabled (= Other OS).
However, secure boot is supported on Windows 8, 8.1 and 10.
In this case, select “Windows UEFI mode” to enable Secure Boot.
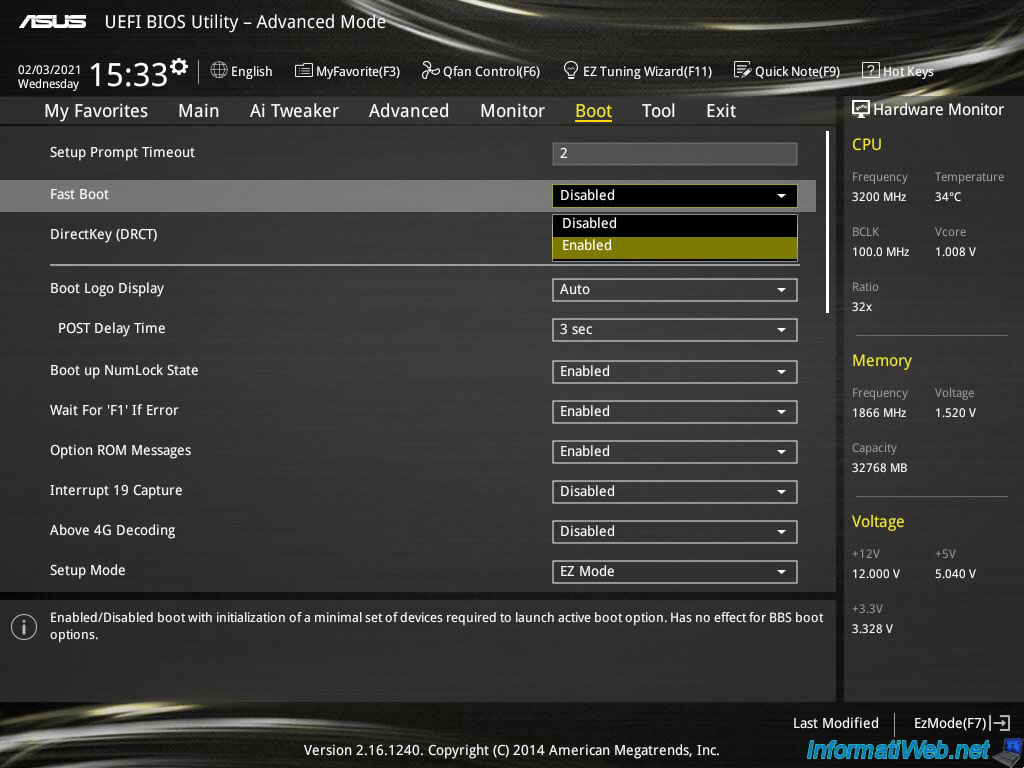
UEFI also allows you to speed up the boot of your computer and Windows.
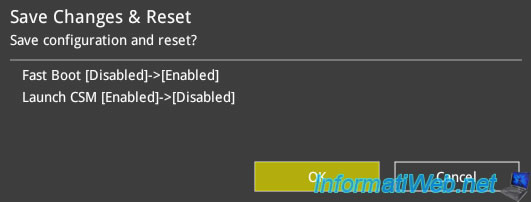
But, you can also enable fast boot in your BIOS.
To do this, in the “Boot” tab, enable the “Fast Boot” option by selecting “Enabled”.
3.2. Change the boot order
Now that your computer is configured to boot in UEFI mode, all you have to do is configure your BIOS boot order to :
- boot first on your CD/DVD drive (to be able to install Windows)
- start in 2nd on your hard drive (to start Windows)
To do this, in the “Boot” tab, locate the “Boot Option Priorities” section and select your CD/DVD drive at the “Boot Option #1” line.
Then, select the hard drive or SSD where you want to install Windows at the “Boot Option #2” line.
Finally, go to the “Boot” tab and click on “Save Changes & Reset”.

Confirm saving changes by clicking OK.