
How to Draw an Apple Step by Step – EasyLineDrawing
This easy six step tutorial shows how to draw an apple for beginners. It includes very simple illustrated examples and quick instructions.
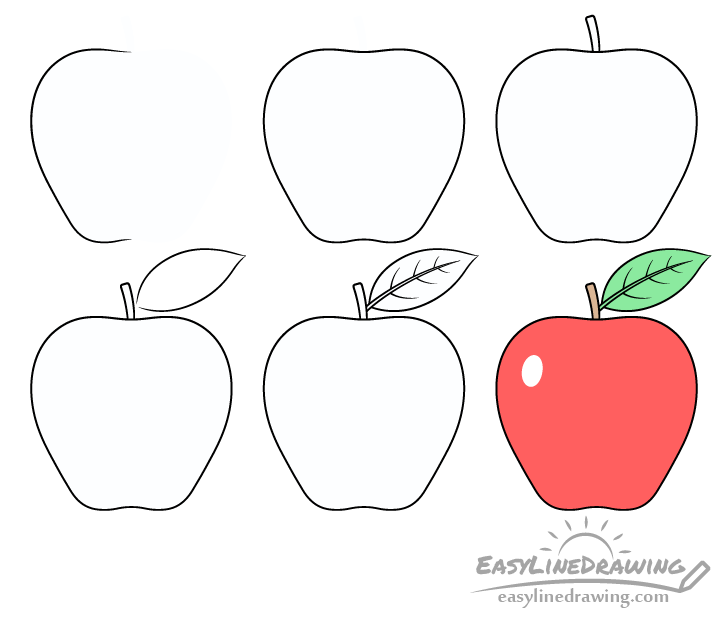
The type of apple shown in this tutorial is a Red Delicious. As the name implies these kinds of apples tend to be characterized by their red color as well as a set of bumps along their bottom. You can see a preview of the drawing stages for this particular apple in the example above.
The example is somewhat stylized and simplified but not overly so.
It’s recommended that you start the tutorial in pencil and make light lines as you will need to erase parts of the drawing in two of the steps. Light lines will also make it easier to do corrections in case you happen to make a mistake. You can darken them later on (before coloring) with a black pen or marker.
Mục Lục
Step 1 – Draw an Outline of the Apple
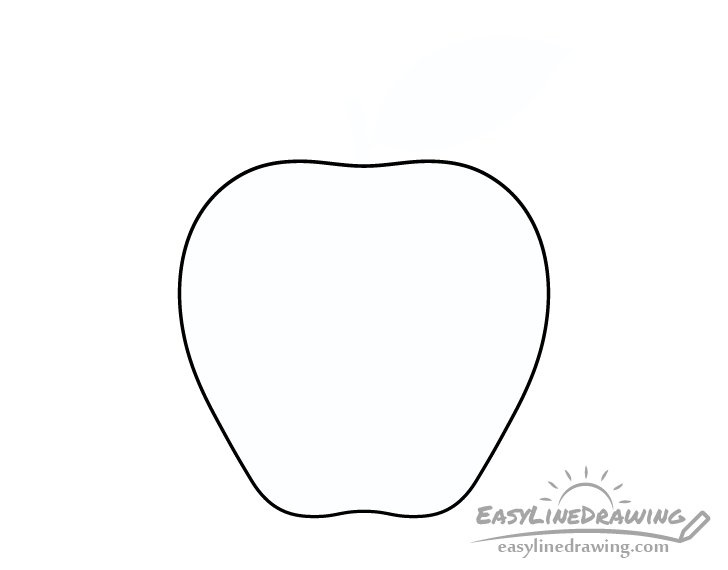
The first thing you should do is make an outline drawing of the main shape of the apple as shown in the example. Red Delicious apples tend to have a wider top and get narrower towards the bottom with bumps (as already mentioned) on the very end. You can also give it’s outline a bit of a downwards curve at the very top.
Step 2 – Draw the Indent at the Top

For this short step add a wavelike shape near the top of the apple’s outline. This will indicate the area that the stem grows out of. Also try and position the indent so that it’s roughly in the middle.
Step 3 – Draw the Stem
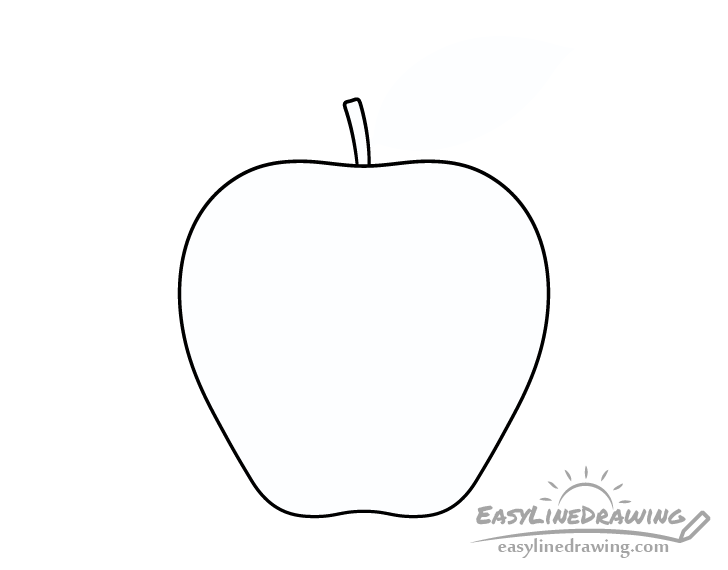
Erase a little bit of the apple’s outline from the first step (towards the upper middle) and draw in the stem (coming out of the middle of the indent). Make it slightly thinner towards the bottom and wider towards the top. Overall it should be fairly small and thin compared to the actual apple. You can also make it’s tip slightly uneven (like a tiny wave).
Step 4 – Draw the Leaf
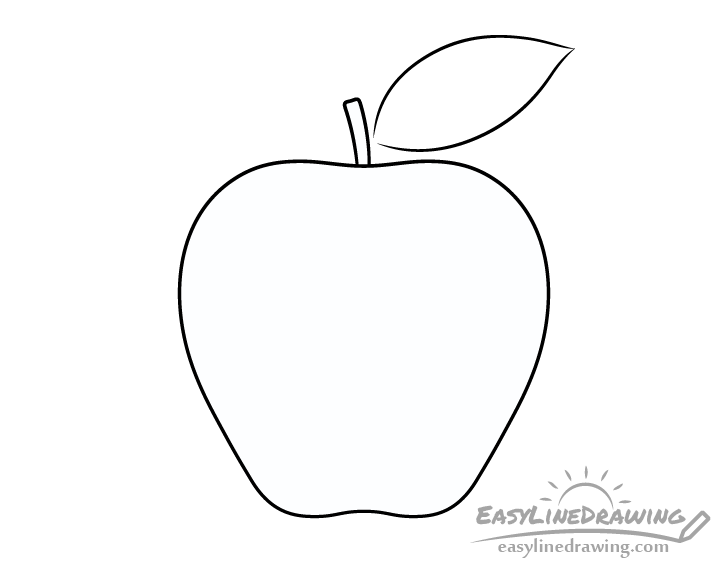
For this step draw the larger parts of the leaf.
First define it’s overall shape with a pair of curved lines. Make it wider in the middle and narrower towards either end (with a pointy tip). Afterwards you can erase the little bit of the apple’s outline that the leaf overlaps and then add the stalk (petiole).

The petiole should transition into the midrib (the part that runs through the middle of the leaf). Make it narrower at the base and thinner as it goes out towards the tip of the leaf. You can outline with two curved lines that eventually join together.
Once done you should have a drawing similar to the example above.
Step 5 – Draw the Leaf Veins & Finish the Line Drawing
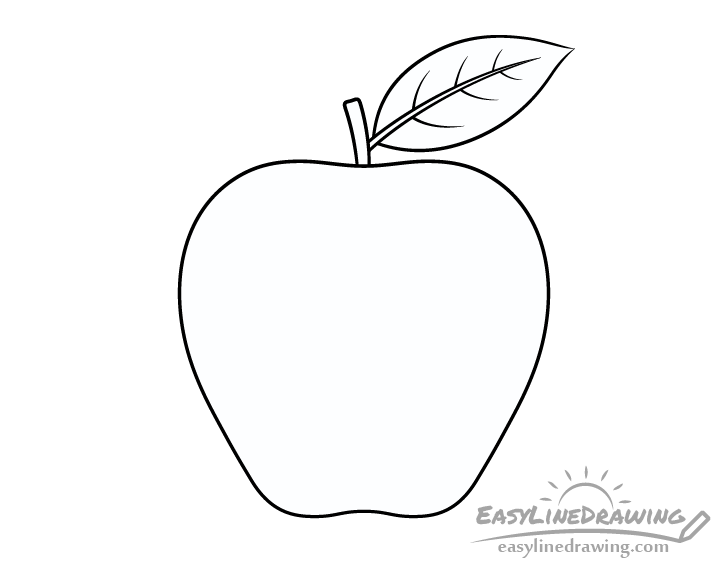
For the last set of details add the veins that run along the leaf. Draw these going from the midrib towards the outer edges (but not touching them) in smooth curves. Try and place some of the veins in slightly different places instead of just on opposite ends of one another. This will make the leaf look more natural.
When done done adding the veins you can look over your drawing to see if it needs any final adjustments. Once you feel that things look good you can go ahead and trace over it with a black pen/marker or just darken your lines with a pencil.
Step 6 – Color the Apple
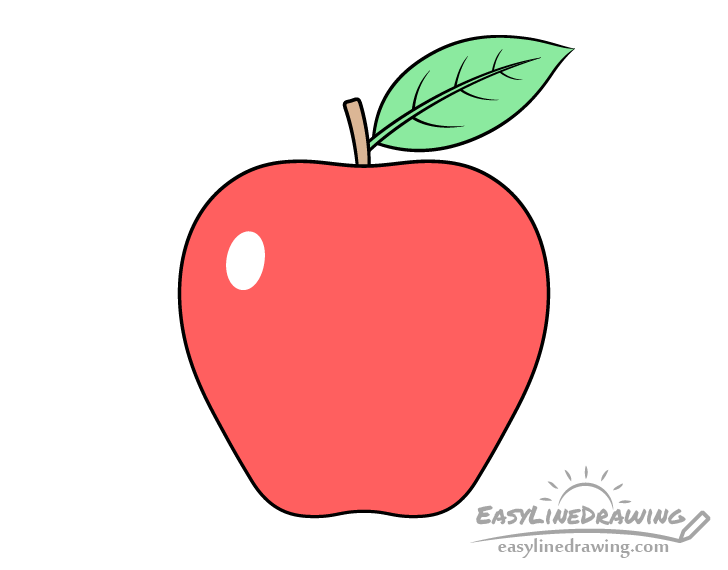
For some very basic colors make the apple red, the leaf green and the stem brown. To make the apple look shiny leave a small white spot for the highlight (light reflectind from it’s smooth surface).
Colored pencils, paints and markers can all be good and easy coloring options. You can even mix a few of these together. You can for example use a marker for the bright red of the apple and a green pencil for the leaf.
Whatever options you choose once done with this step you should be finished with the drawing.
Conclusion
This tutorial shows a simple way to draw a Red Delicious apple using a step by step approach. By taking it’s most defining characteristics you can make the apple easily recognizable without needing to do a more detailed and complex drawing. Hopefully you’ve found the instructions and examples helpful and easy to follow.
For more similar tutorials also try some of the following:
For all other tutorials simply go to the main page of EasyDrawingTips.


